Last updated : Dec 14,2023
Overview
With the introduction of Azure DevOps, Microsoft is offering developers a new continuous integration/continuous delivery (CI/CD) service called Azure Pipelines that enables you to continuously build, test, and deploy to any platform or cloud. It has cloud-hosted agents for Linux, macOS, and Windows; powerful workflows with native container support; and flexible deployments to Kubernetes, VMs, and serverless environments.
Azure Pipelines provides unlimited CI/CD minutes and 10 parallel jobs to every GitHub open source project for free. All open source projects run on the same infrastructure that our paying customers use. That means you’ll have the same fast performance and high quality of service. Many of the top open source projects are already using Azure Pipelines for CI/CD, such as Atom, CPython, Pipenv, Tox, Visual Studio Code, and TypeScript-and the list is growing every day.
In this lab, you’ll see how easy it is to set up Azure Pipelines with your GitHub projects and how you can start seeing benefits immediately.
Objectives
-
Install Azure Pipelines from the GitHub Marketplace.
-
Integrate a GitHub project with an Azure DevOps pipeline.
-
Track pull requests through the pipeline.
Prerequisites
-
An Azure DevOps account from https://dev.azure.com.
-
A GitHub account from https://github.com.
Exercise 1: Getting started with Azure Pipelines
Task 1: Forking a GitHub repo and installing Azure Pipelines
-
Navigate to https://github.com/actionsdemos/calculator. This is the baseline project we will fork and use for this lab.
-
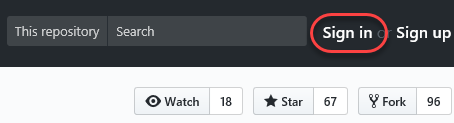
If you’re not already signed in to GitHub, sign in now.
-
Click Fork to fork the repository to your own account.
-
If prompted, select an account to fork the repository into.
-
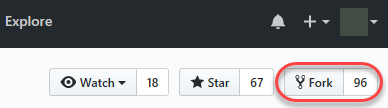
The GitHub Marketplace provides a variety of tools from Microsoft and 3rd parties that help you extend your project workflows. Click Marketplace from the top navigation to visit it.

-
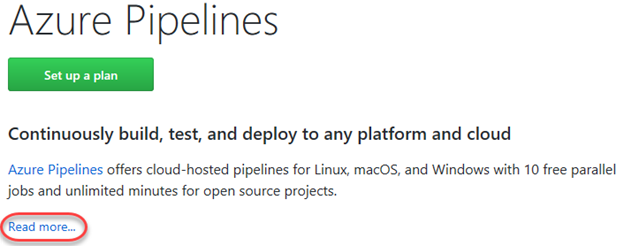
Search for “Azure Pipelines” and select the result.

-
Click Read more.
-
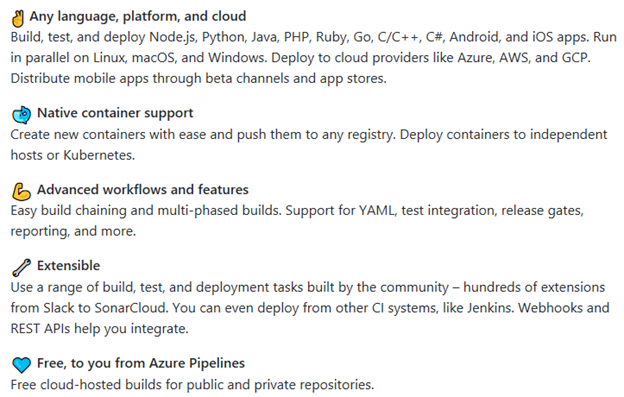
Take a moment to read through the benefits of Azure Pipelines.
-
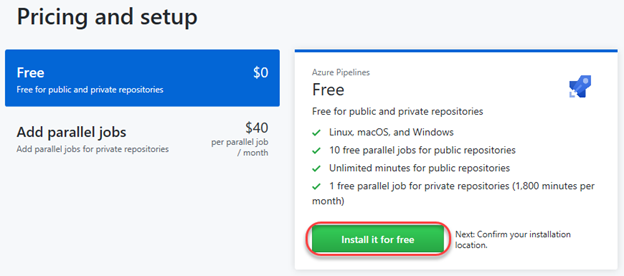
The Azure Pipelines offering is free for anyone to use for public repositories, and free for a single build queue if you’re using a private repository. Click Install it for free.
-
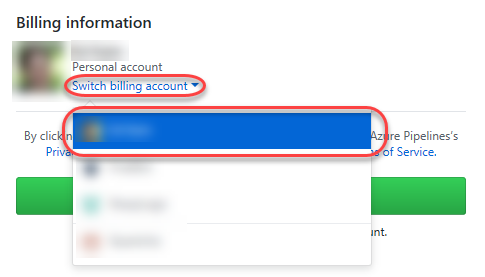
If you have multiple GitHub accounts, select the one you forked the calculator to from the Switch billing account dropdown.
-
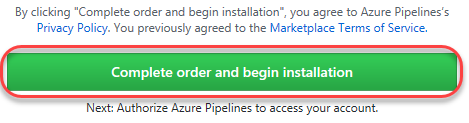
Click Complete order and begin installation.
-
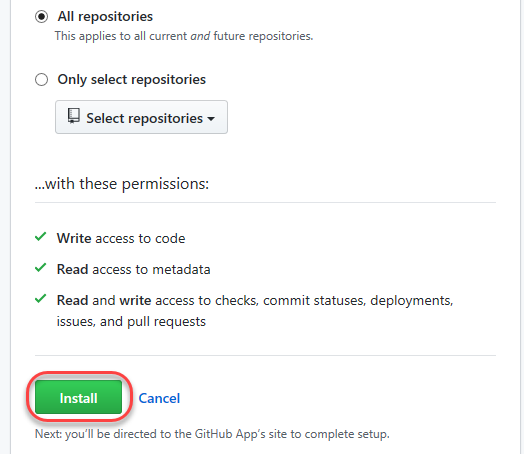
You have the option to specify repositories to include, but for the purposes of this lab, just include all of them. Note that Azure DevOps requires the listed set of permissions to fulfill its services. Click Install.
-
You may be prompted to confirm your GitHub password to continue.
-
You may be prompted to log in to your Microsoft account. Make sure you’re logged into the one associated with your Azure DevOps account.
Task 2: Configuring your Azure Pipelines project
-
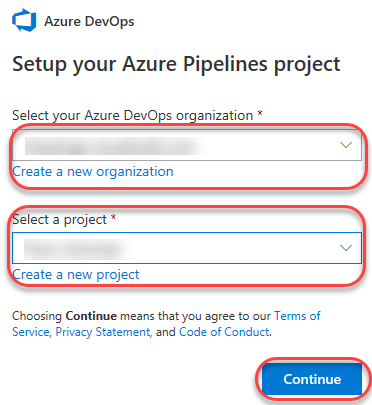
You are now on the Azure DevOps site and need to set up your Azure Pipelines project. Select (or create) the Azure DevOps organization you would like to perform these builds under, as well as the Azure DevOps project from that organization you would like to use. Click Continue.
-
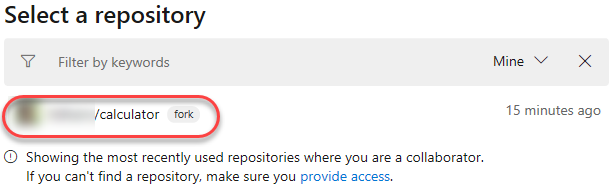
Select the calculator project from GitHub to build as part of the pipeline.
-
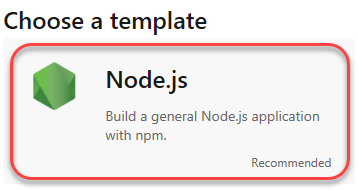
Azure Pipelines will analyze your project in an attempt to determine if any existing templates would be a good fit. In this case, the recommended template is for Node.js, which is perfect for our needs. Some alternative templates are also suggested, although the recommended one is the best for this lab. Select it to continue.
-
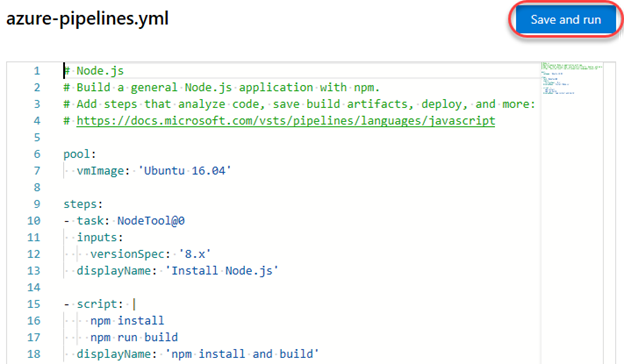
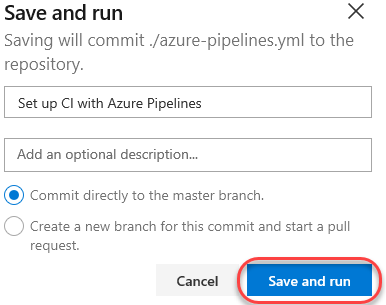
The build pipeline is defined as YAML, a markup syntax well-suited to defining processes like this because it allows you to manage the configuration of the pipeline like any other file in the repo. It’s a pretty simple template that identifies the pool to pull a VM from for building, the process to install Node.js for building, and the actual build itself. Click Save and run to save the pipeline and queue a new build.
-
For the purposes of this lab, you can commit this new file directly to the master branch. Click Save and run.
-
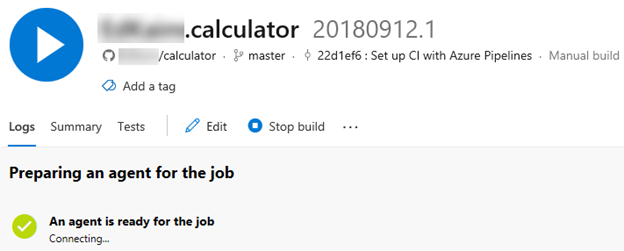
It will take a moment for the pipeline to complete. During this time it will configure the build agent, pull in the source from GitHub, and build it according to the pipeline definition.
-
The build should complete successfully.

Task 3: Modifying a YAML build pipeline definition
-
While the default pipeline is a great start, it doesn’t do everything we would like to have automated. For example, it would be great if it also ran our tests to confirm that the changes don’t create bugs. Let’s return to GitHub where we can edit the YAML by hand. Right-click the GitHub project link and select Open in new tab. Since this lab will involve stepping back and forth between GitHub and Azure DevOps, it’ll be easier to keep a browser tab open to each.

-
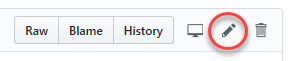
Open azure-pipelines.yml.

-
Click the Edit button.
-
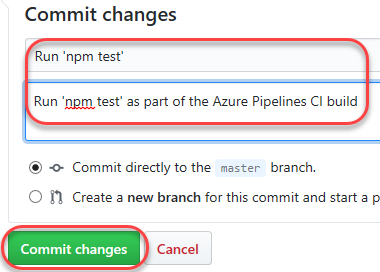
Our project already contains tests written using Mocha so we just need to execute them in out pipeline. To add the test run, add the “npm test” command below. Also update the displayName to ‘npm install, build, and test’ so that it’s easier to track what each task of the build is doing later on.These are the lines to add.
     npm test
   displayName: 'npm install, build, and test'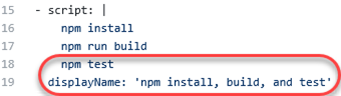
-
Also, update the trigger to point to master instead of main, since the default branch of this repository is called master
-
Scroll to the bottom of the page, provide some documentation for the change and click Commit changes. Again, it’s okay to commit this change directly to the master branch for the purposes of this lab.
-
Return to the Azure DevOps browser tab. Use the breadcrumb navigation to return to the Pipelines page.

-
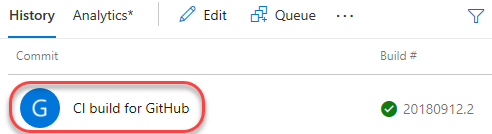
A new build should already be there. Click it to view progress.
-
Depending on how quickly you got here, the build may be queued, in progress, or already done. Click Logs and follow it through to completion.

-
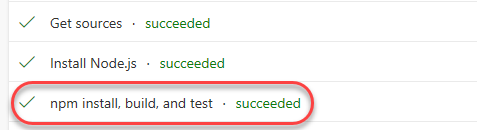
Once completed, click the npm install, build, and test task to view its log output.
-
After the install and build steps we can see the logs for the tests. Everything passes! Click Esc to close the task view.
Task 4: Proposing a change via GitHub pull request
-
One of the great benefits of this pipeline setup is that we now have a quality gate that’s automatically run every time someone commits a change. This makes it much easier to manage a project that could have any number of contributions coming in at various levels of quality. Return to the GitHub browser tab to test it out.
-
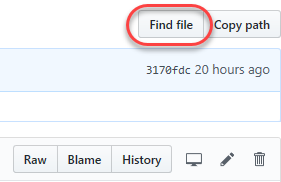
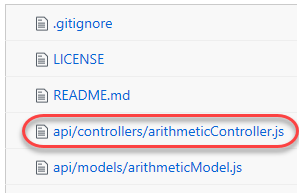
Click Find file.
-
Open arithmeticController.js.
-
This controller contains the core functionality of the app. However, the code for the add operation isn’t completely clear. Put yourself in the position of someone with good intentions, but a lack of experience with JavaScript. They might identify this as an opportunity to help out by cleaning up the code to make it better.

-
Click the Edit button.

-
Remove the first and third plus signs from the add method to make the code easier to read. (No spoilers, please.)

-
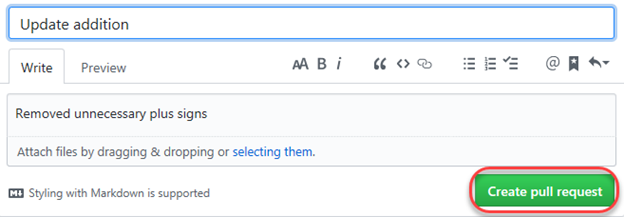
Scroll down and add some documentation for the change. Also select Create a new branch and give it the name “addition-cleanup”. Click Propose file change.

-
Click Create pull request to kick off the process of getting your untested changes into some production code!
-
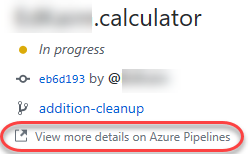
Azure DevOps will detect the change and start the build pipeline. This will update the UI in GitHub explaining that some of the checks haven’t completed yet. Return to your original mindset of “project owner” and click Details to learn more.
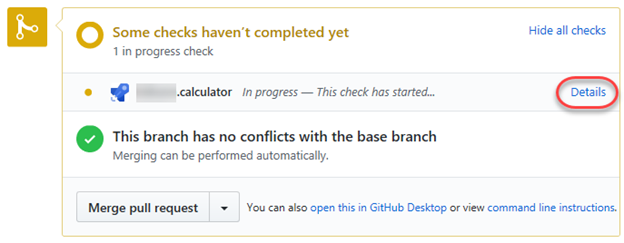
-
Click View more details on Azure Pipelines. This will open a new tab.
-
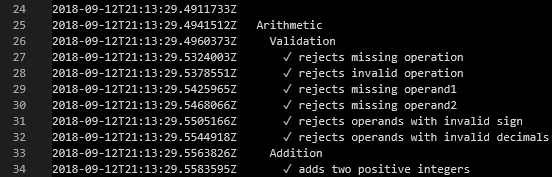
Follow the build until it fails. Click the npm install, build, and test task to view the log output.
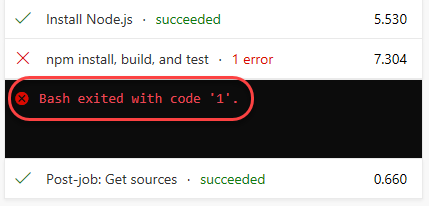
-
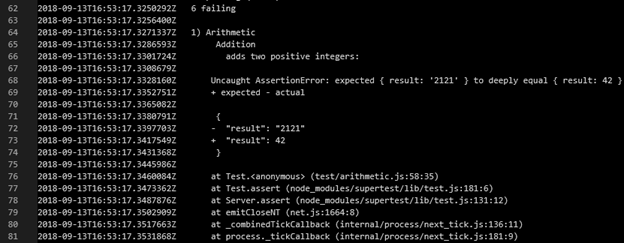
Locate the section that lists out failing tests. It might not be immediately clear why the tests failed, but all of the history we’ve accrued in the pipeline makes it easy to identify that something from this new pull request is the cause. The next step will be to figure out why “21 + 21” produced “2121” instead of the expected “42”.
-
Close the current tab.
Task 5: Using the broken pull request to improve the project
-
Return to the GitHub browser tab and the role of project owner.
-
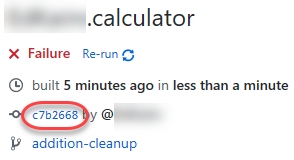
Click the commit to view its details. (Your code will appear different to the following screenshot)
-
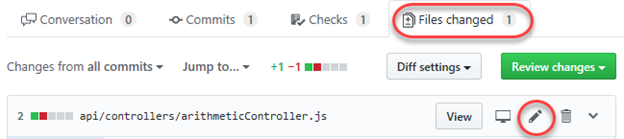
Select the Files changed tab and click the Edit button.
-
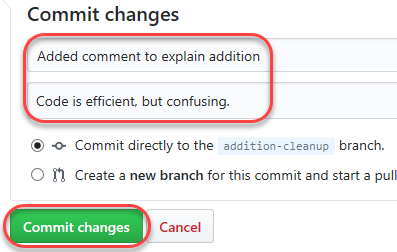
It would appear that the changes were made by someone who didn’t realize that the plus signs before each variable were necessary to coerce those variables to their number representations. By removing them, JavaScript interpreted the middle plus sign as the string concatenation operator, which explains why 21 + 21 = 2121 in the failed test. Undo the original changes by adding the plus signs before the a and b variables. Also add a comment explaining that this is necessary for the operation to perform as expected.

-
Scroll down to document the changes and click Commit changes.
-
Select the Conversation tab.

-
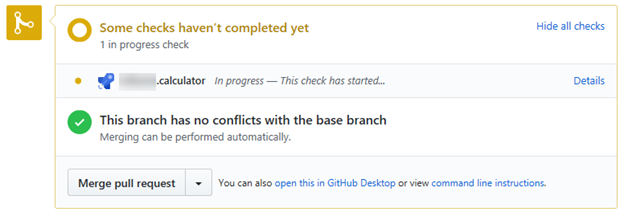
Azure DevOps will again detect the change and start the build pipeline. Wait for the following section to change to green to indicate that all checks have passed.
-
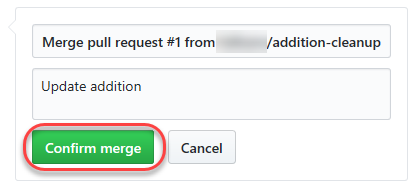
Once all checks have passed, click Merge pull request.

-
Click Confirm merge.
Task 6: Adding a build status badge
-
An important sign for a quality project is its build status badge. When someone finds a project that has a badge indicating that the project is currently in a successful build state, it’s a sign that the project is maintained effectively. Return to the Azure DevOps tab.
-
Click the build pipeline to navigate to its overview page.

-
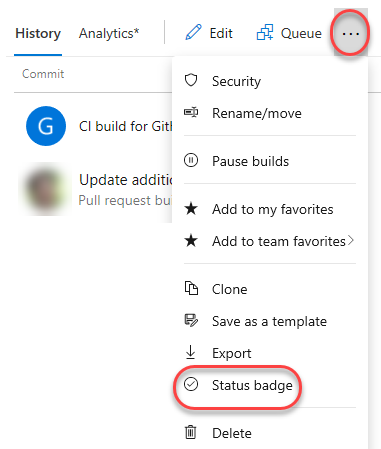
From the ellipses dropdown, select Status badge.
-
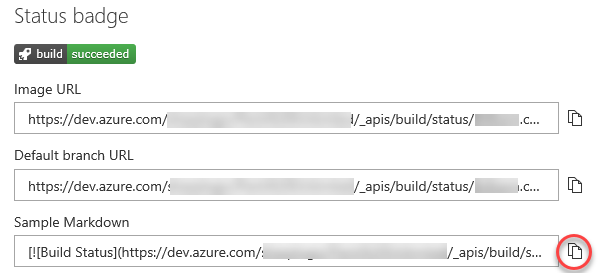
The Status badge UI provides a quick and easy way to integrate the build status wherever you want. Often, you’ll want to use the provided URLs in your own dashboards, or you can use the Markdown snippet to add the status badge to locations such as Wiki pages. Click the Copy to clipboard button for Sample Markdown.
-
Return to the GitHub tab.
-
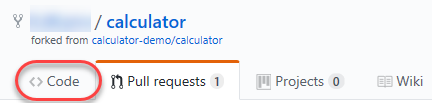
Select the Code tab.
-
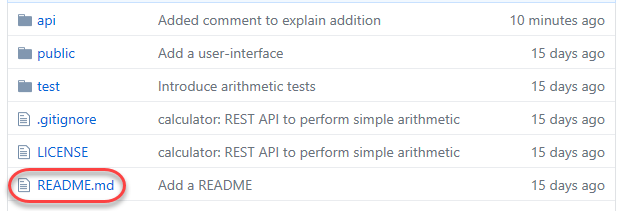
Open README.md.
-
Click the Edit button.

-
Paste in the clipboard contents around line 5.
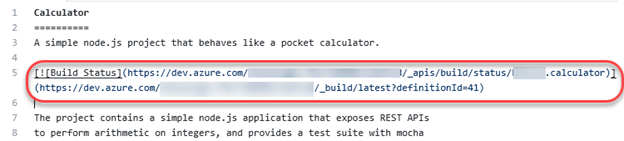
-
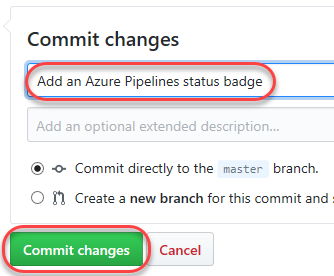
Scroll down and add a commit comment and click Commit changes.
-
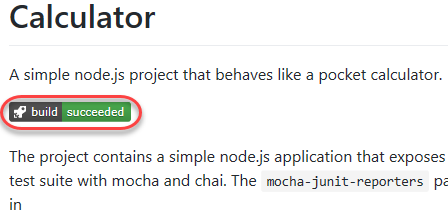
You now have a dynamic build status badge on your project’s front page that allows everyone to know that you’re effectively managing your project.
Note If the badge is broken, you have to enable anonymous access to badges in your Azure DevOps account. This has to be done both at the project level, and the organization level.
Go to Project Settings (https://dev.azure.com/
Summary
In this lab, you learned how to integrate a GitHub project with Azure DevOps using the new Azure Pipelines integration from the Marketplace.