Overview
Ansible is an open-source tool that automates cloud provisioning, configuration management, and application deployments. Using Ansible you can provision virtual machines, containers, network, and complete cloud infrastructures. In addition, Ansible allows you to automate the deployment and configuration of resources in your environment.
Ansible includes a suite of Ansible modules that can be executed directly on remote hosts or via playbooks. Users can also create their own modules. Modules can be used to control system resources - such as services, packages, or files - or execute system commands.
For interacting with Azure services, Ansible includes a suite of Ansible cloud modules that provides the tools to easily create and orchestrate your infrastructure on Azure.
What’s covered in this lab
In this lab, you will see
- How Ansible can be used to implement Infrastructure as Code (IaC)
- How to automate infrastructure deployments in the Cloud with Ansible and Azure pipelines.
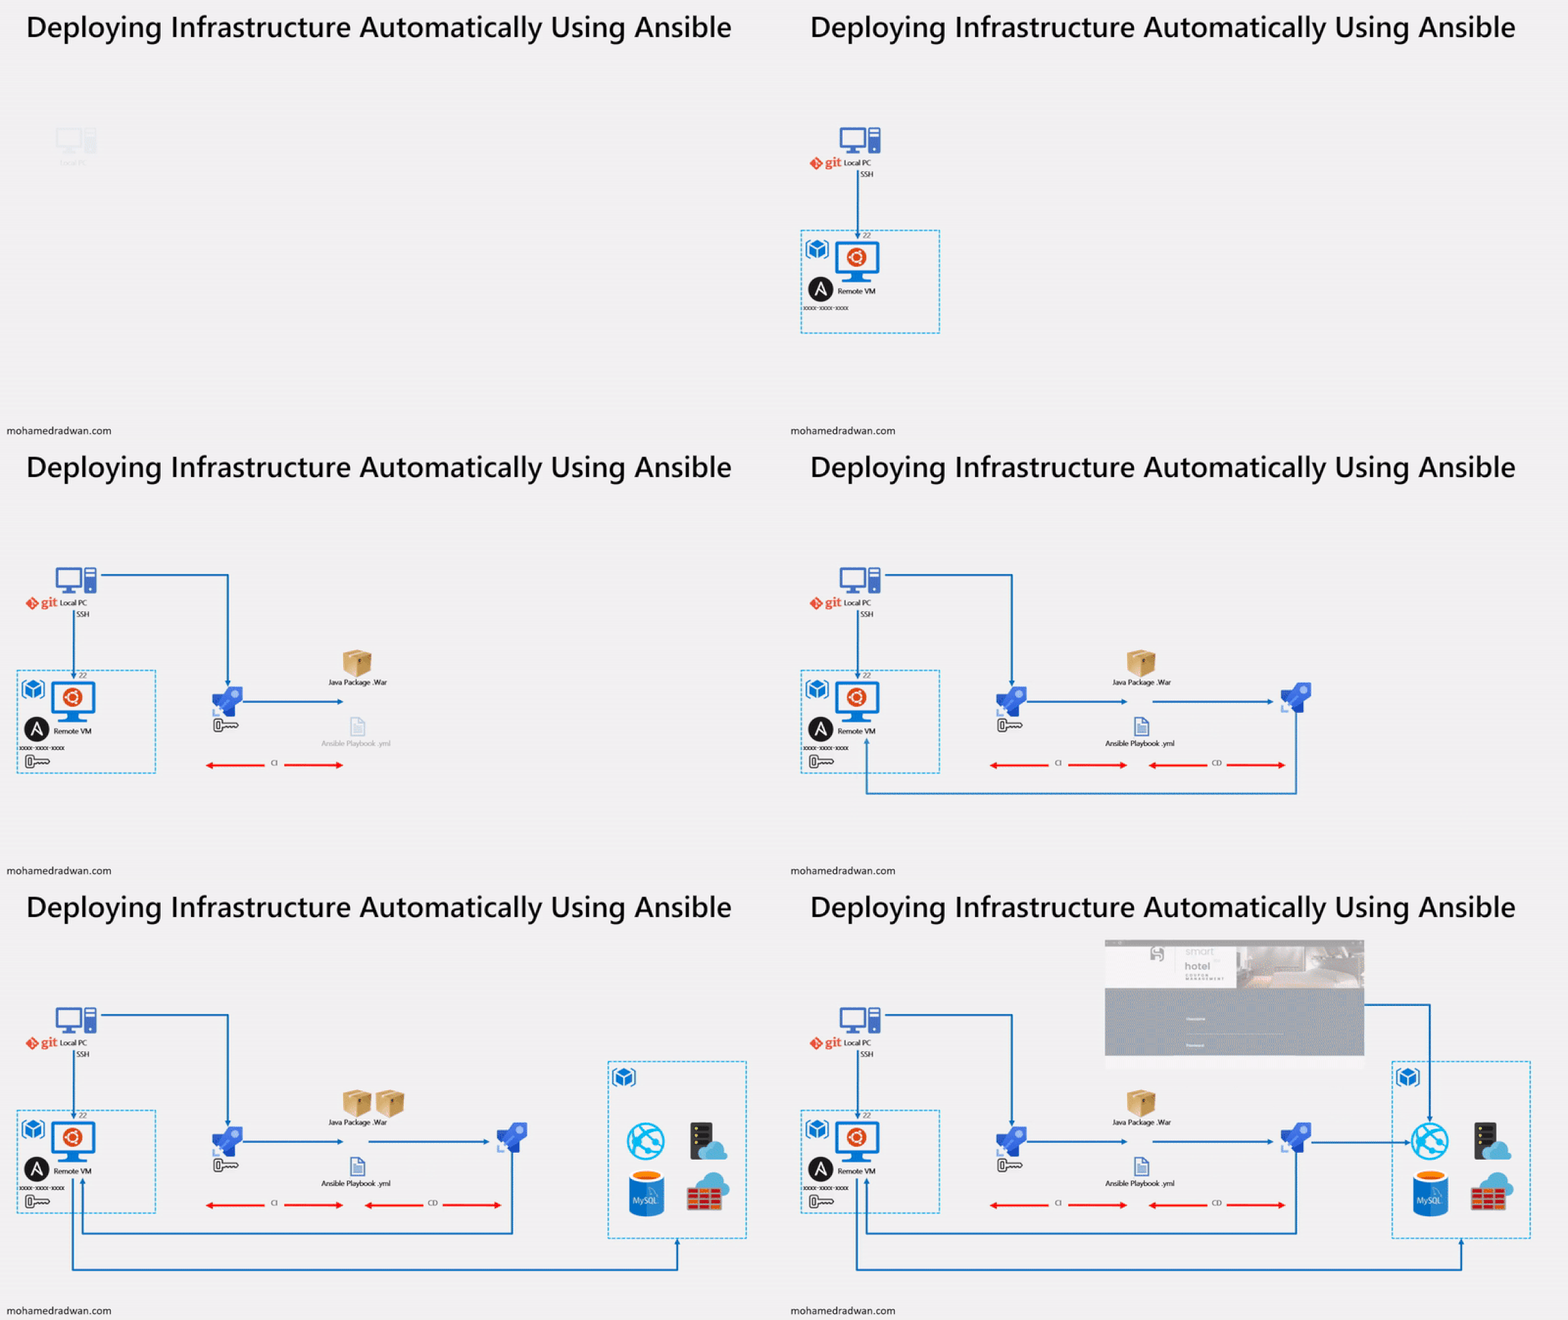
The following image will walk you through all the steps explained in this lab
Before you begin
-
Refer the Getting Started page before you begin following the exercises.
-
Use the Azure DevOps Demo Generator to provision the project on your Azure DevOps organization. This URL will automatically select Ansible template in the demo generator. If you want to try other projects, use this URL instead -https://azuredevopsdemogenerator.azurewebsites.net/
Follow the simple walkthrough to know how to use the Azure DevOps Demo Generator.
Setting up the Environment
Task 1: Create an Azure service principal with Azure CLI
Ansible includes a suite of modules for interacting with Azure Resource Manager, giving you the tools to easily create and orchestrate infrastructure on the Microsoft Azure Cloud. Using the Azure Resource Manager modules requires authenticating with the Azure API. In this lab, you will use Azure service principal for authentication.
-
Login to the Azure portal.
-
Click Cloud Shell and select Bash.

-
Enter the following command to get Azure SubscriptionID and copy the same to notepad.
az account show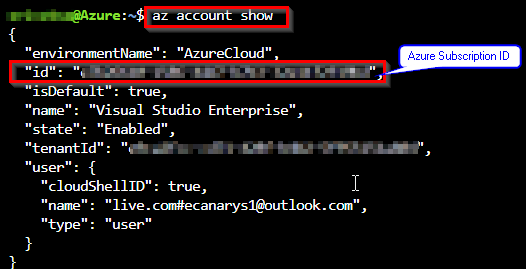
-
Enter the following command by replacing ServicePrincipalName with your desired value and Subscription ID from the previous step.
az ad sp create-for-rbac --name ServicePrincipalName --role Contributor --scopes /subscriptions/<subscriptionid>It will give you a JSON output as shown in the image. Copy the output to notepad. This details required in your next tasks.

For more information about Azure service principal click here.
Task 2: Configure Ansible in a Linux machine
To create and provision the resources in Azure with Ansible, we need to have a Linux VM with Ansible configured. In this exercise, you will deploy an Azure Linux VM and configure Ansible on the virtual machine
-
In the Azure Cloud shell enter below command to create Azure resource group
az group create --name AnsibleVM --location eastus -
Create the Azure virtual machine for Ansible.
az vm create --resource-group AnsibleVM --name AnsibleVM
--image OpenLogic:CentOS:7.7:latest
--admin-username azureuser
--admin-password <password>
Replace the
<password>with your password. -
Once the deployment is successful, navigate to the resource group and select the VM.
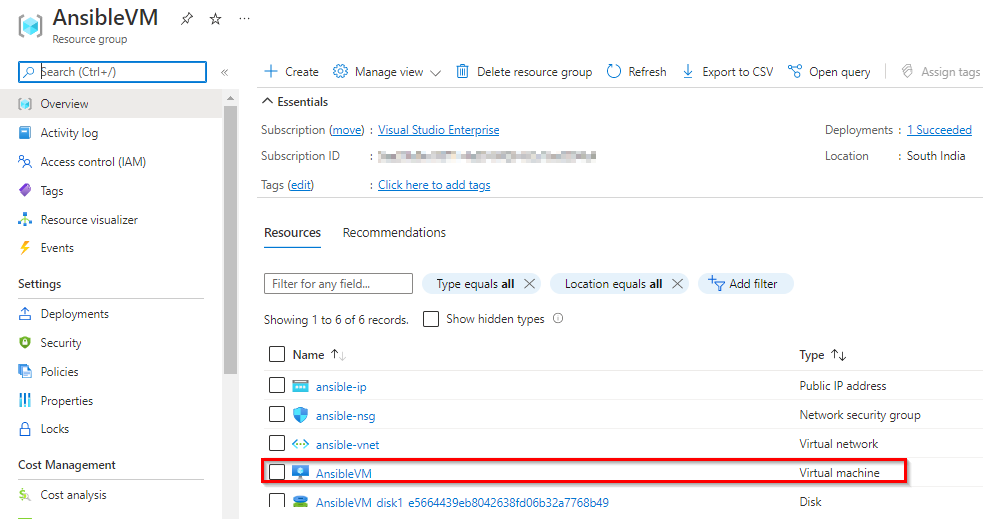
-
Select Overview and copy the Public IP address.

-
Open a Command prompt and enter the below command
ssh azureuser@<PublicIP>to login to VM. It will prompt for confirmation to connect, type Yes and provide the Password you have given in step 1.
Note: Replace azureuser with your VM username in the above command.
-
Run the following commands to configure Ansible on Centos:
#!/bin/bash # Update all packages that have available updates. sudo yum update -y # Install Python 3 and pip. sudo yum install -y python3-pip # Upgrade pip3. sudo pip3 install --upgrade pip # Install Ansible. pip3 install "ansible==2.9.17" # Install Ansible azure_rm module for interacting with Azure. pip3 install ansible[azure] - Now we must create a directory named .azure in the home directory and a credentials file under it. This local credentials file is to provide credentials to Ansible. Type the following commands to create them.
mkdir ~/.azure nano ~/.azure/credentials -
Insert the following lines into the credentials file. Replace the placeholders with the information from the service principal details you copied in the previuous task. Press Ctrl+O to save the file and Ctrl+X to exit from the text editor.
[default]subscription_id=<your-Azure-subscription_id>client_id=<azure service-principal-appid>secret=<azure service-principal-password>tenant=<azure serviceprincipal-tenant> -
Run
nano ~/.bashrcand insert the following text into .bashrc. Press Ctrl+O to save the file and Ctrl+X to exit from the text editor.PATH=$PATH:$HOME/.local/bin:$HOME/bin -
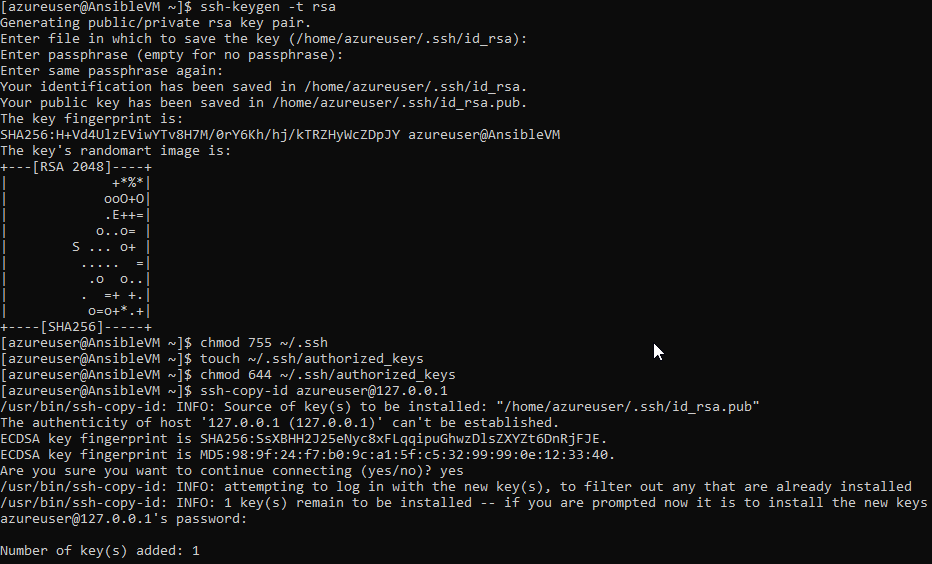
Ansible is an agentless architecture based automation tool . Only it needs ssh authentication using Ansible Control Machine private/public key pair. Now let us create a pair of private and public keys. Run the following command to generate a private/public key pair for ssh and to install the public key in the local machine.
ssh-keygen -t rsachmod 755 ~/.sshtouch ~/.ssh/authorized_keyschmod 644 ~/.ssh/authorized_keysssh-copy-id azureuser@127.0.0.1Note: Replace azureuser with your VM username in the above command.
When asked for the password give the password of the VM that has been noted
-
In the next task, you need SSH private key to created SSH endpoint in Azure DevOps service. Run the following command to get the private key. Copy the private key to notepad.
cat ~/.ssh/id_rsa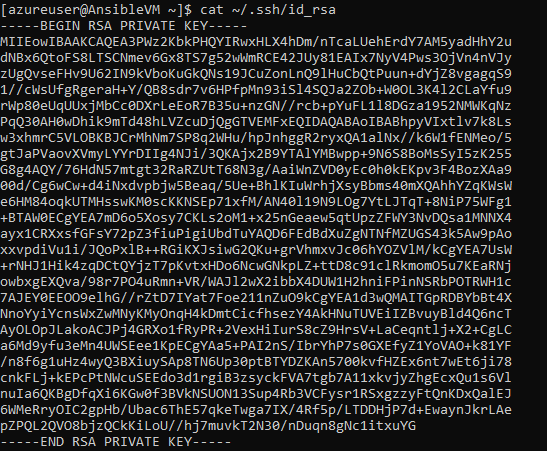
Task 3: Create a SSH Service Connection in Azure DevOps
To connect and run playbooks through Ansible VM in Azure pipelines, we need to have a connection between Azure DevOps and Ansible VM. This service connection provides authentication to Ansible.
-
Navigate to the project we created above using Azure DevOps Demo Generator.
-
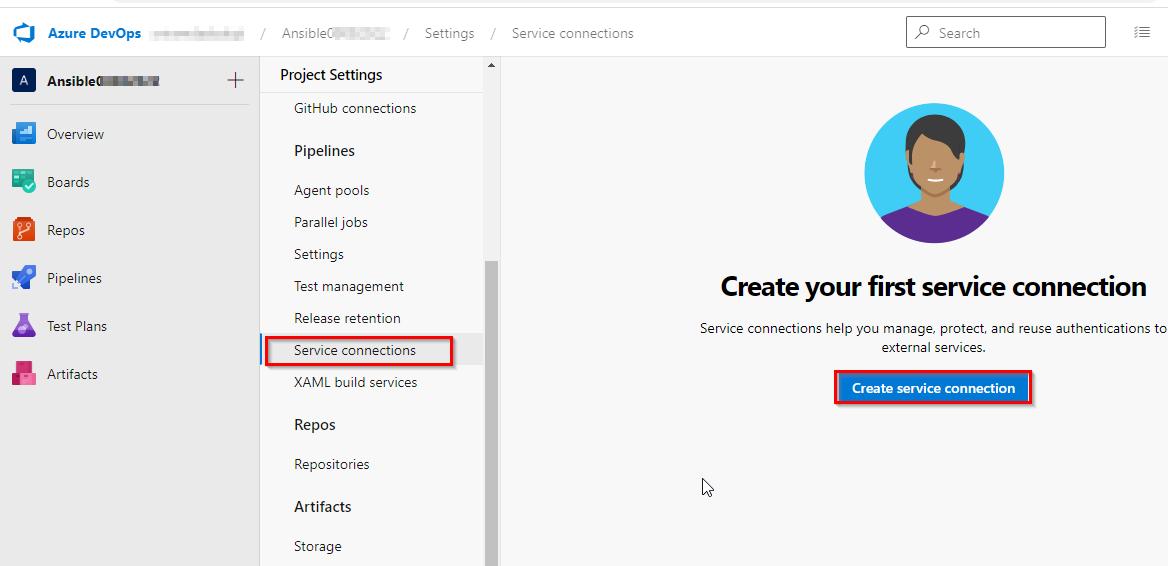
Navigate to Project Settings –> Service Connections. Select Create service connection.
-
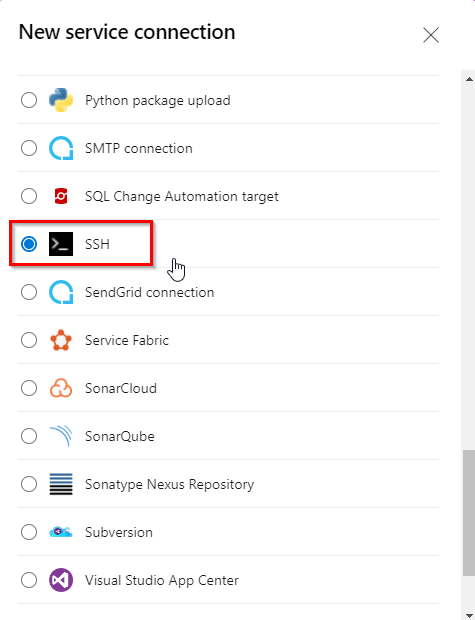
In New Service Connection windows select SSH and click Next
-
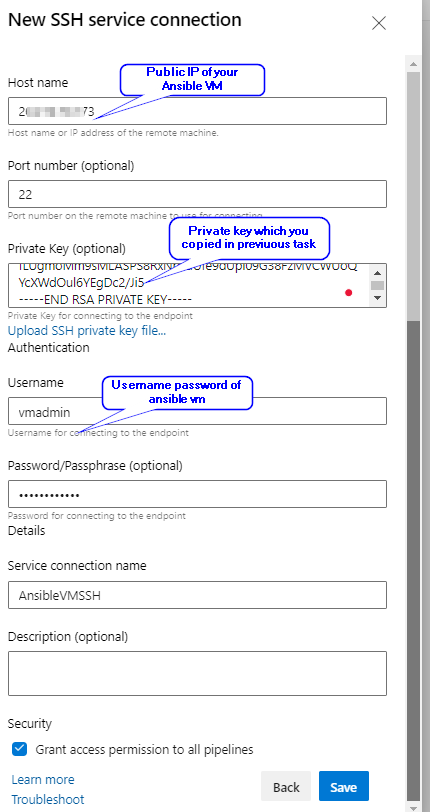
In New SSH service connection window provide the required details and click Save to save the connection.
Exercise 1: Examine the Ansible playbook (IaC) in your Source code
In this lab, we will use SmartHotel360-CouponManagement, a sample Java application backed by a MySQL database. We will examine the Ansible playbook which helps you to provision the Azure resources required to deploy SmartHotel java application.
-
Navigate to your project. Select Repos.
-
Select the webapp.yml file under the ansible-scripts folder. Go through the code.
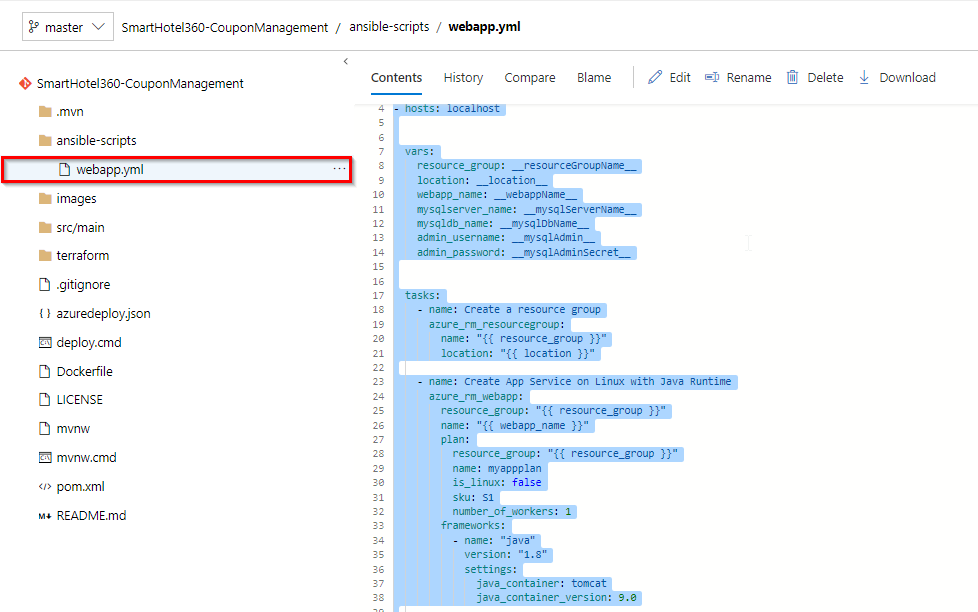
webapp.yml is an Ansible playbook file written in YAML format. Ansible Playbooks are Ansible’s configuration, deployment, and orchestration language. They can describe a policy you want your remote systems to enforce or a set of steps in a general IT process. These playbooks use YAML file format to define a model of a configuration or a process.
Ansible includes a suite of modules for interacting with Azure Resource Manager, giving you the tools to easily create and orchestrate infrastructure on the Microsoft Azure Cloud.
In this example, we want to deploy an Azure Resource group, App service plan, App service and MySQL database required to deploy the website. And we have added playbook file (Infrastructure as Code) to source control repository in your Azure DevOps project which can deploy the required Azure resources.
Update the playbook webapp.yml as the following.
Change the name of the App service from Linux to Windows as the following image

Also, change the EndIpAdress from 255.255.255.255 to 0.0.0.0 as the following image

If you would like to learn more about the Ansible playbooks for Azure click here.
Exercise 2: Build your application using Azure CI Pipeline
In this exercise, you will build your application and publish the required files to an artifact called drop.
-
Navigate to Pipelines –> Pipelines. Select Ansible-CI and click Edit.

-
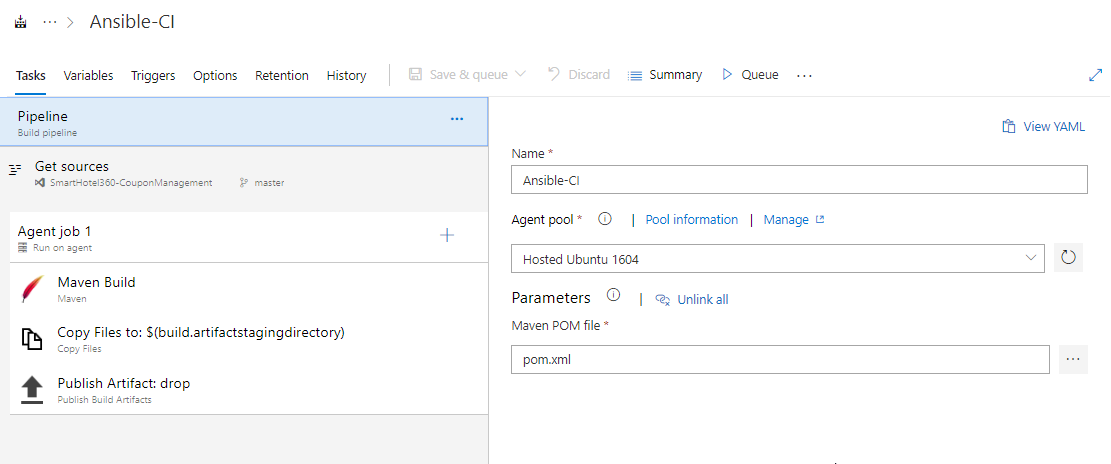
Your build pipeline will look like as below. This CI pipeline has tasks to compile Java project. The Maven in the pipeline will restore dependencies, build, test and publish the build output into a war file (package) which can be deployed to a web application.
For more guidance on how to build Java projects with Azure Pipelines see here.
Note: We also have a YAML build pipeline if that’s something you’re interested in. To proceed through the YAML pipeline, choose Ansible-CI-YAML and click Edit to view the YAML pipeline. If you utilize the YAML pipeline, make sure to update the Ansible-CD release definition’s artifact link. -
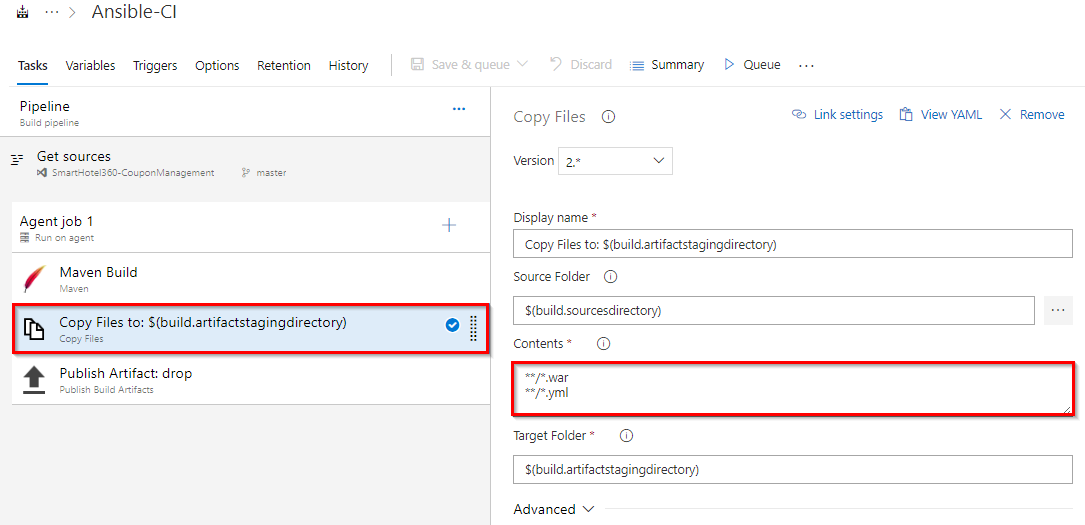
In addition to the application build, we need to publish Ansible scripts so that it will be available in CD pipeline. So, we configured Copy files task to copy Ansible playbook .yml and the java web package .war file to Artifacts directory.
-
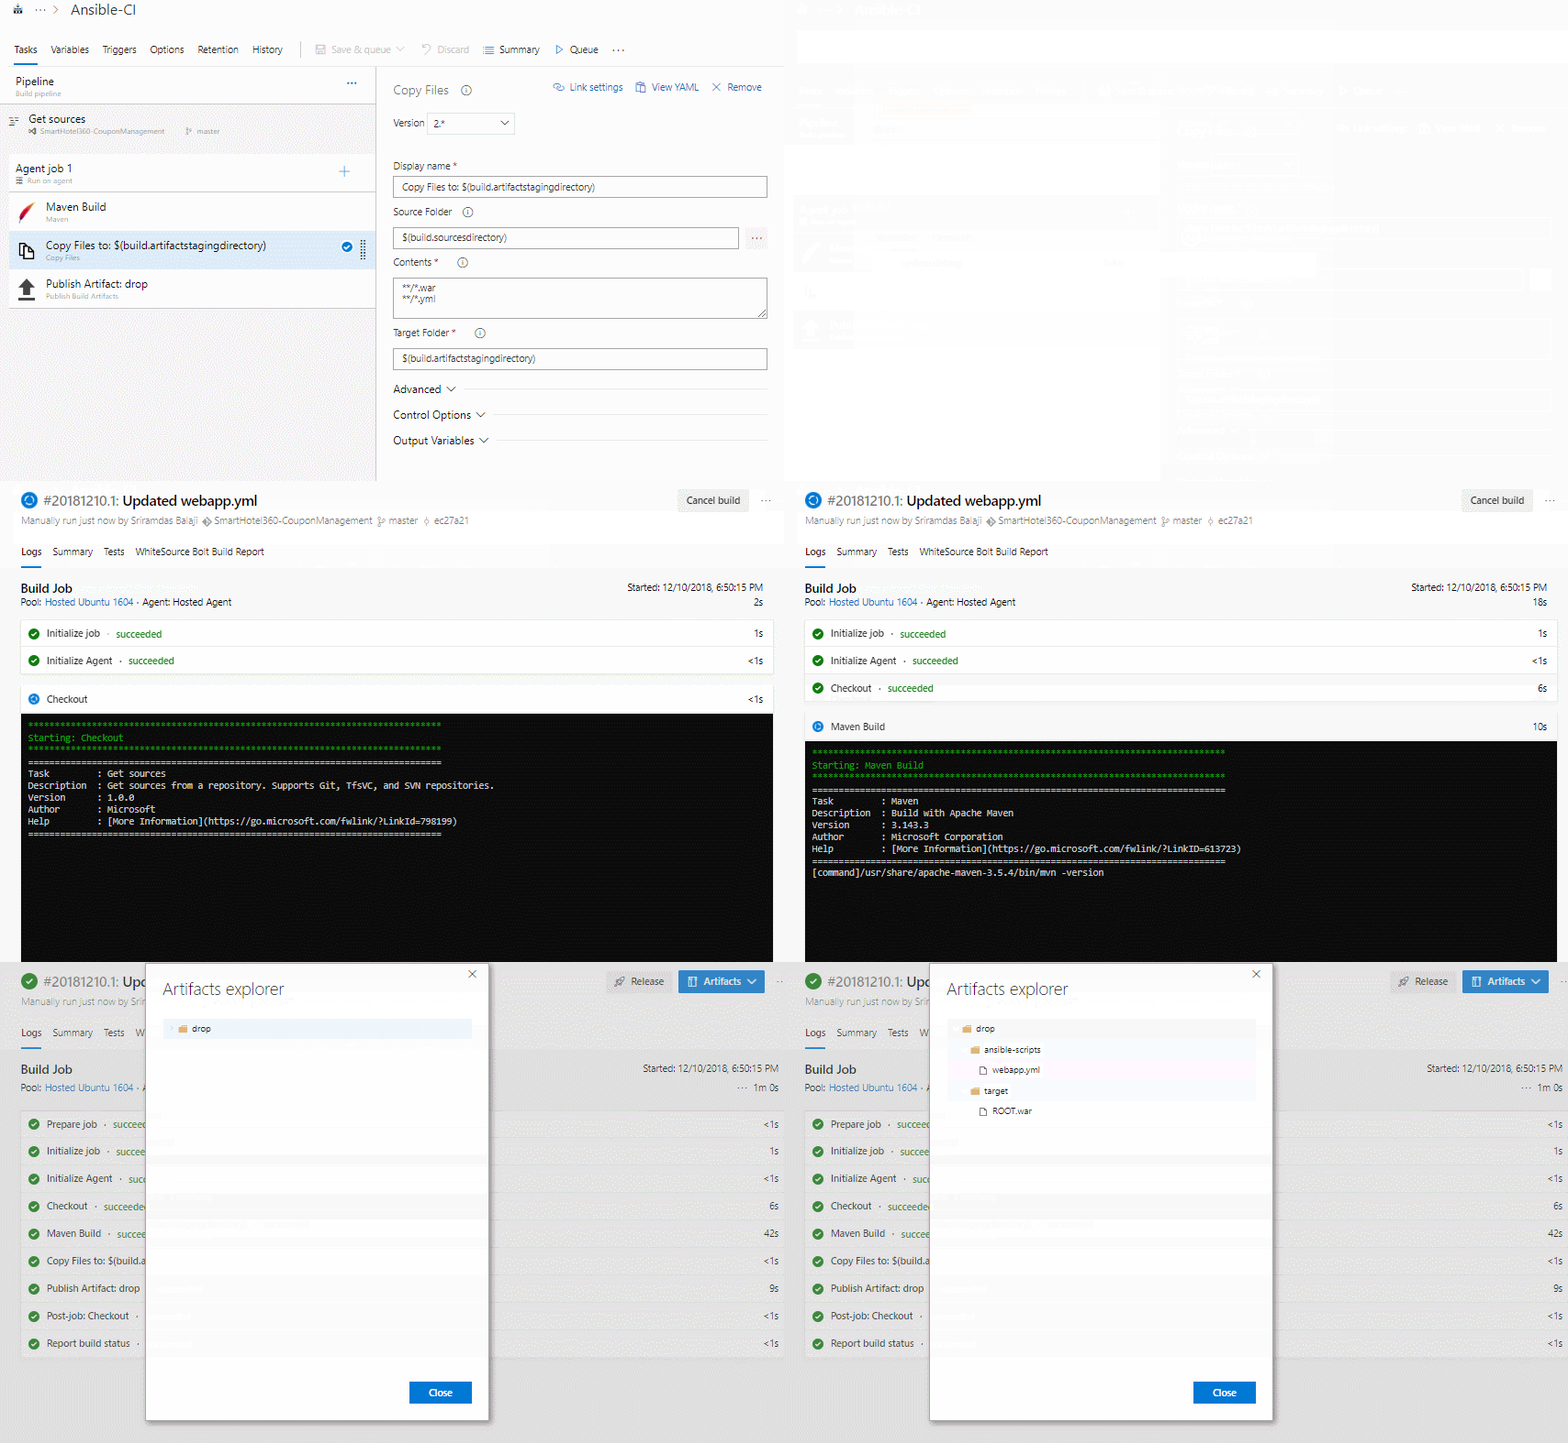
Now click Queue to trigger the build. Once the build success, verify that the artifacts have ansible_scripts folder and ROOT.war file in the drop.
Exercise 3: Deploy resources using Ansible in Azure CD Pipeline
In this exercise, we will create azure resources using Ansible as part of our deployment (CD) pipeline and deploy the SmartHotel Coupon management application to the App service provisioned by Ansible.
-
Navigate to Pipelines » Releases. Select Ansible-CD and click Edit pipeline.

-
Select Azure Dev stage and click View stage tasks to view the pipeline tasks.
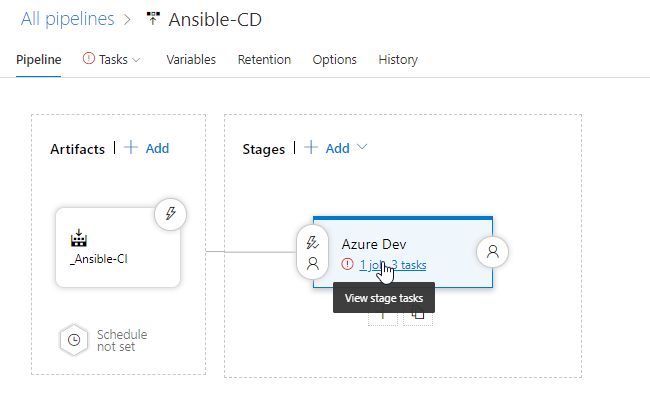
You will see the tasks as below.
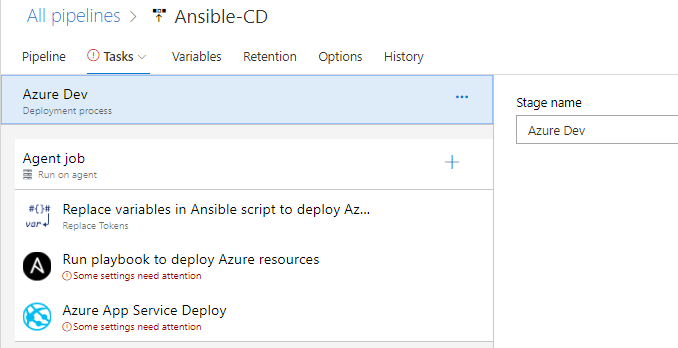
-
Select the Replace Tokens task. And make sure Token pattern is selected as __’’‘__ as shown in image.
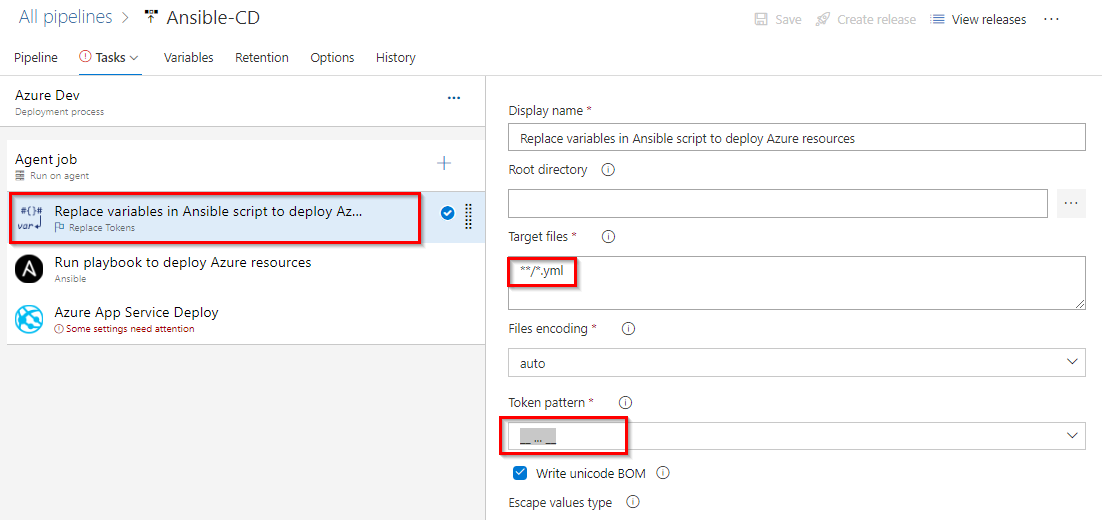
If you observe the webapp.yml file in Exercise 1, Step 2 you will see there are few values are suffixed and prefixed with __. For example __ webappName __. Using Replace tokens task we will replace those values with the variable values defined in the release pipeline.
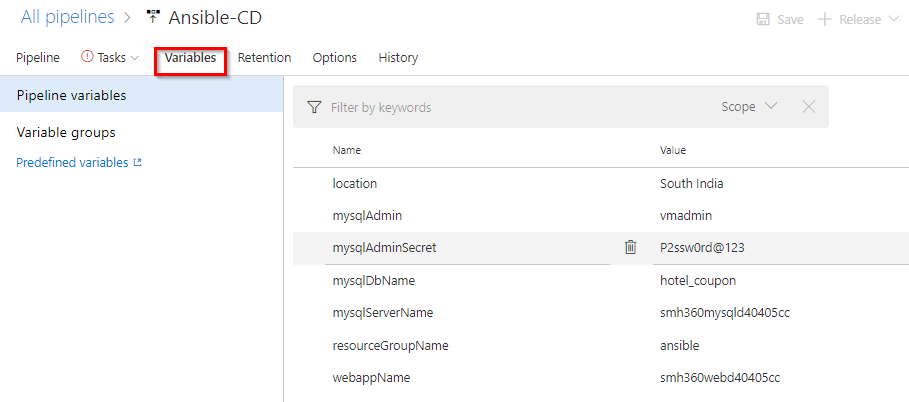
Your CD pipeline is provisioned with some default values. If required you can changes the variable values.
-
Select the Ansible task. This task is to integrate with Ansible. This task executes a given Ansible playbook on a specified list of inventory nodes via command line interface. This task requires that the Playbook files be located either on a private Linux agent or on a remote machine where Ansible automation engine has been installed. Select Ansible Location as Remote Machine and select Ansible SSH endpoint that you created in Task 3.
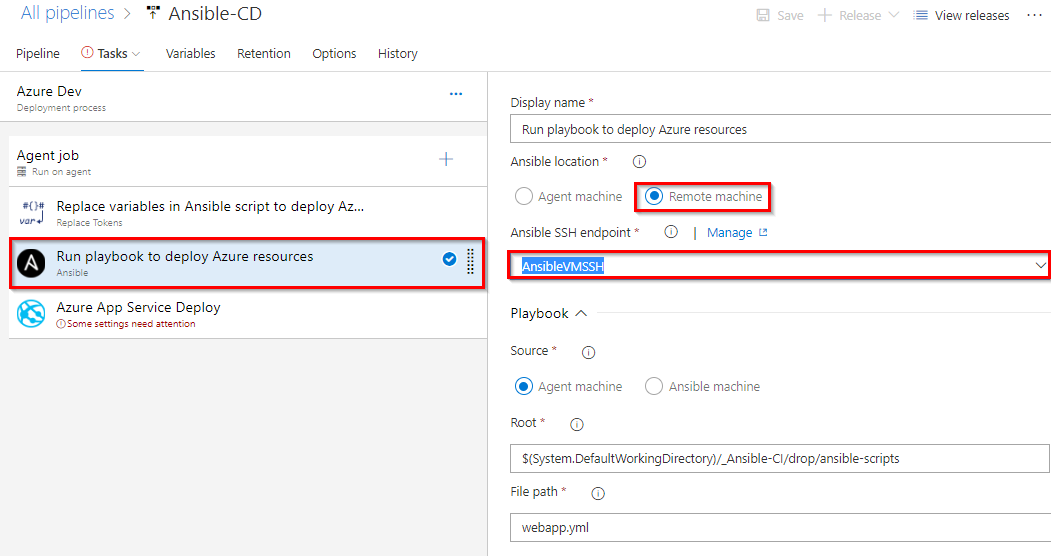
Under the Inventory section, select Host list as inventory location and enter pubic ip of your ansible vm in Host list field as shown below.

-
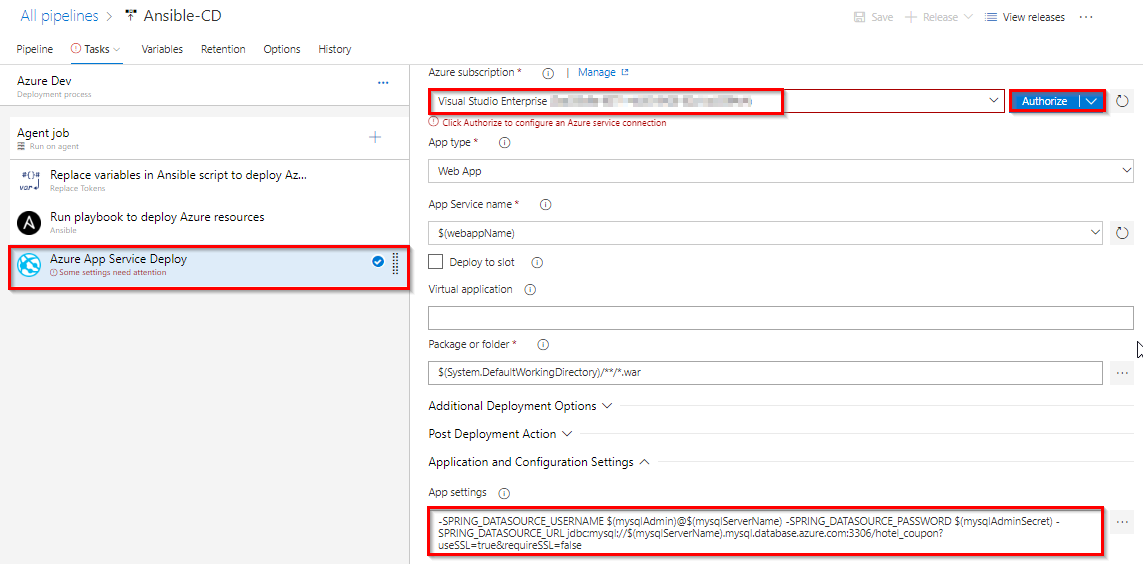
Select Azure App Service Deploy task. Select the Azure subscription from the drop-down list and click Authorize to configure Azure service connection. And this application require few app settings to connect to the MySQL database provisioned using Ansible script. That we are updating using App settings parameter in the task. This task will deploy the SmartHotel360-CouponManagement package to Azure app service which is provisioned by Ansible task in previous step.
-
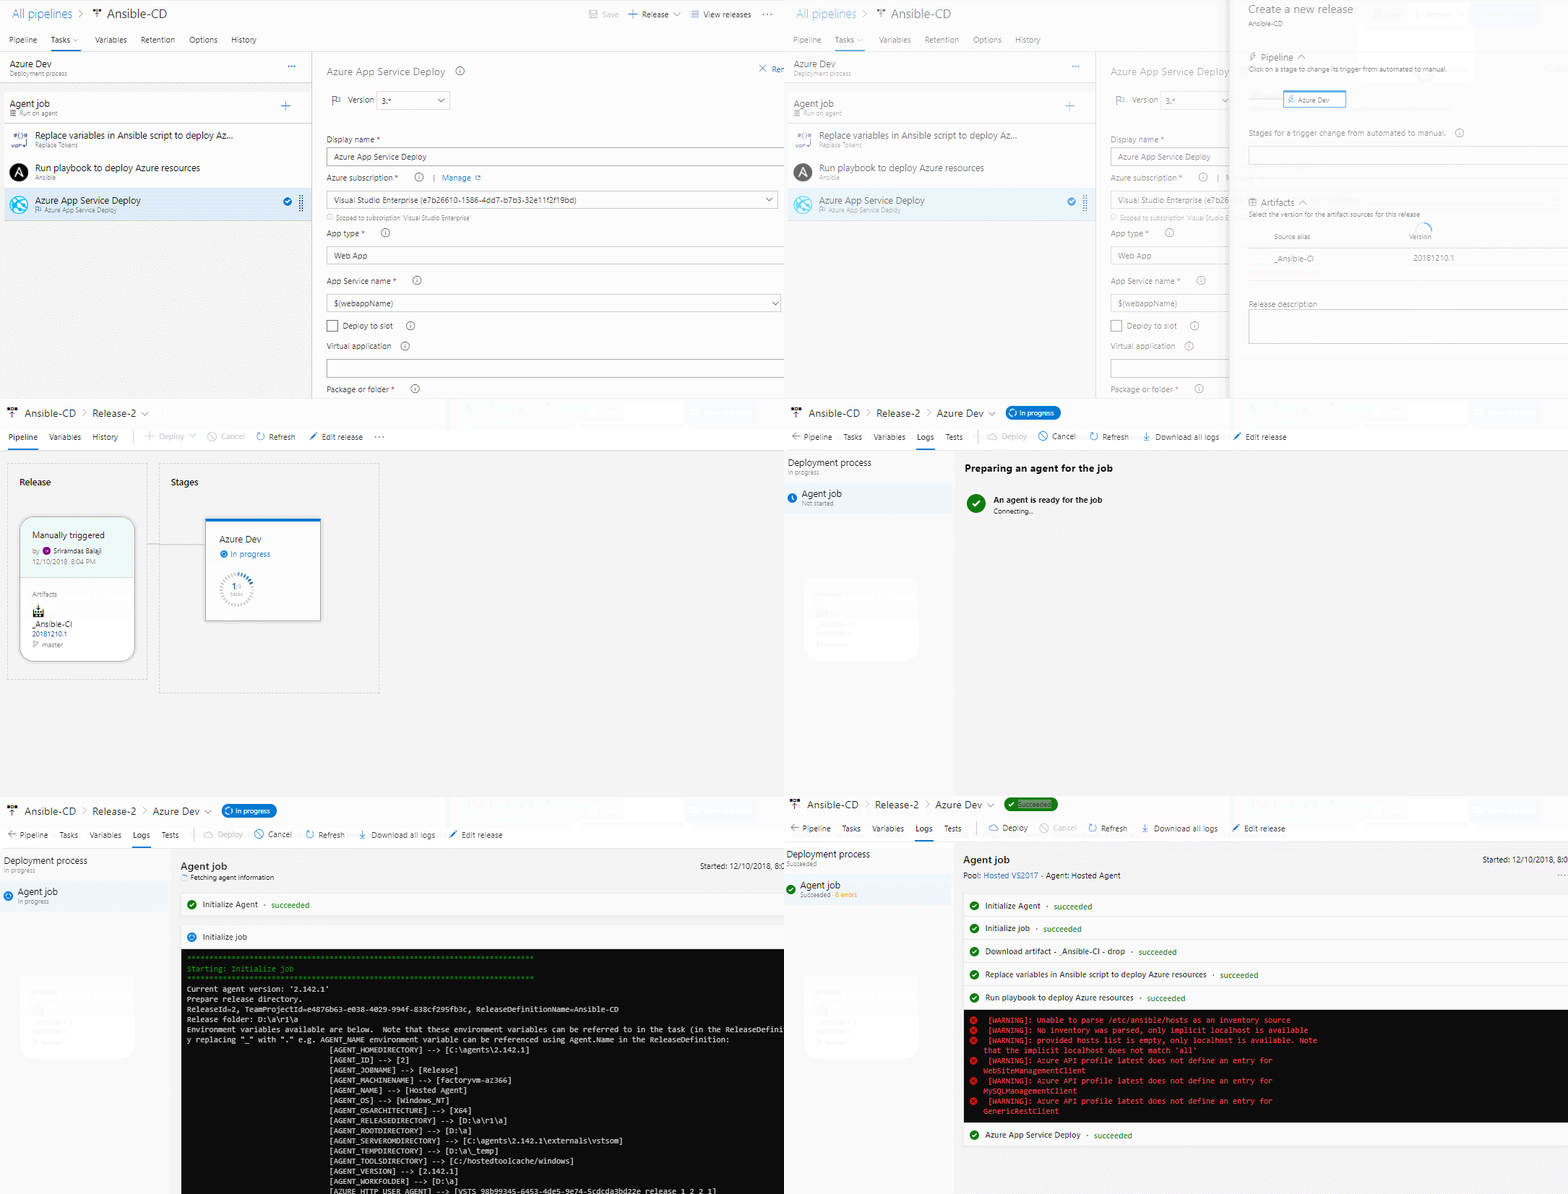
Once you are done Save the changes and Create a release.
-
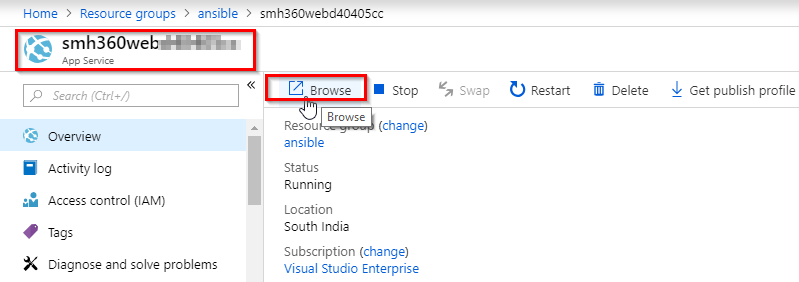
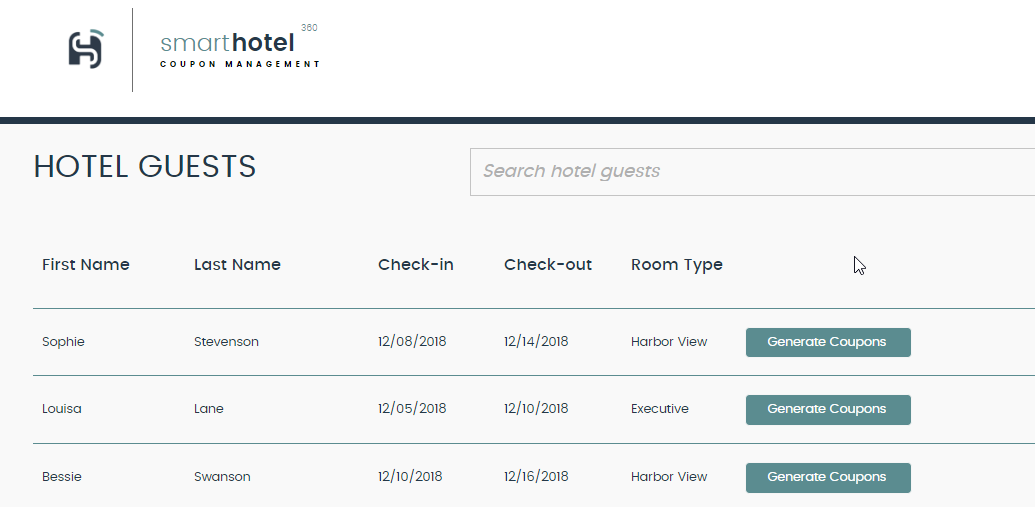
Once the release is success navigate to your Azure portal. Search for smh360web in App services. Select the app that created with smh360-xxxx and browse to view the application deployed.

-
You can Login to the site with the following credentials.
` Username: me@smarthotel360.com `
` Password: 1234 `

Summary
In this lab, you have learnt how to deploy Azure resources automatically with Ansible and deploy the application with Azure Pipelines.
For Ansible on Azure documentation and Quick starts click here.
Reference
You can watch the following video that walks you through all the steps explained in this lab