Overview
A Docker container image is a lightweight, standalone, executable package of software that includes everything needed to run an application: code, runtime, system tools, system libraries and settings.
This lab outlines the process to build custom Docker images of an ASP.NET Core application, push those images to a private repository in Azure Container Registry (ACR). These images will be used to deploy the application to the Docker containers in the Azure App Service (Linux) using Azure DevOps.
The Web App for Containers allows the creation of custom Docker container images, easily deploy and then run them on Azure. Combination of Azure DevOps and Azure integration with Docker will enable the following:
-
Build custom Docker images using Azure DevOps Hosted Linux agent
-
Push and store the Docker images in a private repository
-
Deploy and run the images inside the Docker Containers
Before you begin
-
Refer the Getting Started page to know the prerequisites for this lab.
-
Click the Azure DevOps Demo Generator link and follow the instructions in Getting Started page to provision the project to your Azure DevOps.
Setting up the Environment
-
The following resources needs to be configured for this lab:
-
Azure Container Registry
-
Azure Web App for Containers
-
Azure SQL Server Database
-
-
Launch the Azure Cloud Shell from the Azure portal and choose Bash.
-
Create Azure Container Registry:
i. Create a Resource Group. Replace
<region>with the region of your choosing, for example eastus.az group create --name DockerRG --location <region>ii. Create ACR( Azure Container Registry)
az acr create -n <unique-acr-name> -g DockerRG --sku Standard --admin-enabled trueImportant: Enter a unique ACR name. ACR name may contain alpha numeric characters only and must be between 5 and 50 characters -
Create Azure Web App for Containers:
i. Create a Linux App Service Plan:
az appservice plan create -n myappserviceplan -g DockerRG --is-linuxii. Create a custom Docker container Web App: To create a web app and configuring it to run a custom Docker container, run the following command:
az webapp create -n <unique-appname> -g DockerRG -p myappserviceplan -i elnably/dockerimagetest -
Create Azure SQL server and Database: Create an Azure SQL server.
az sql server create -l <region> -g DockerRG -n <unique-sqlserver-name> -u sqladmin -p P2ssw0rd1234Create a database
az sql db create -g DockerRG -s <unique-sqlserver-name> -n mhcdb --service-objective S0Important: Enter a unique SQL server name. Since the Azure SQL Server name does not support UPPER / Camel casing naming conventions, use lowercase for the DB Server Name field value. -
Create a firewall rule for SQL server that allows access from Azure services
az sql server firewall-rule create --resource-group DockerRG --server <your-sqlserver-name> --name AllowAllAzureIps --start-ip-address 0.0.0.0 --end-ip-address 0.0.0.0 -
Update web app’s connection string
az webapp config connection-string set -g DockerRG -n <your-appservice-name> -t SQLAzure --settings defaultConnection='Data Source=tcp:<your-sqlserver-name>.database.windows.net,1433;Initial Catalog=mhcdb;User Id=sqladmin;Password=P2ssw0rd1234;'Update your app service name and SQL server name in the above command. This command will add a connection string to your app service with the name
defaultConnection. -
Navigate to the resource group. You can see that the following components are provisioned.
Azure Components Description  Container Registry
Used to store images privately  Web App for Containers
Docker images are deployed to containers in this App Service  App Service Plan
Resource where App Service resides  SQL Server
SQL Server to host database  SQL database
SQL database to host MyHealthClinic data 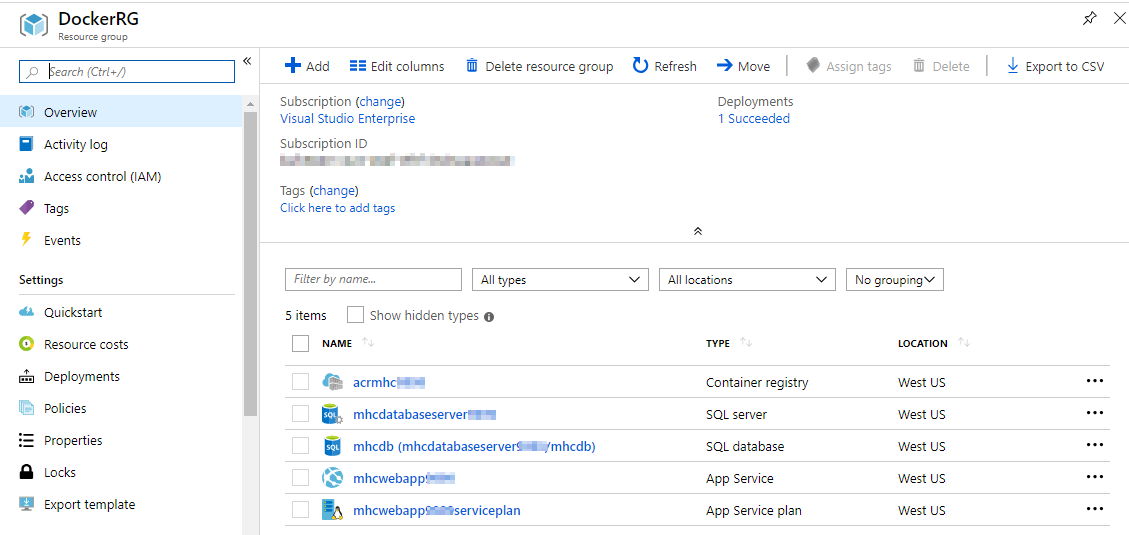
-
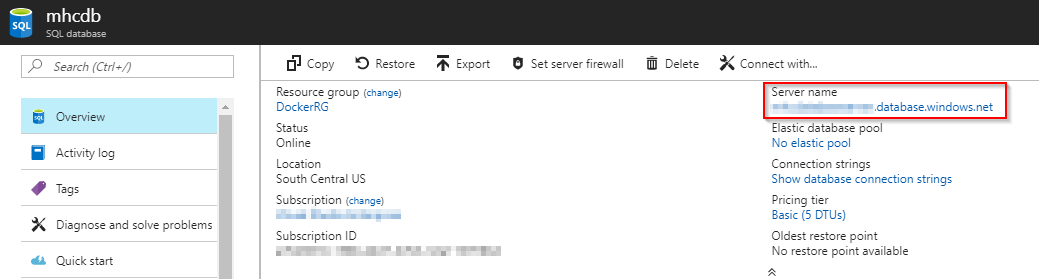
Click on the mhcdb SQL database and make a note of the server details under the header Server name.
-
Navigate back to the resource group. Click on the container registry and make a note of the server details under the header Login server. These details will be required in the Exercise 2.

Exercise 1: Configure Continuous Integration (CI) and Continuous Delivery (CD)
Now that the required resources are provisioned, the Build and the Release definition need to be manually configured with the new information. The dacpac will also be deployed to the mhcdb database so that the schema and data is configured for the backend.
-
Navigate to the Pipelines option under the Pipelines tab. Select the build definition
MHCDocker.build, and select the Edit option.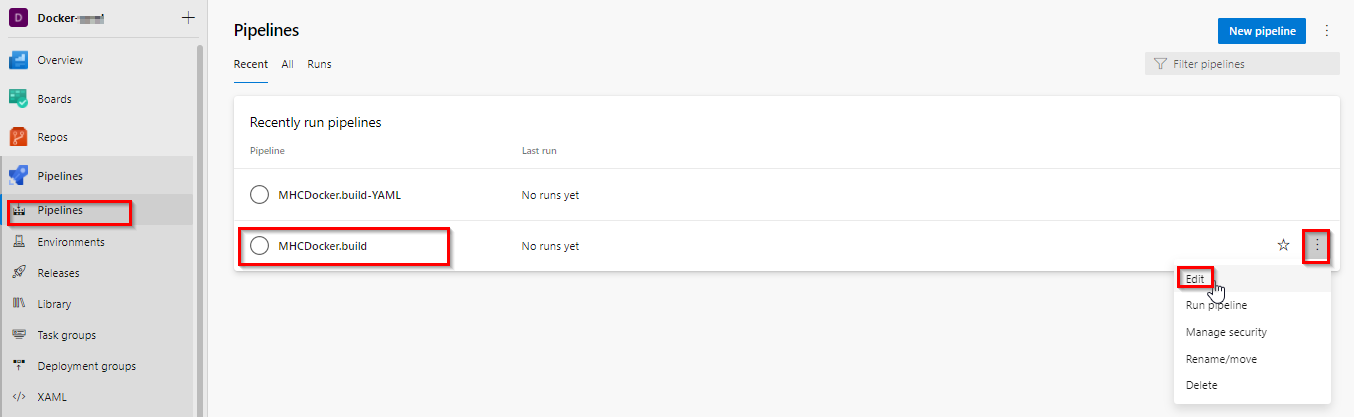 Note: We also have a YAML build pipeline if that’s something you’re interested in. To proceed through the YAML pipeline, choose MHCDocker.build-YAML and click Edit to view the YAML pipeline. If you utilize the YAML pipeline, make sure to update the MHCDocker.release release definition’s artifact link.
 -
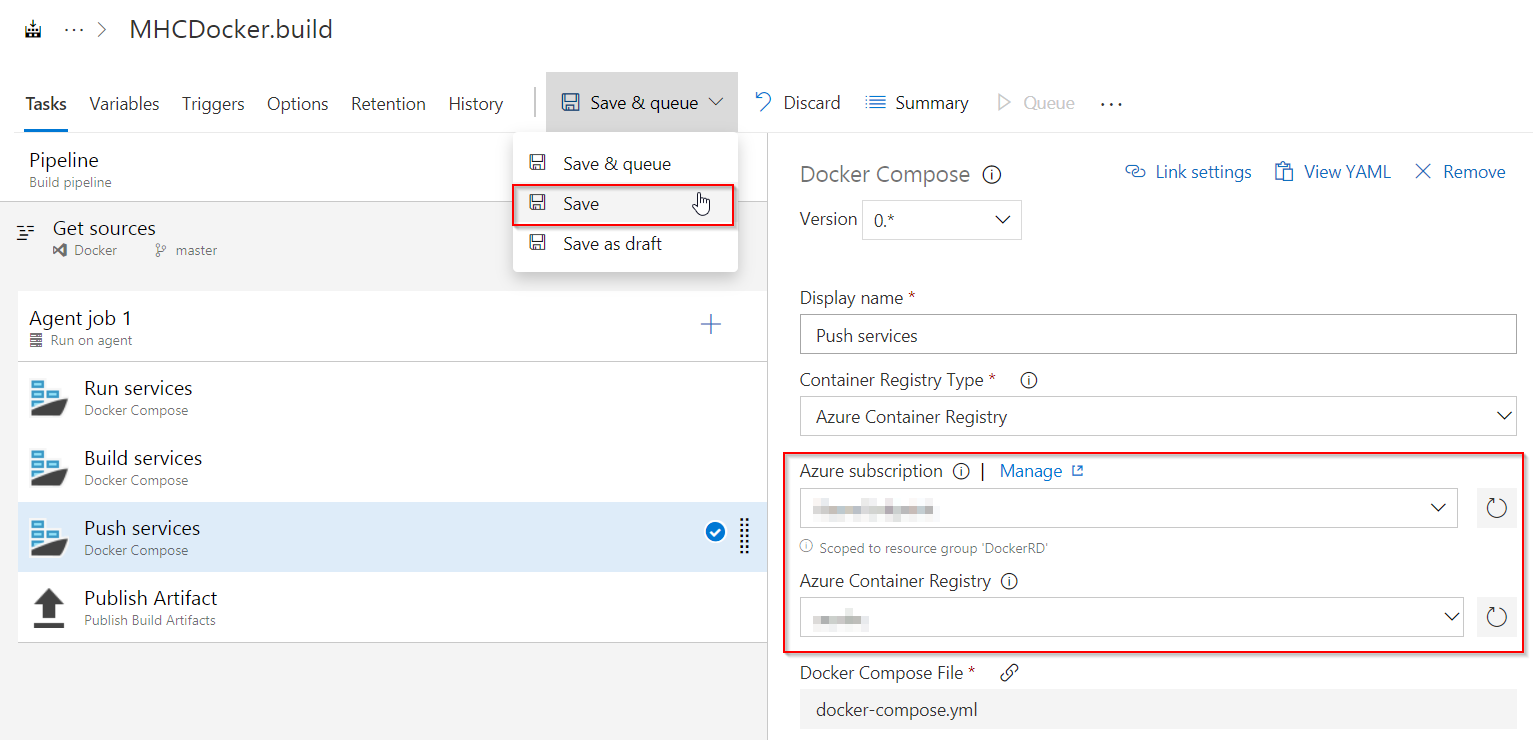
In the Run services, Build services and Push services tasks, authorize (only for the first task) the Azure subscription and update Azure Container Registry with the endpoint component from the dropdown and click on Save.
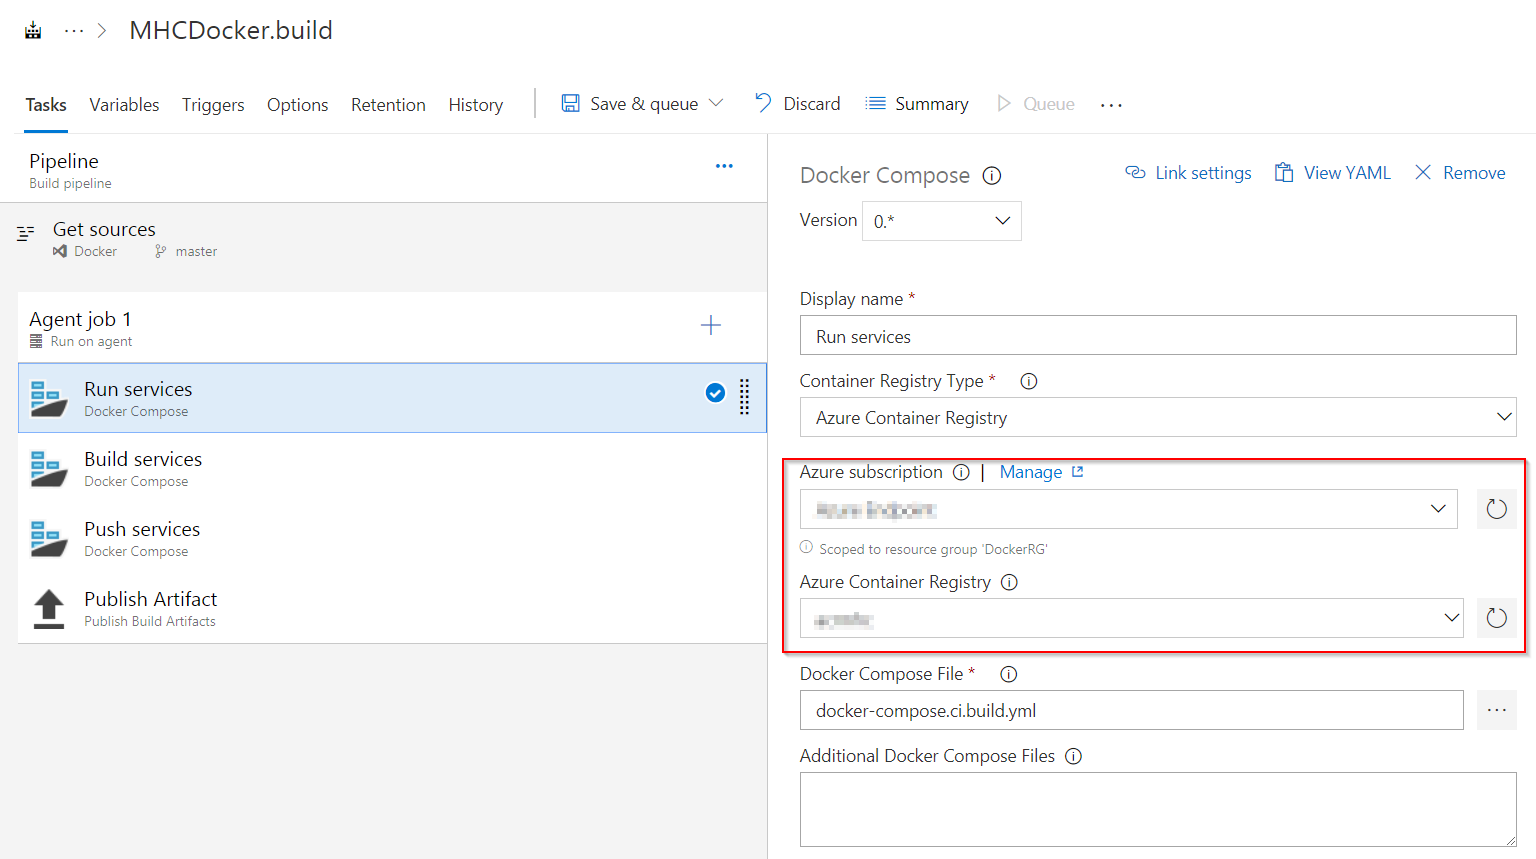
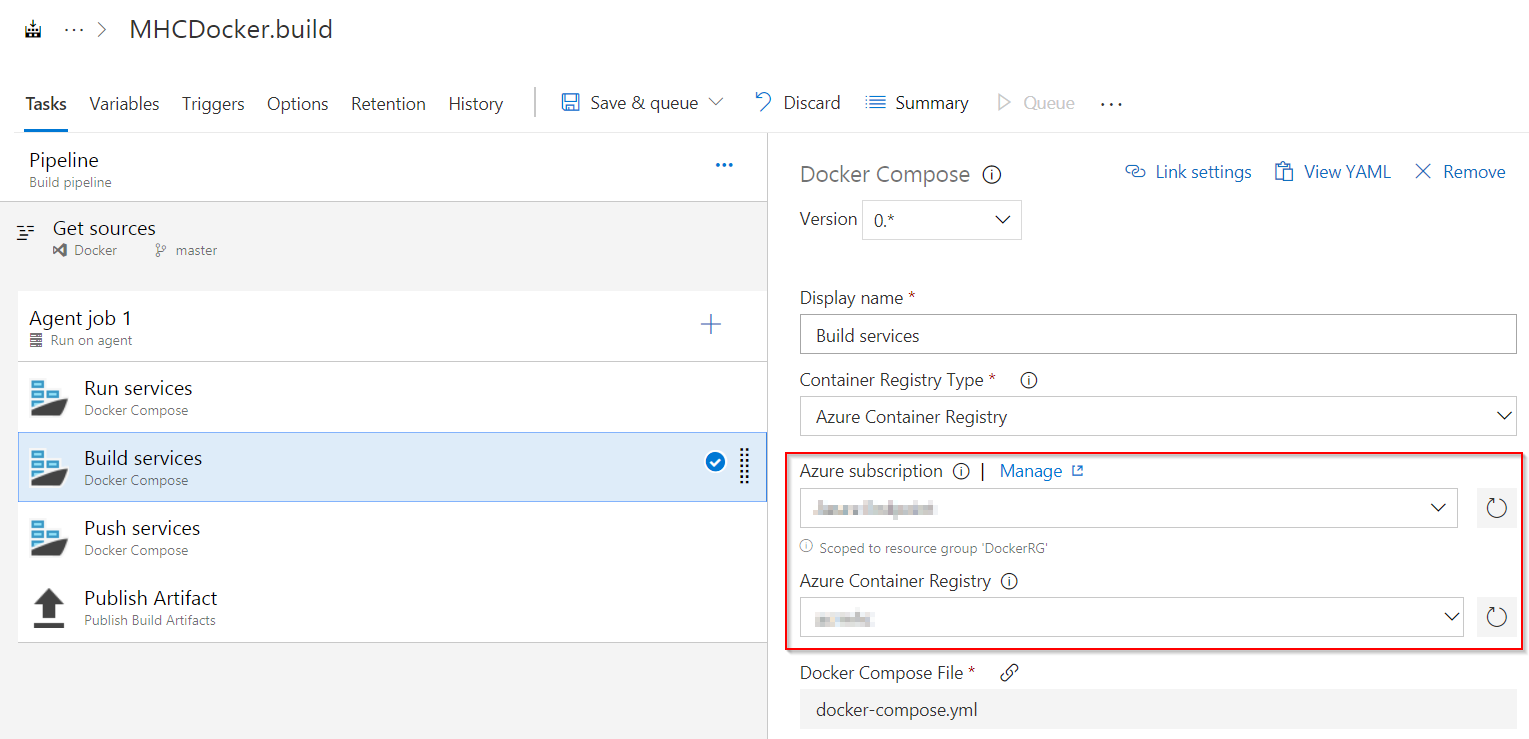
Tasks Usage  Run services
prepares suitable environment by restoring the required packages Build servicesbuilds myhealth.web image Push servicespushes myhealth.web image tagged with $(Build.BuildId) to container registry  Publish Build Artifacts
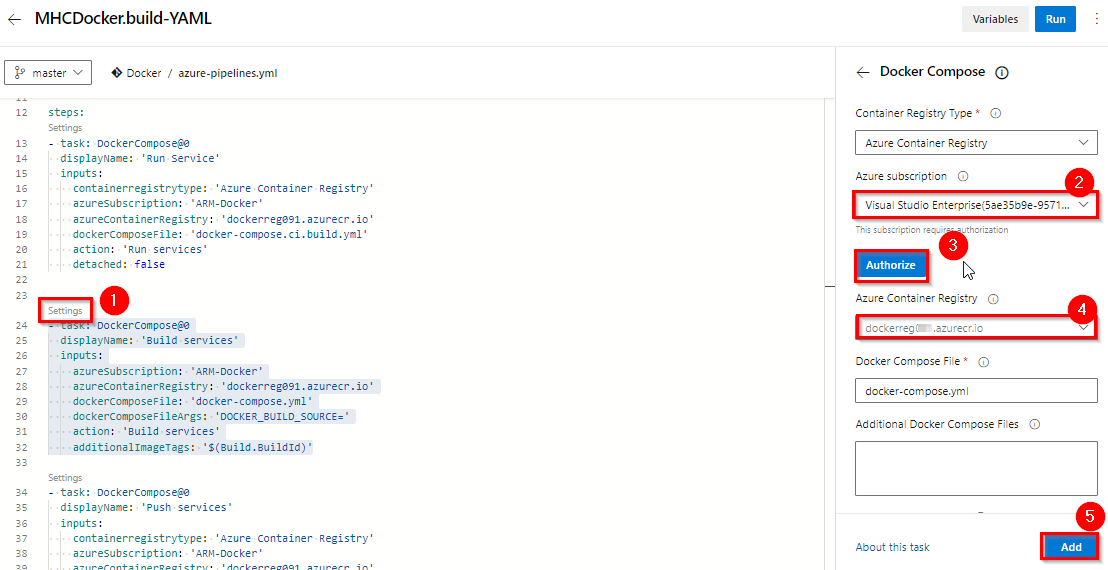
used to share dacpac for database deployment through Azure DevOps artifacts If you are using MHCDocker.build-YAML build pipeline, select Settings on the Run services, Build services and Push services tasks snippet, authorize the Azure subscription and update Azure Container Registry with the endpoint component from the dropdown and click on Add to update the yaml snippet.
-
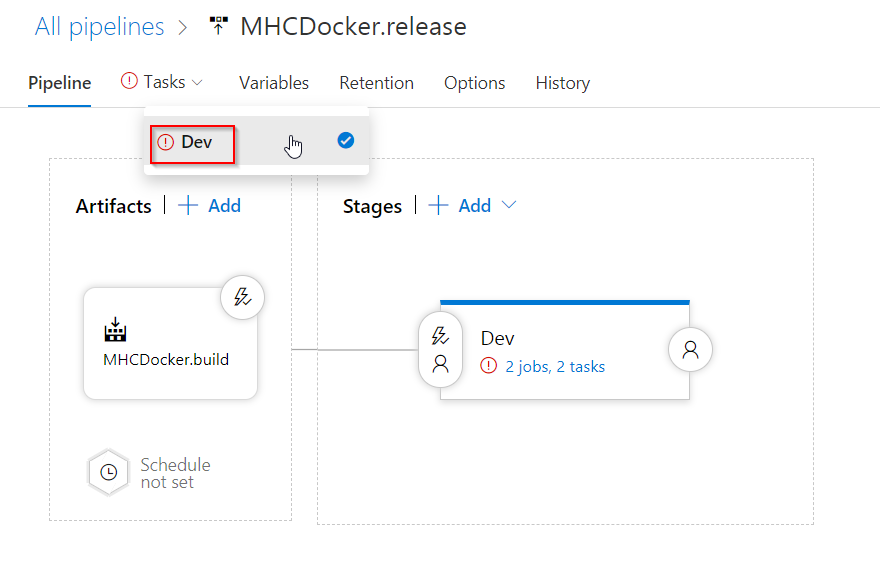
Navigate to the Releases section under the Pipelines tab. Select the release definition
MHCDocker.release, click Edit option and then click on the Tasks section.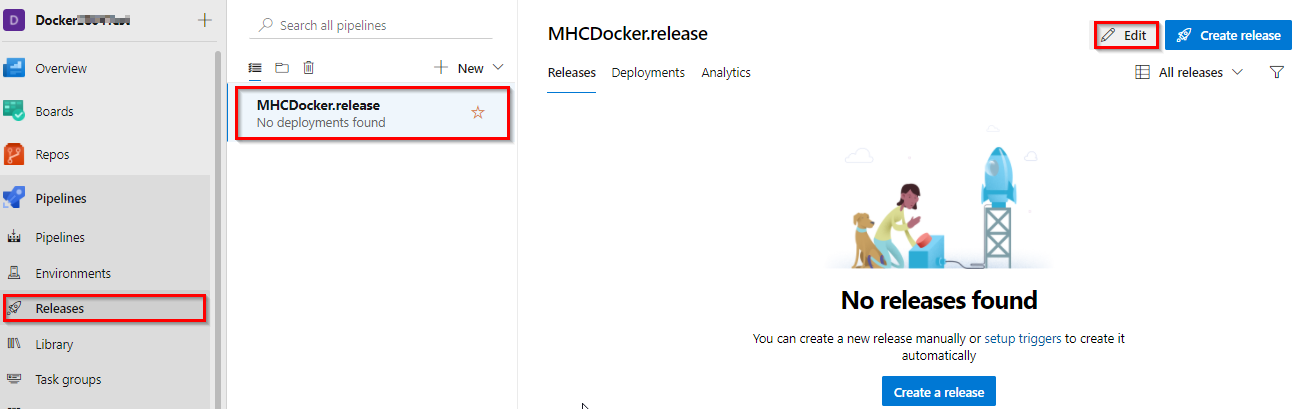
-
The usage details of the agents are provided below:
Agents Usage Details DB deployment The Hosted VS2017 agent is used to deploy the database Web App deployment The Hosted Ubuntu 1604 agent is used to deploy the application to the Linux Web App -
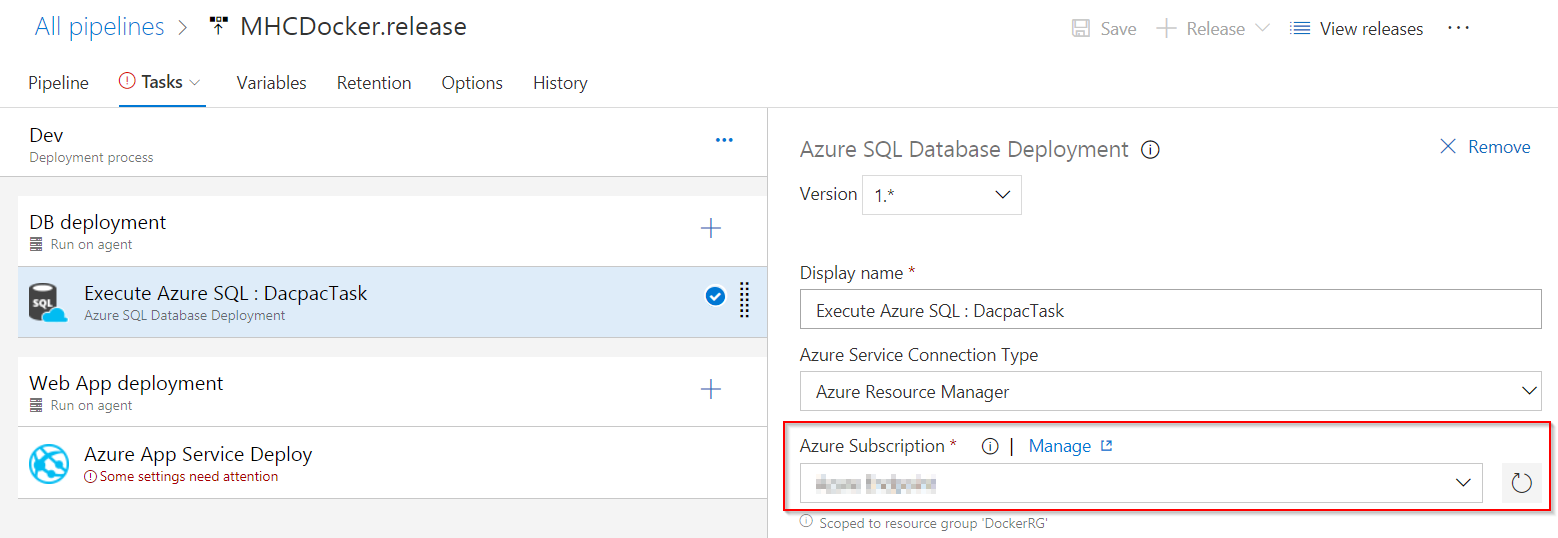
Under the Execute Azure SQL: DacpacTask section, select the Azure Subscription from the dropdown.
Execute Azure SQL: DacpacTask: This task will deploy the dacpac to the mhcdb database so that the schema and data are configured for the backend.
-
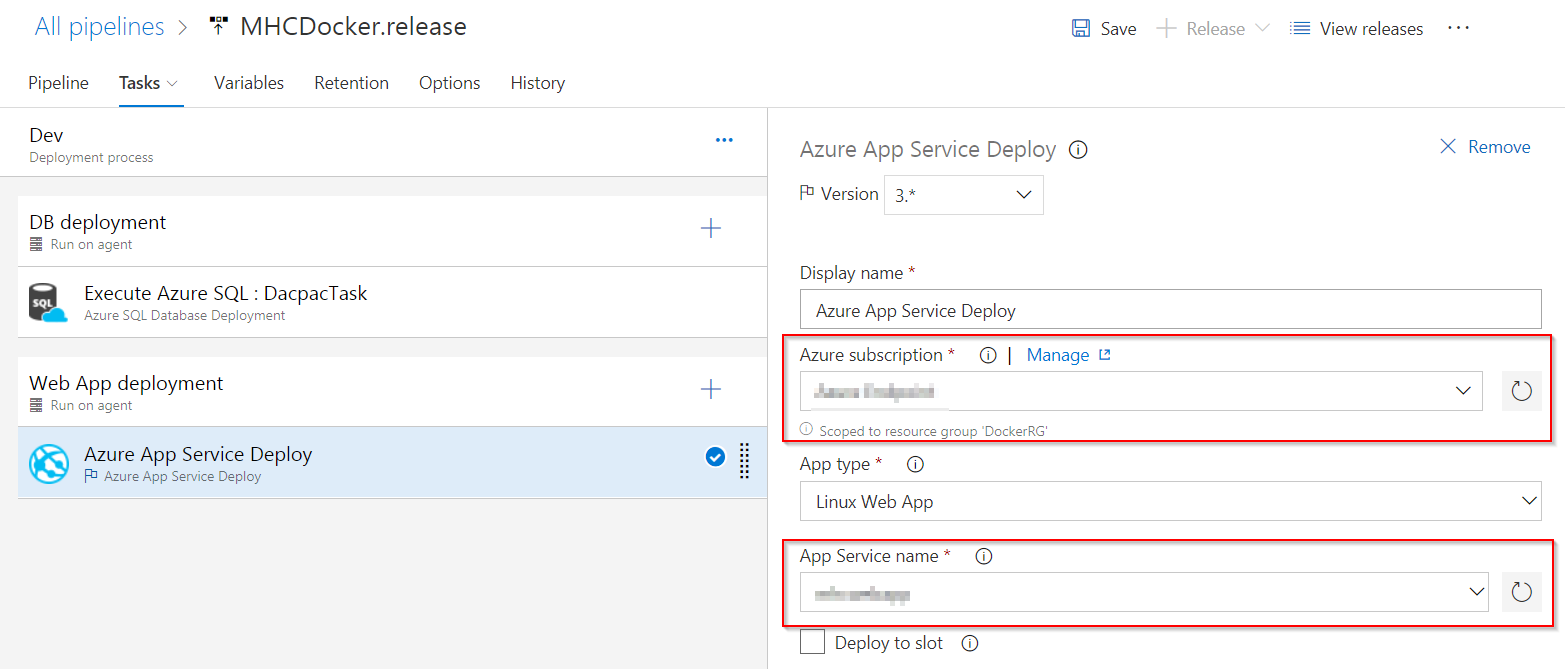
Under Azure App Service Deploy task, update the Azure subscription and Azure App Service name with the endpoint components from the dropdown.
Azure App Service Deploy will pull the appropriate docker image corresponding to the BuildID from repository specified, and then deploys the image to the Linux App Service.
-
Click on the Variables section, update the ACR details and the SQLserver details with the details noted earlier while the configuration of the environment and click on the Save button.
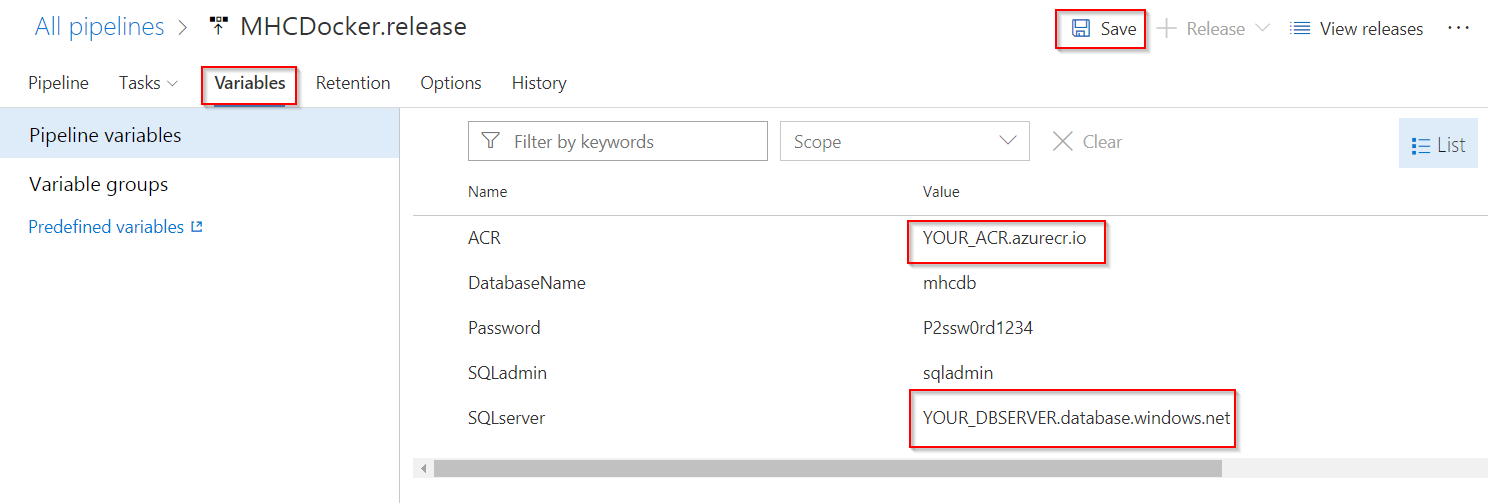
The Database Name is set to mhcdb, the Server Admin Login is set to sqladmin and the Password is set currently to P2ssw0rd1234.
Exercise 2: Initiate the CI Build and Deployment through code commit
In this exercise, the source code will be modified to trigger the CI-CD.
-
Click on Files section under the Repos tab, and navigate to the
Docker/src/MyHealth.Web/Views/Homefolder and open theIndex.cshtmlfile for editing.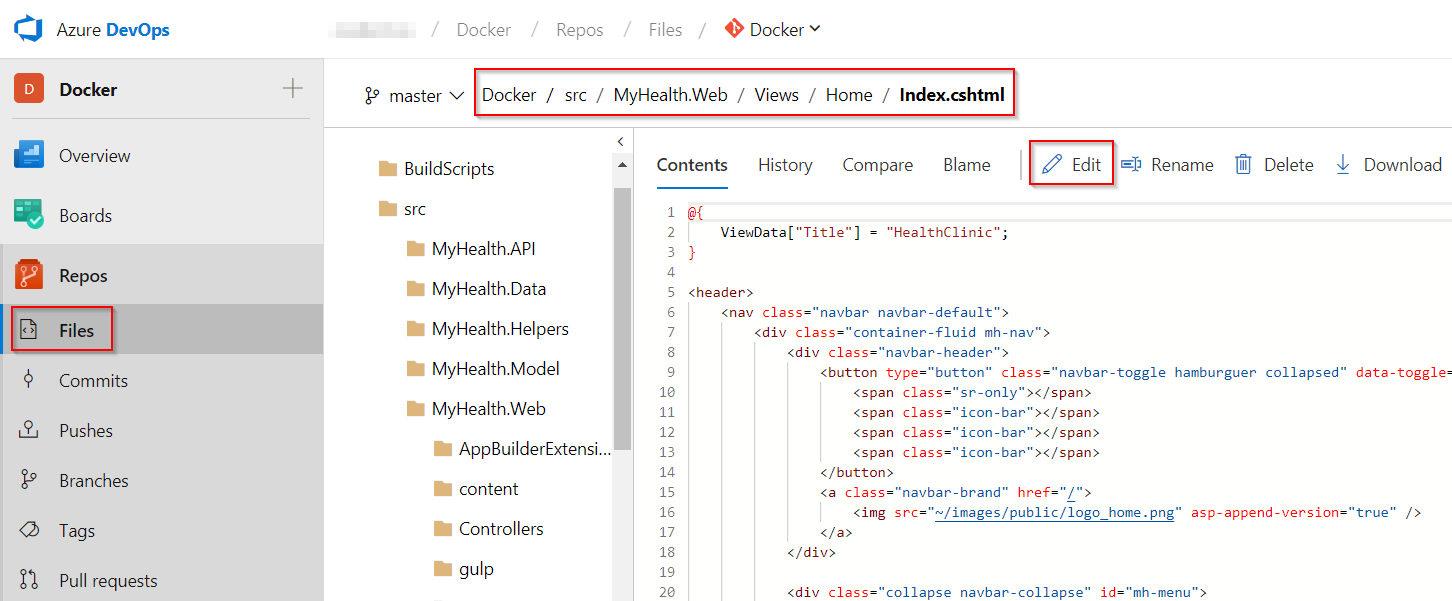
-
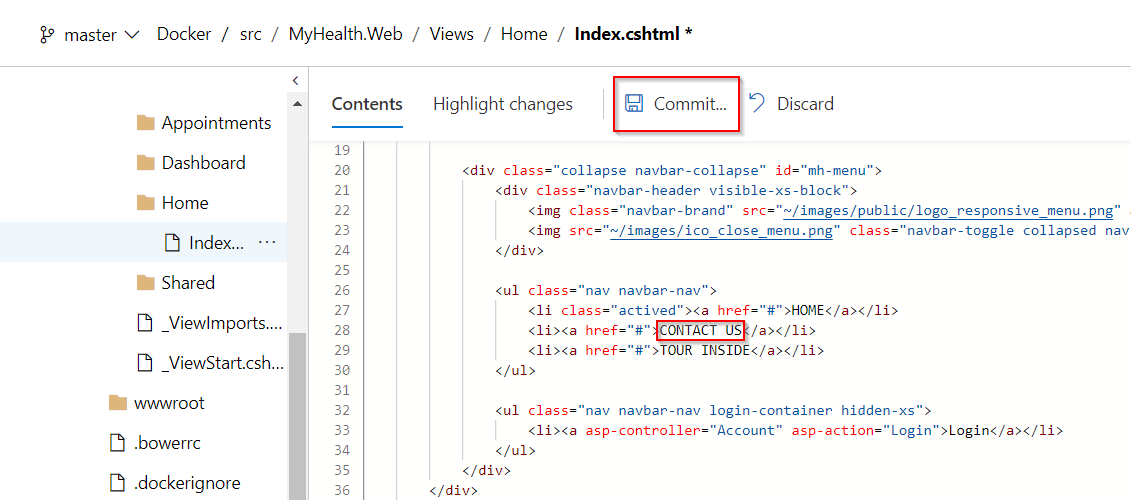
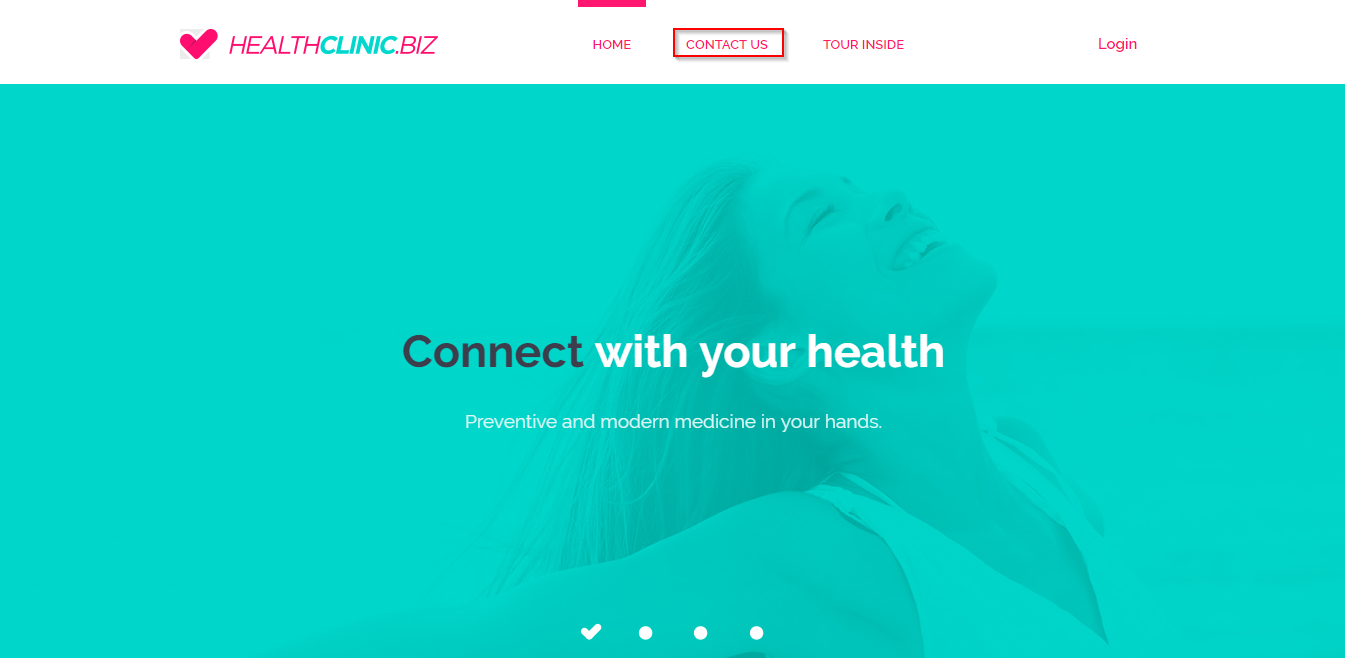
Modify the text JOIN US to CONTACT US on the line number 28 and then click on the Commit button. This action would initiate an automatic build for the source code.
-
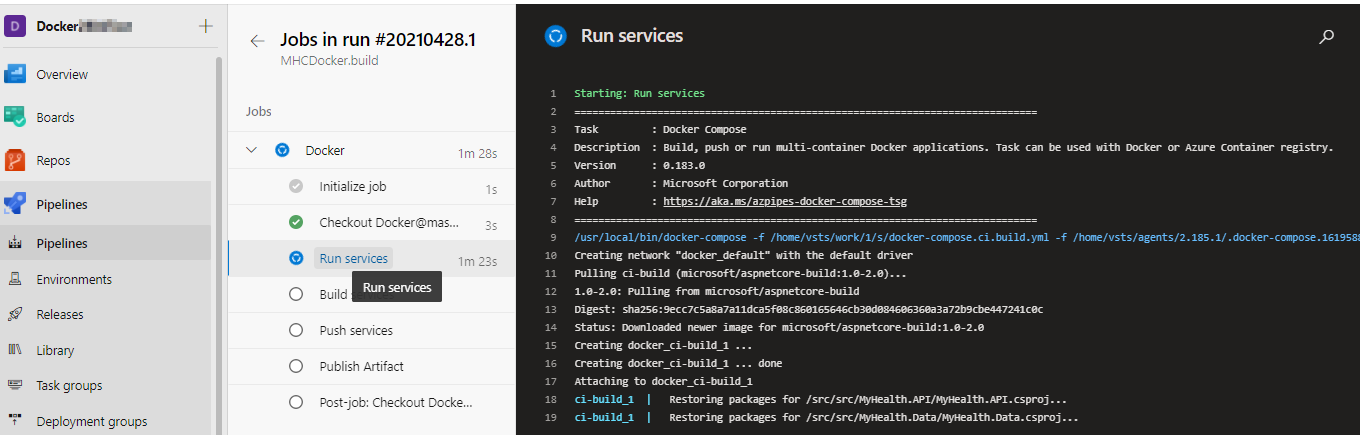
Click on Pipelines tab, you will see
MHCDoker.buildbuild is queued. Double click on Build # or Commit to view the build in progress.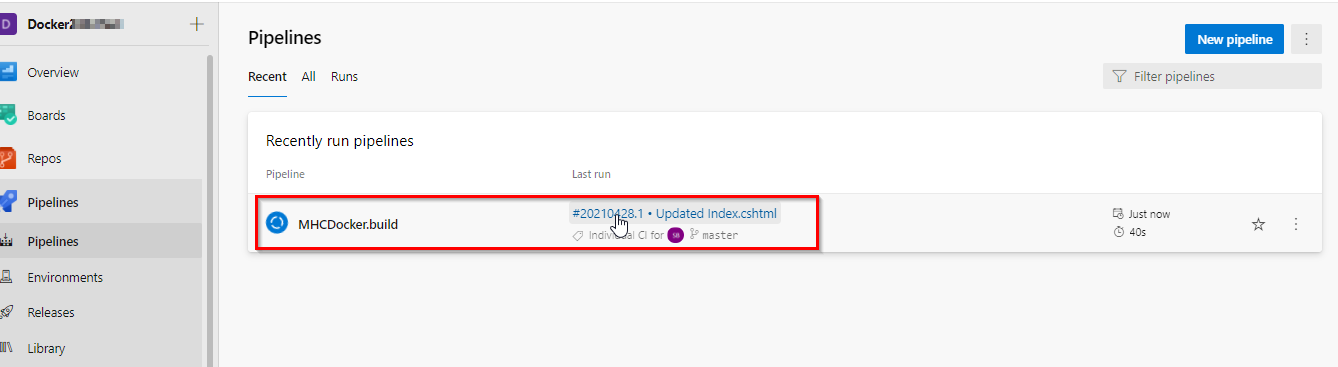
-
The Build will generate and push the docker image of the web application to the Azure Container Registry. Once the build is completed, the build summary will be displayed.

-
Navigate to the Azure Portal and click on the App Service that was created at the beginning of this lab. Select the Container Settings option and provide the information as suggested and then click the Save button.
Field Value to be provided Image Source Select the value Azure Container Registry Registry Select the registry value from the dropdown image Select the value myhealth.web Tag Select the value latest. This is required to map Azure Container Registry with the Web App. 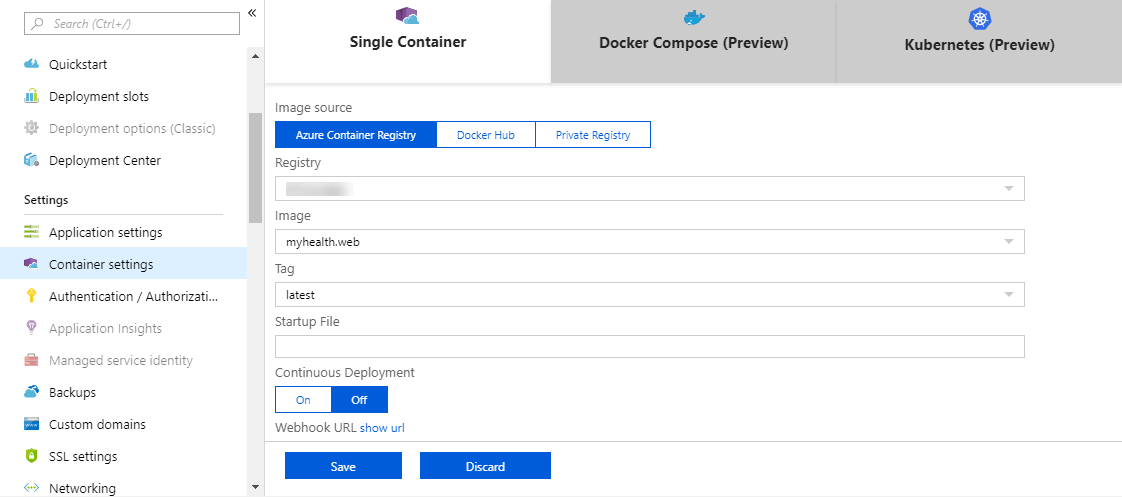 Tip: The Continuous Deployment can be configured to deploy the web app to the designated server whenever a new docker image is pushed to the registry on the Azure portal itself. However, setting up an Azure DevOps CD pipeline will provide better flexibility and additional controls (approvals, release gates, etc.) for the application deployment.
 -
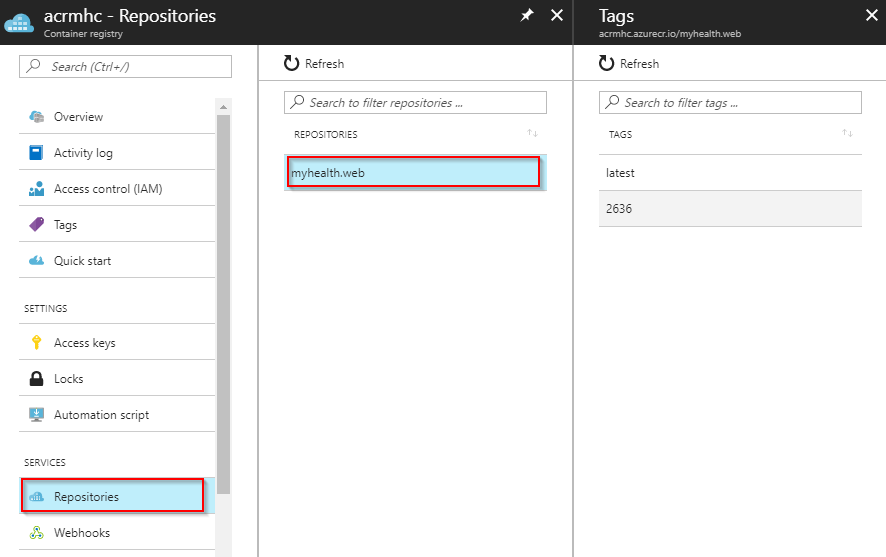
Navigate to the Azure Container registry created and then select the Repositories option to view the generated docker images.
-
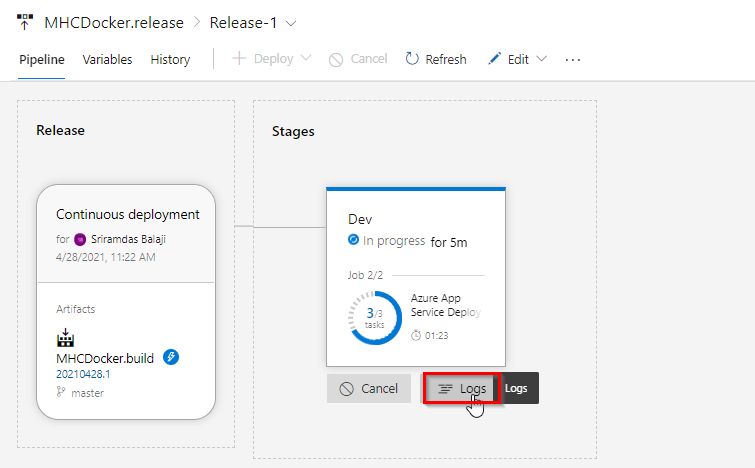
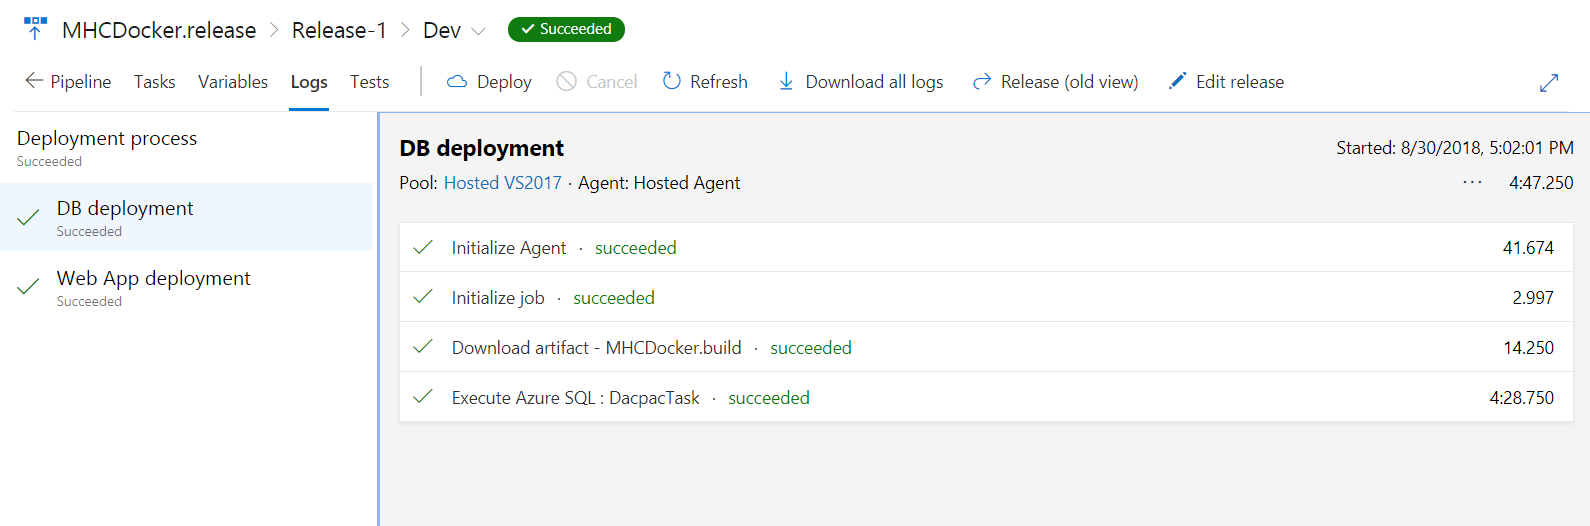
Navigate to the Releases section under Pipelines tab, and double-click on the latest release displayed on the page. Click on Logs to view the details of the release in progress.

-
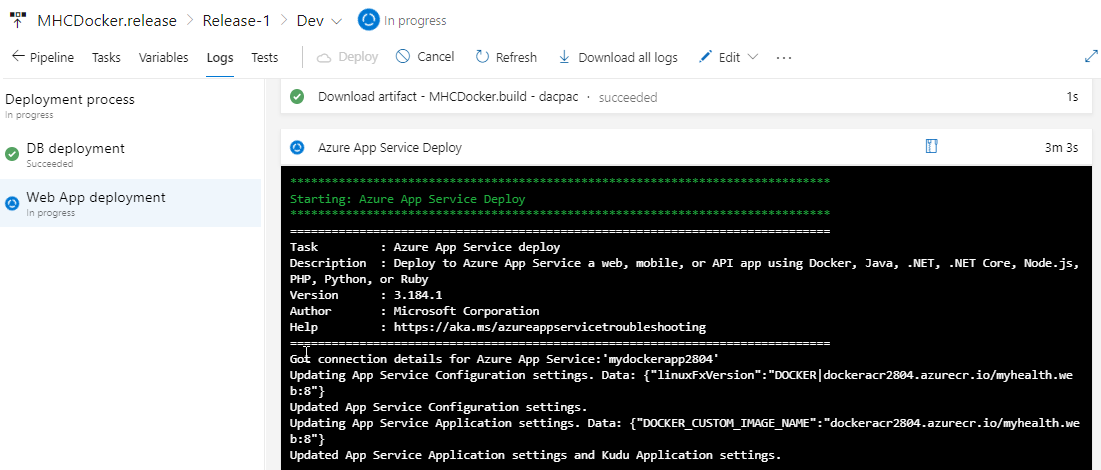
The release will deploy the docker image to the App Service based on the BuildID tagged with the docker image. Once the release is completed, the release Logs will be displayed.
-
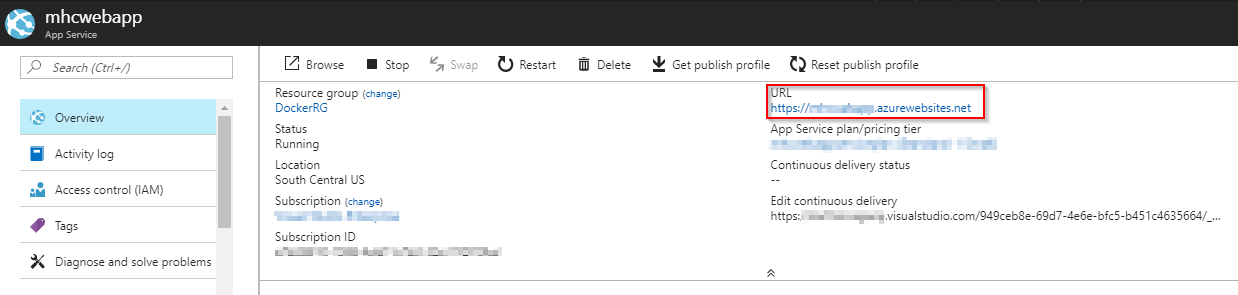
Navigate back to the Azure Portal and click on the Overview section of the App Service. Click on the link displayed under the URL field to browse the application and view the changes.
-
Use the credentials Username:
userand Password:P2ssw0rd@1to login to the HealthClinic web application.
Summary
With Azure DevOps and Azure, we have configured a dockerized application by leveraging docker capabilities enabled on Azure DevOps Ubuntu Hosted Agent.