Overview
GitHub is a web based Git version control repository hosting service which offers distributed version control and source code management functionality of Git.
Visual Studio Team Services provides a first-class support for Git with several advantages including
- Unlimited free private repositories
- Powerful code reviews
- Advanced branch policies
- Integrated CI/CD pipeline
- Semantic code search
The primary difference between the two is that VSTS is focused on closed source projects and GitHub is focused more on open source projects. GitHub offers both private and public repositories. However, it doesn’t have an integrated build server.
Teams can overcome this shortfall by using Visual Studio Team Services (VSTS) as a continuous integration platform for GitHub.
What’s covered in this lab
In this hands-on lab, we will introduce you to open source DevOps using GitHub, Visual Studio Team Services and Azure. You will learn how to deploy an ASP.Net application to Azure App Service using CI/CD pipeline in Visual Studio Team Services with code repository in GitHub.We will cover the following steps:
- Forking project repository to your GitHub account
- Linking GitHub account to VSTS
- Editing the existing build definition to include source code from GitHub
- Configuring build Triggers
- Executing Build
Prerequisites for the lab
-
Microsoft Azure Account: You will need a valid and active Azure account for the Azure labs. If you do not have one, you can sign up for a free trial
-
If you are an active Visual Studio Subscriber, you are entitled for a $50-$150 credit per month. You can refer to this link to find out more information about this including how to activate and start using your monthly Azure credit.
-
If you are not a Visual Studio Subscriber, you can sign up for the FREE Visual Studio Dev Essentials program to create a Azure free account (includes 1 year of free services, $200 for 1st month).
-
-
You will need a Visual Studio Team Services Account. If you do not have one, you can sign up for free here
-
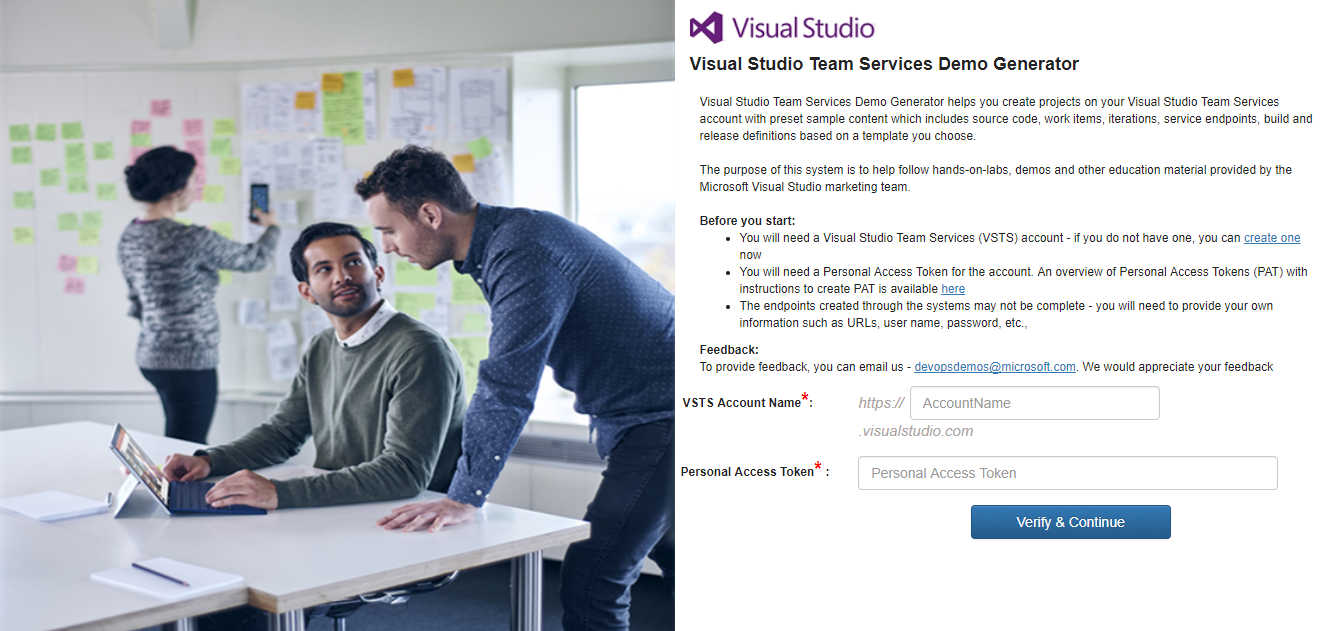
You will need a Personal Access Token to set up your project using the VSTS Demo Generator. Please see this article for instructions to create your token.
Note: You should treat Personal Access Tokens like passwords. It is recommended that you save them somewhere safe so that you can re-use them for future requests. -
A GitHub account. Create a new account from here.
Setting up the code repository on GitHub
There are multiple ways to add code to a GitHub repository. We can start with a new empty repository and manually add files, commit and push. But for the purpose of this lab, we will Fork an existing repository. A Fork is nothing but a copy of a repository. When we Fork, we are creating a personal copy of the repository - any changes that we make will not affect the original code. If we want to contribute back to the original, you can submit a Pull Request
-
Let us go to GitHub and make sure we are logged in with our GitHub user account.
-
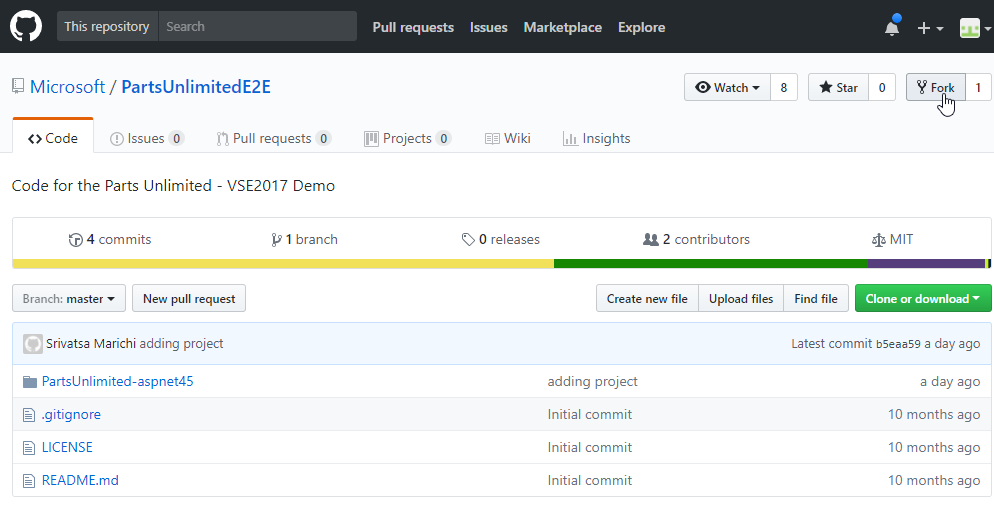
Let us navigate to the PartsUnlimitedE2E repository and select Fork to our GitHub account.
Setting up the VSTS team project
-
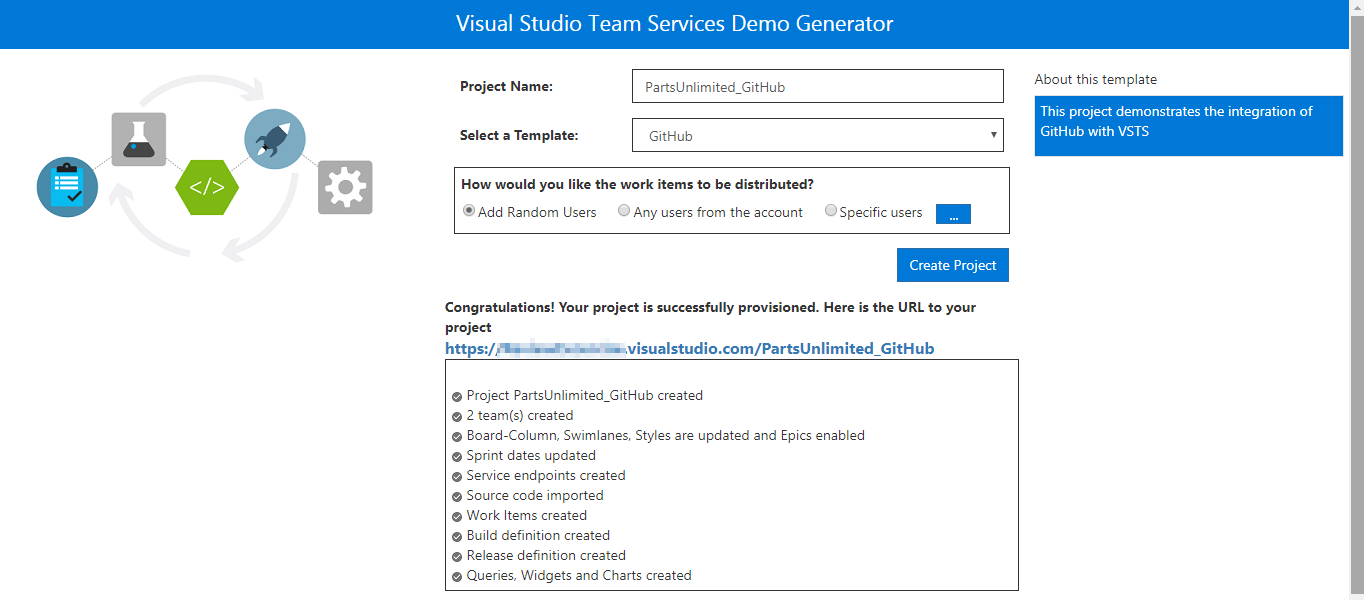
Use the VSTS Demo Generator to provision the team project on the VSTS account.
VSTS Demo Generator helps you create team projects on your VSTS account with sample content that include source code, work items,iterations, service endpoints, build and release definitions based on the template you choose during the configuration.
-
Once the team project is provisioned, click on the URL to navigate to the team project.
Exercise 1: Connecting VSTS to GitHub repository
-
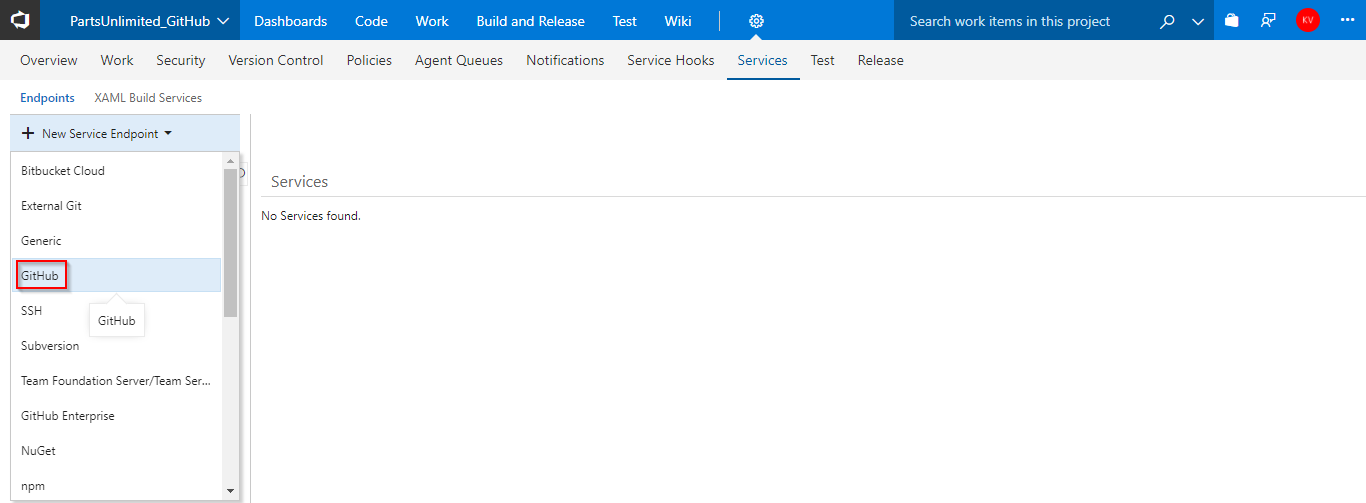
In VSTS, navigate to Services by clicking the gear icon
 .
.
-
Create a new GitHub connection by clicking on + New Service Endpoint and click GitHub.
 Important: We will need to specify what authorization method you want to provide. If we choose Grant Authorization, the default option, as the authorization method, the dialog shows an Authorize button that opens the GitHub login page. If we select Personal access token, we must obtain a suitable token and paste it into the Token textbox. The dialog shows the recommended scopes for the token: repo, user, admin:repo_hook. See this page on GitHub for information about obtaining an access token.
 -
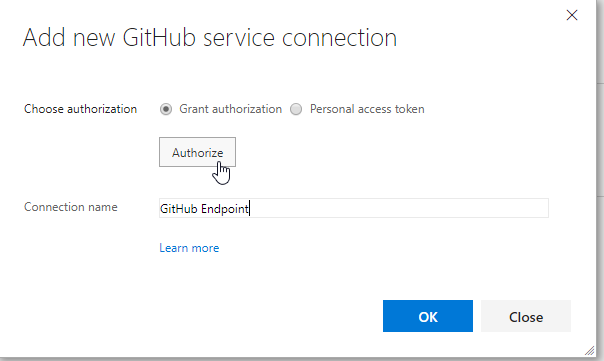
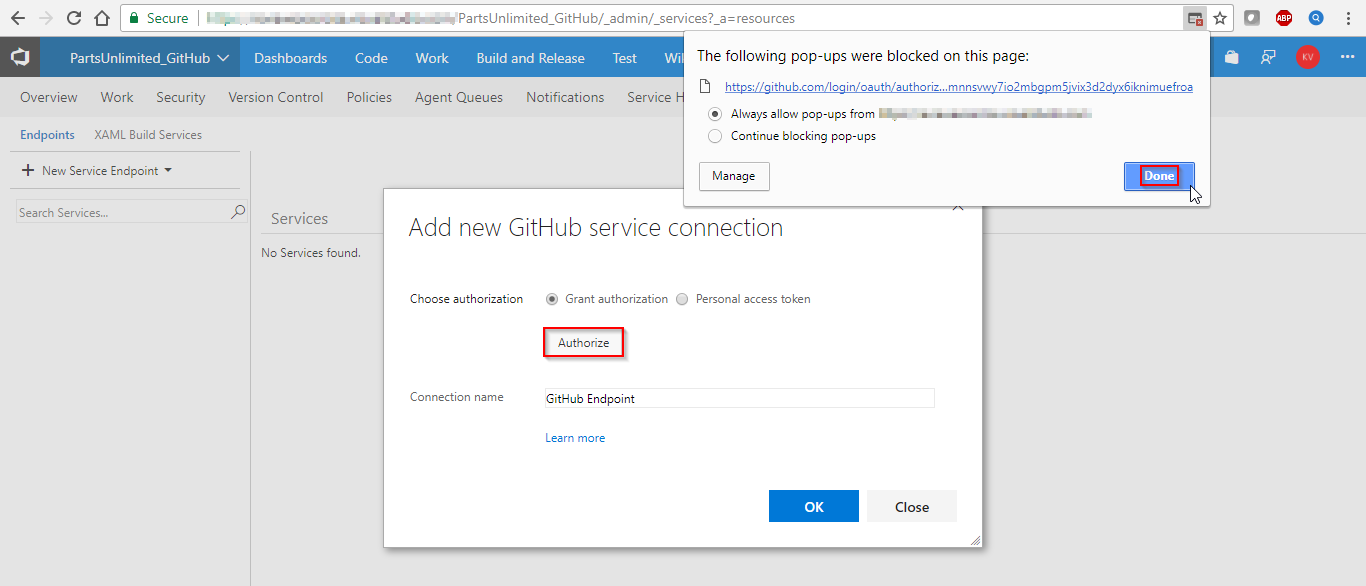
Select Grant Authorization. Click on the Authorize button which opens the GitHub login page.
We will follow the steps required by GitHub to authorize access to our account.

Note: The authorization is in a new pop-up window, we may have to unblock the pop-up window in your browser.
-
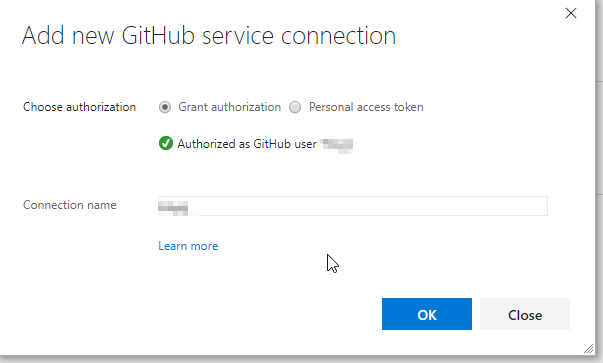
When access is granted, you will see a message that confirms the connection and you can name the connection accordingly and Click OK.
-
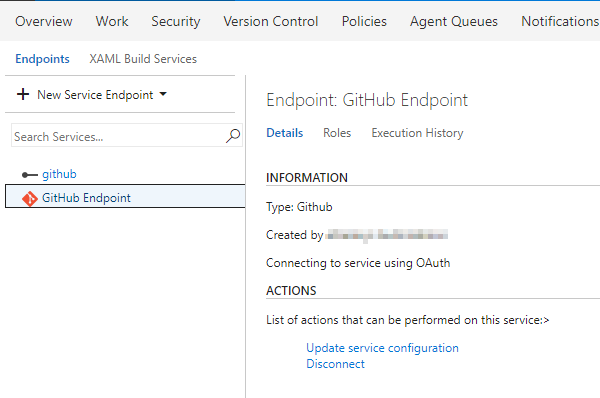
You will now see the service endpoint along with GitHub icon that you created under the Endpoints sub-tab.
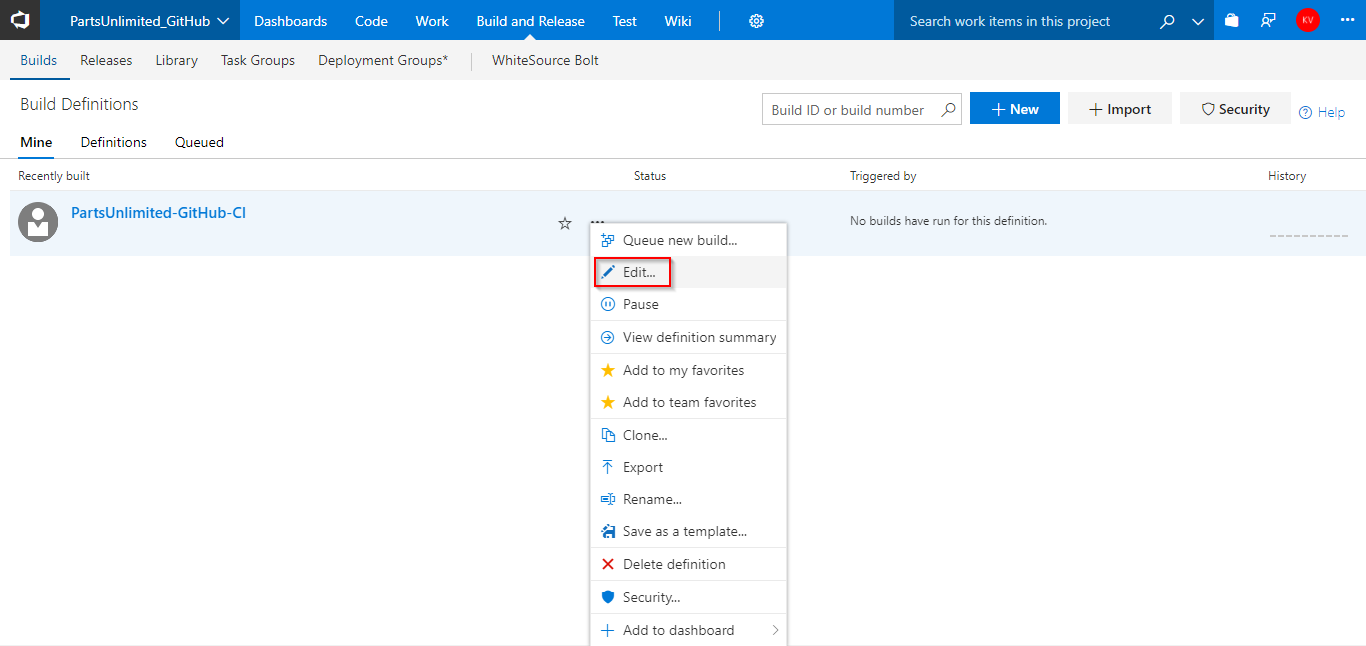
Exercise 2: Configure Build
-
Go to Builds under Build & Release. Click the ellipsis next to the build definition GitHub and choose Edit.
-
Click on Get Sources under the Tasks tab. Select GitHub as the source, confirm that the service endpoint connection created in #2 of the previous exercise shows up as a drop down value, select it. Select the appropriate Repository and choose the master Branch from which the source will be fetched. Save the build definition.

Exercise 3: Configure Release
Since the connections are not established during project provisioning, we will manually create the endpoints.
In VSTS, navigate to Services by clicking the gear icon . Select Azure Resource Manager as the service endpoint. Specify Connection name, select your Subscription from the dropdown and click OK. We use this endpoint to connect VSTS with Azure.
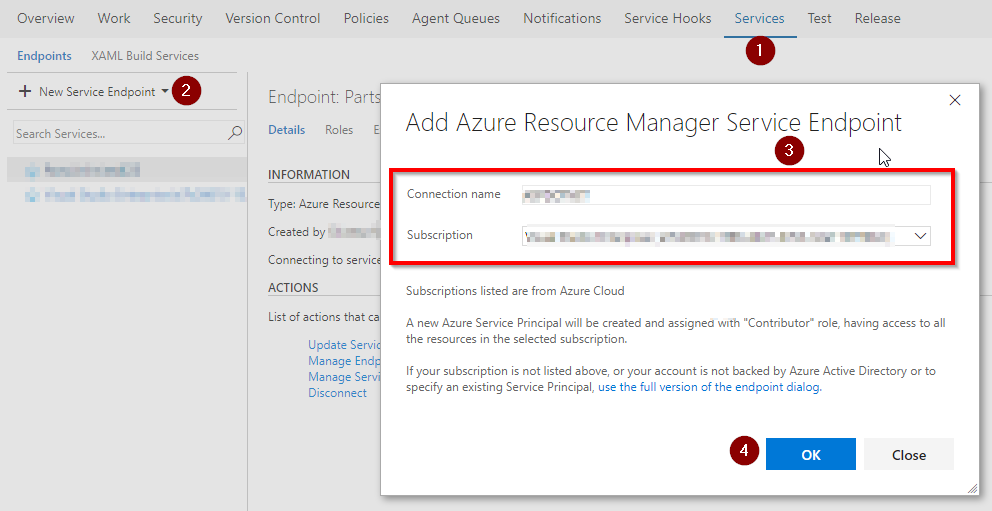
You will be prompted to authorize this connection with Azure credentials. Disable pop-up blocker in your browser if you see a blank screen after clicking OK, and retry the step.
-
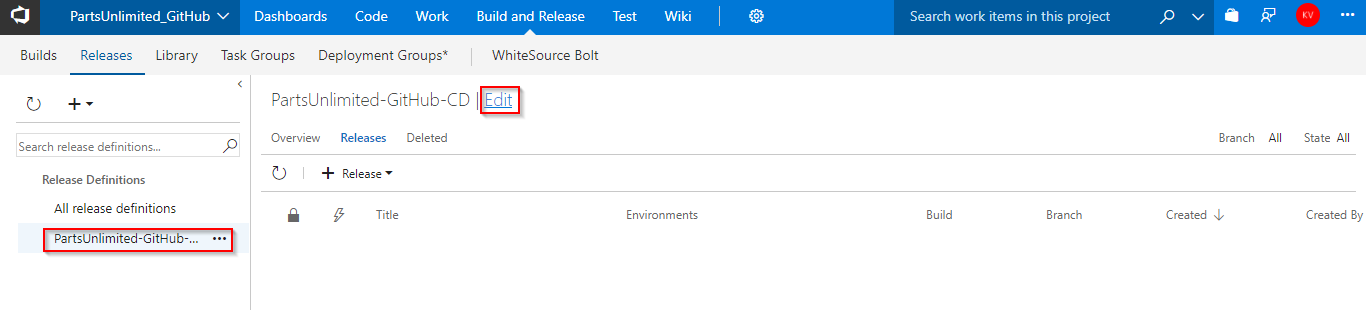
Go to Releases under Build & Release tab, edit the release definition GitHub.
-
Select Tasks and click Dev.
-
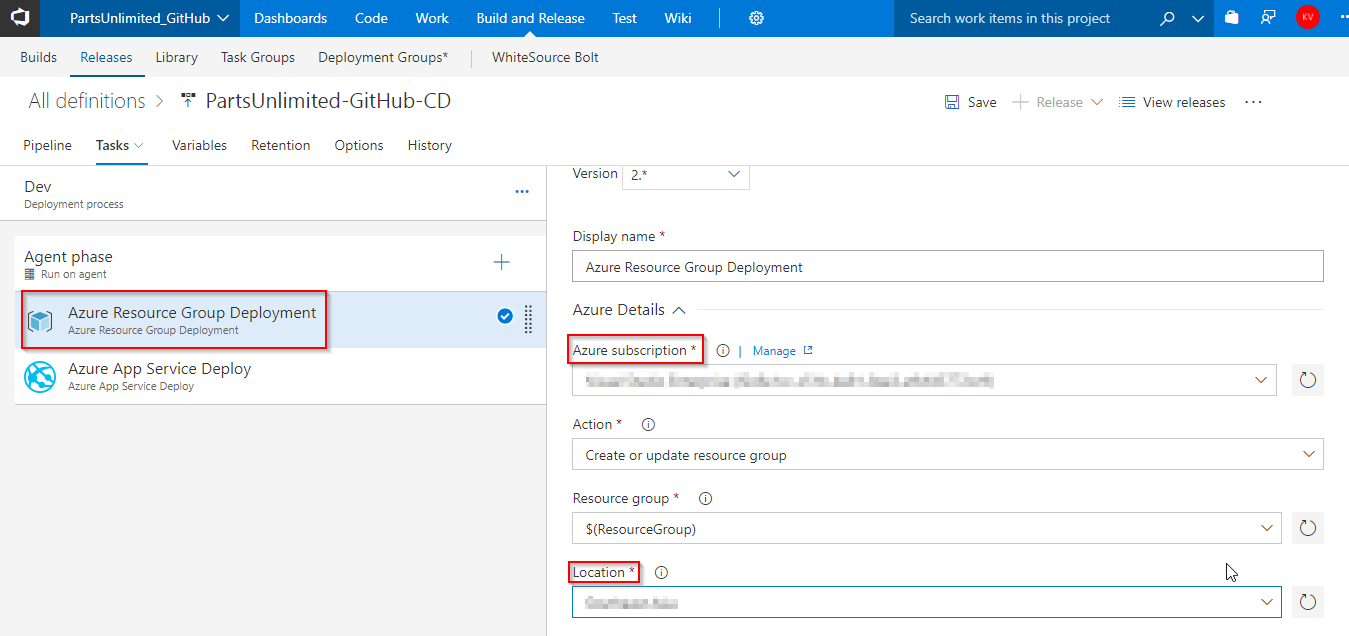
Under Azure Resource Group Deployment task, update Azure subscription with the endpoint component from the dropdown and select the desired location.
-
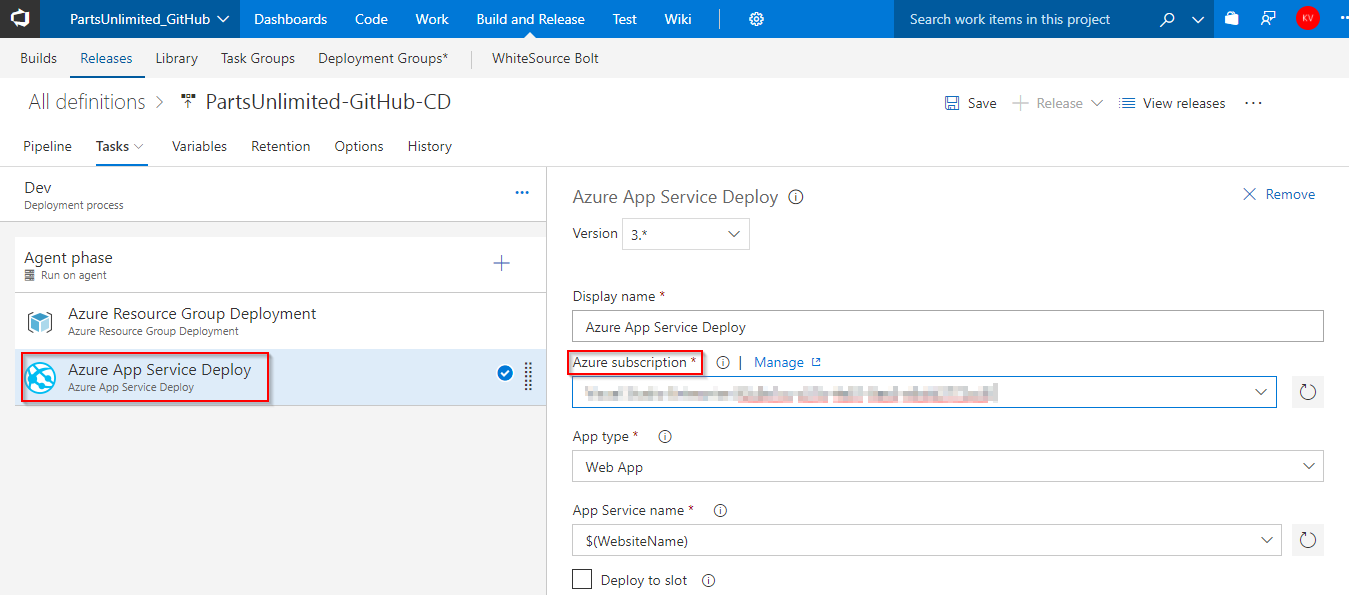
Under Azure App Service Deploy task, update Azure subscription with the endpoint component from the dropdown. Save the release definition.
Exercise 4: Triggering CI and CD
Navigate to your forked GitHub repository. Let’s make a simple change in the code to trigger the CI build.
-
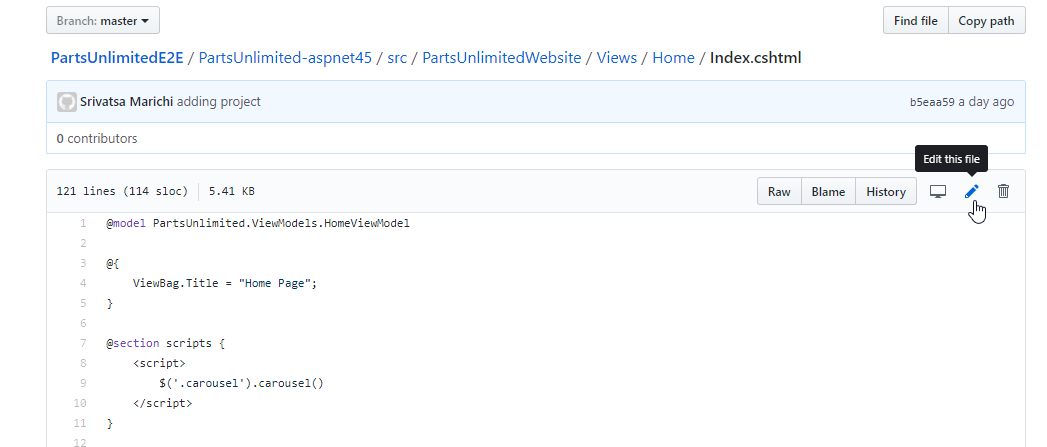
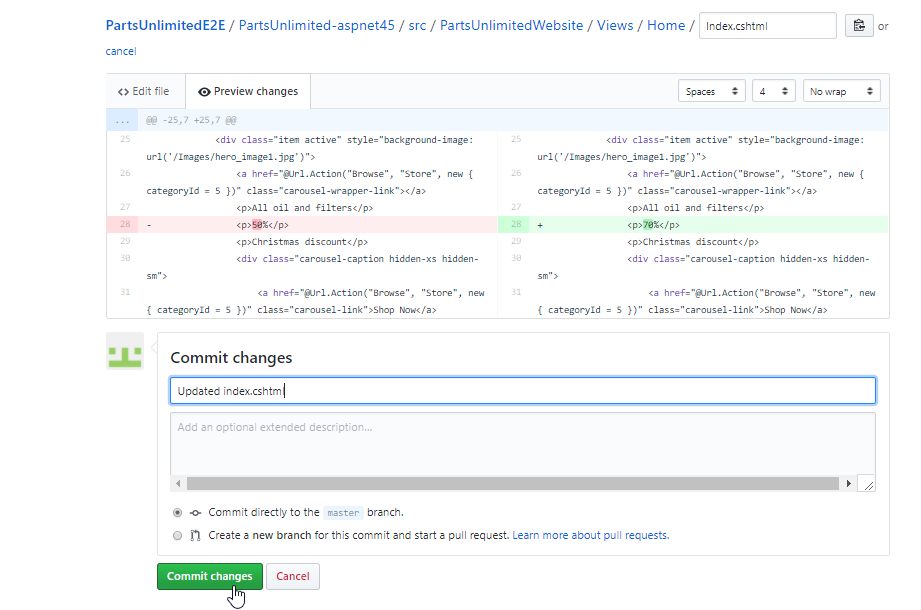
From your forked GitHub repository, open the file Index.cshtml under master branch by navigating to the below path-
PartsUnlimitedE2E/PartsUnlimited-aspnet45/src/PartsUnlimitedWebsite/Views/Home/Index.cshtml
-
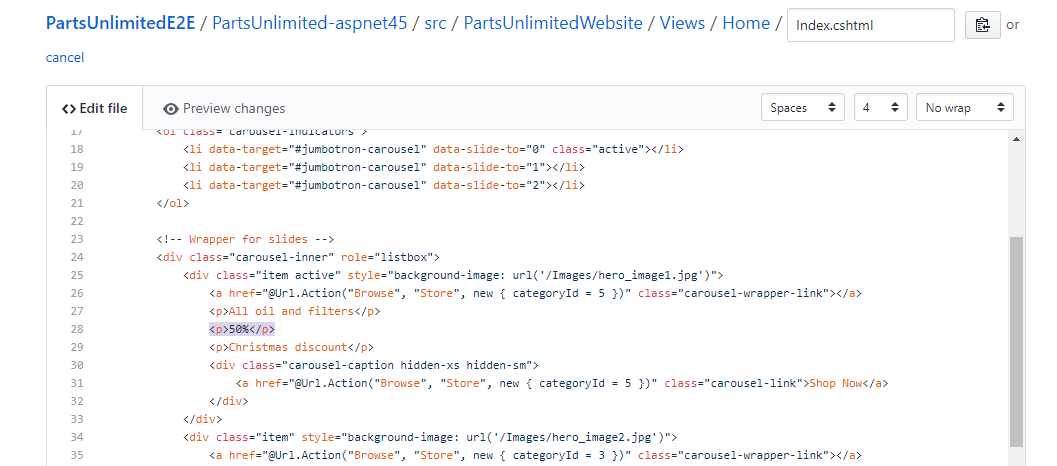
Edit the code. For this example, let’s change line 28 to increase discount from 50% to 70%.
-
Navigate to Preview changes, enter a commit message and click on Commit Changes.
-
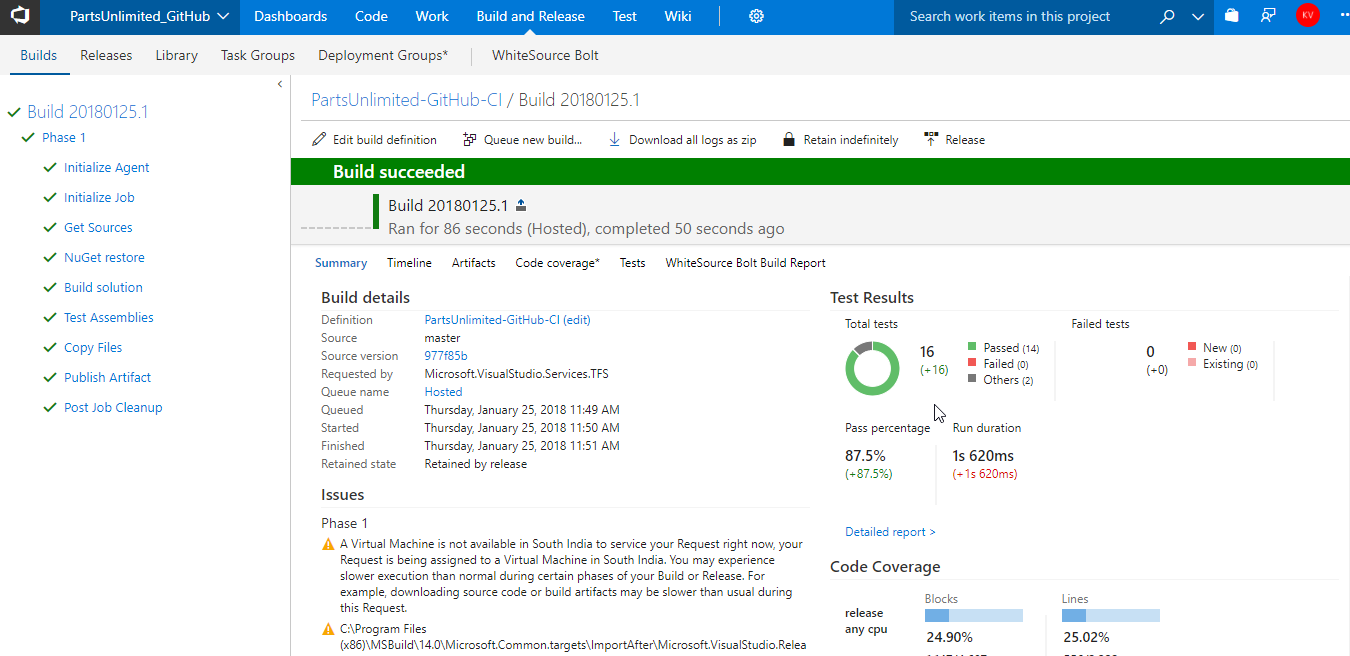
The code commit will trigger a CI build. Go to the Build tab in your VSTS project to see the CI build in progress.
-
Once the build is complete, you will see the summary which shows Test Results and Code Coverage.
The release uses Infrastructure as a Code to automate the provisioning of Azure App service and SQL Azure service. The release is configured to trigger upon successful completion of the CI build.
-
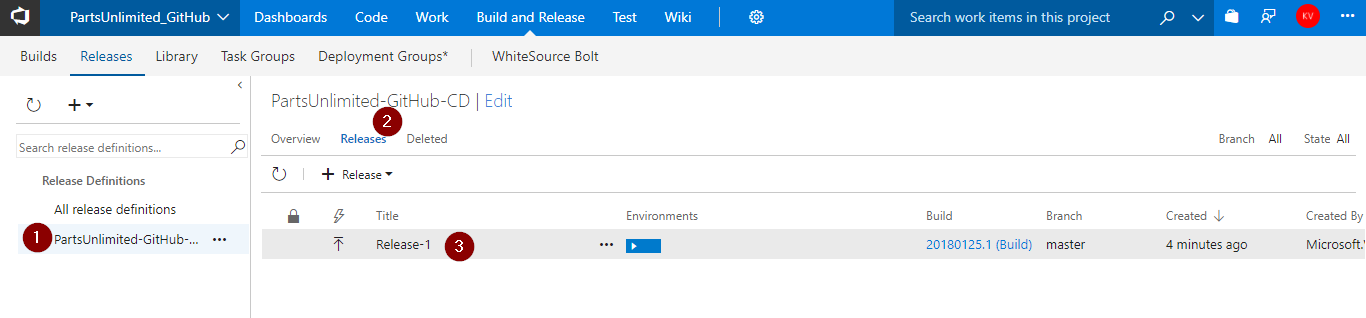
Go to Releases tab under Build and Release hub. Select the GitHub definition, you will see a release in-progress.
-
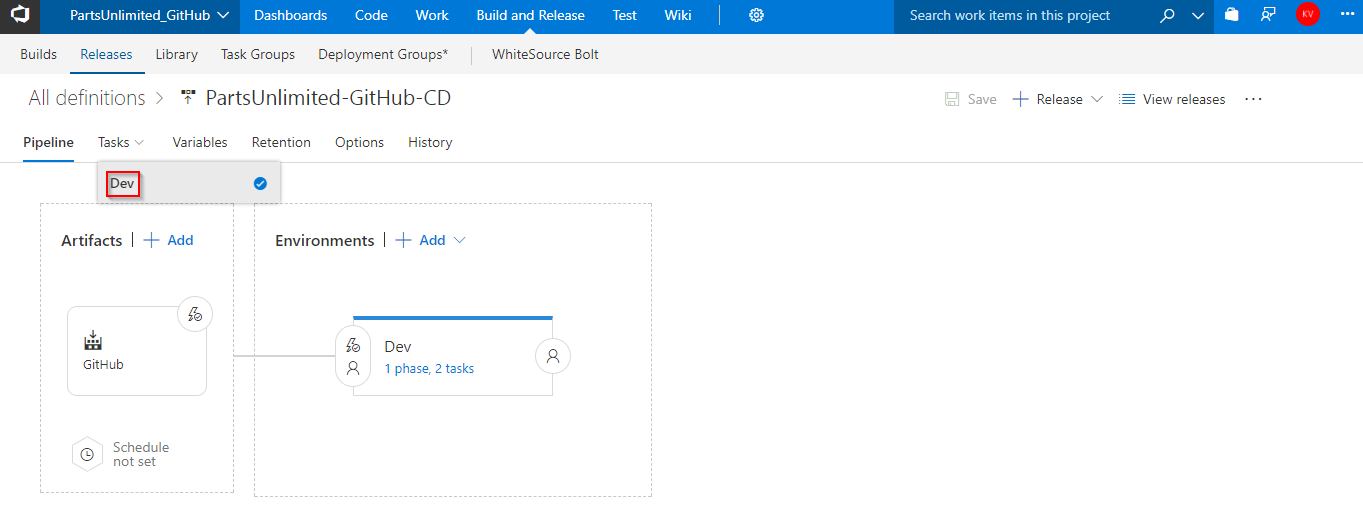
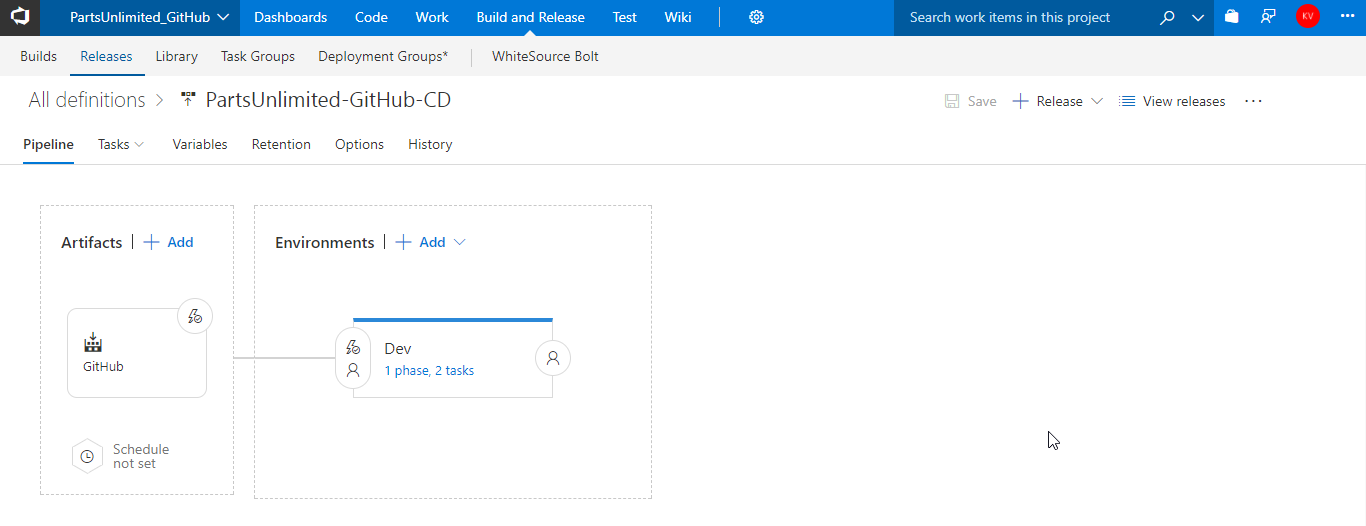
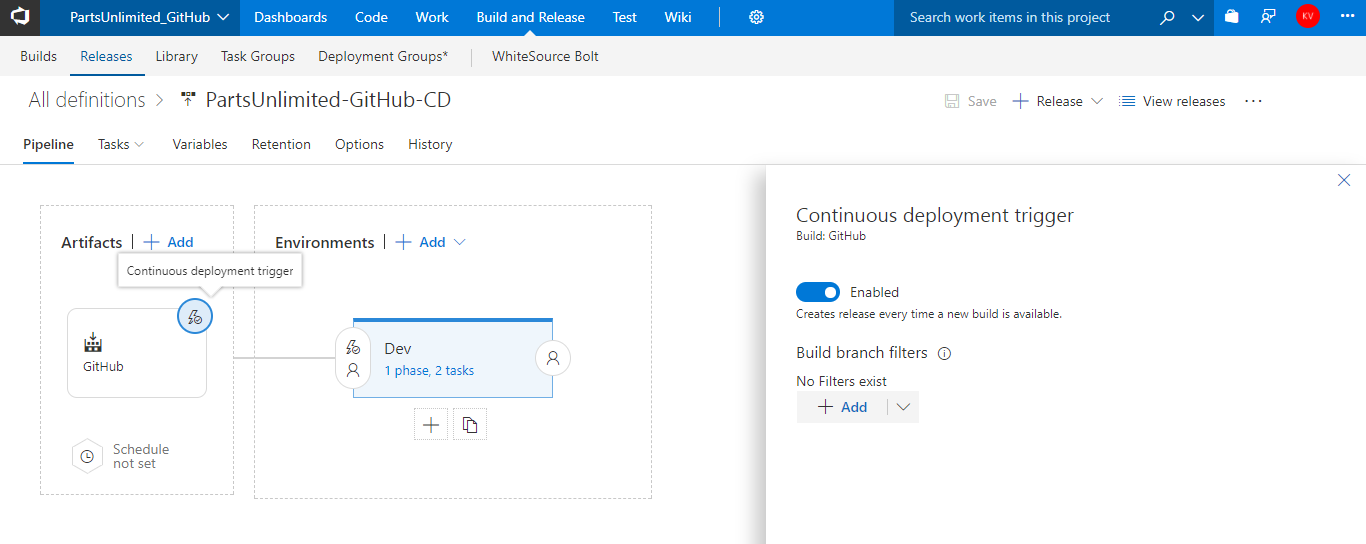
Let us explore the release definition. Click edit to see the release pipeline where the target environment is Dev.
-
This release definition uses the artifact (Webapp package and ARM template) of CI Build to deploy to Azure. Continuous Deployment condition has been enabled for this artifact.
-
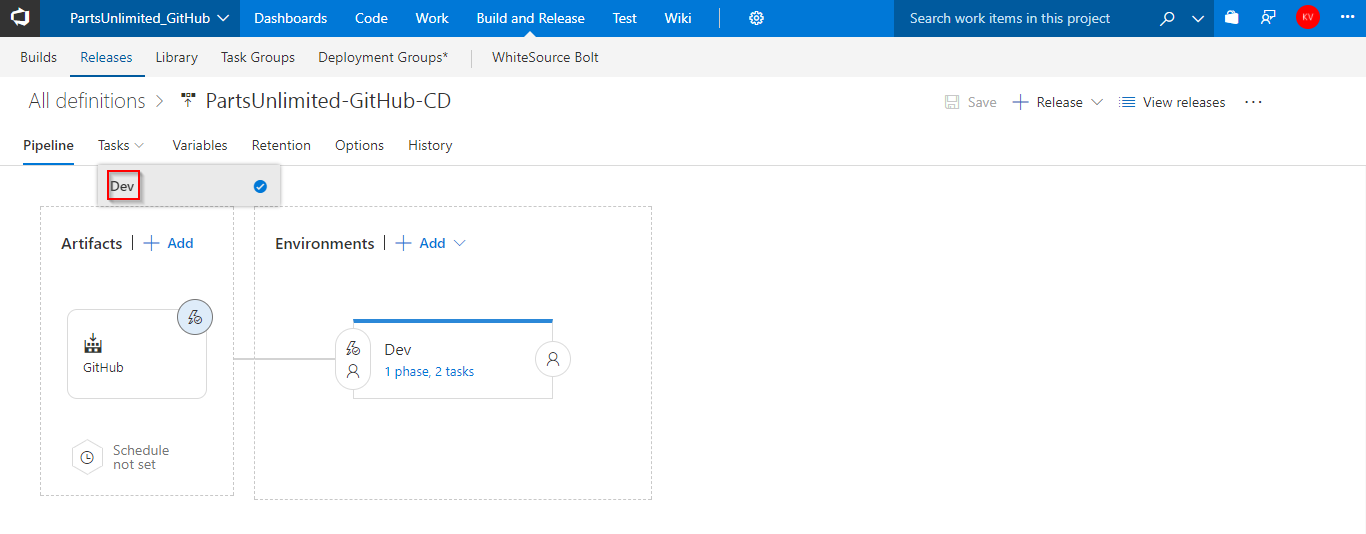
Navigate to the Dev environment and you will see 2 tasks are used. Let us explore the tasks.
-
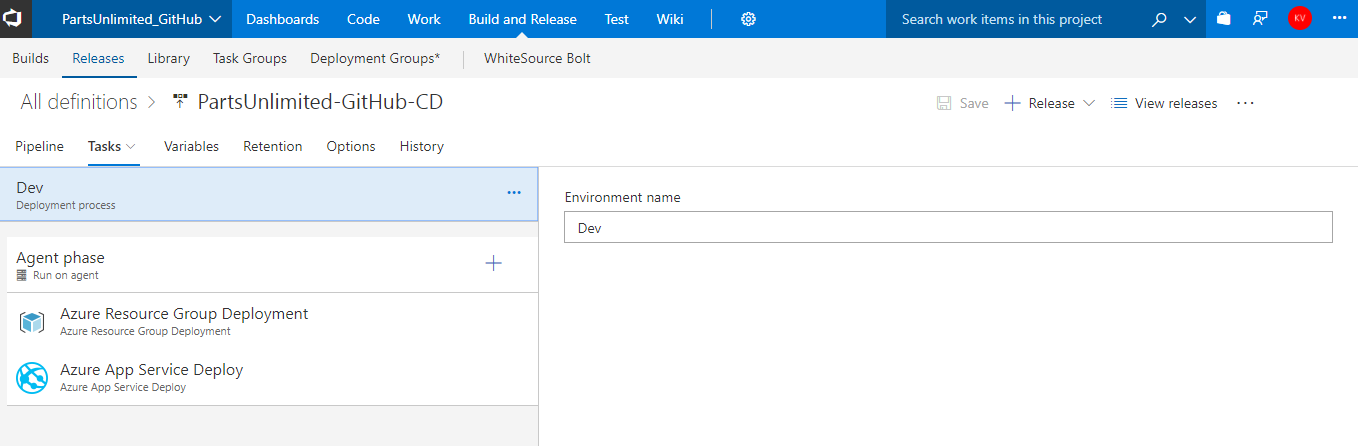
Azure Resource Group Deployment: The project used in this lab has the Azure App service as its front-end and Azure SQL DB service as its back-end. We will provision these services as PAAS on Azure using ARM templates. This task will create the above services in a resource group.
-
Azure App Service Deploy: The task is used to deploy a Web project to the Azure App Service created above.
-
-
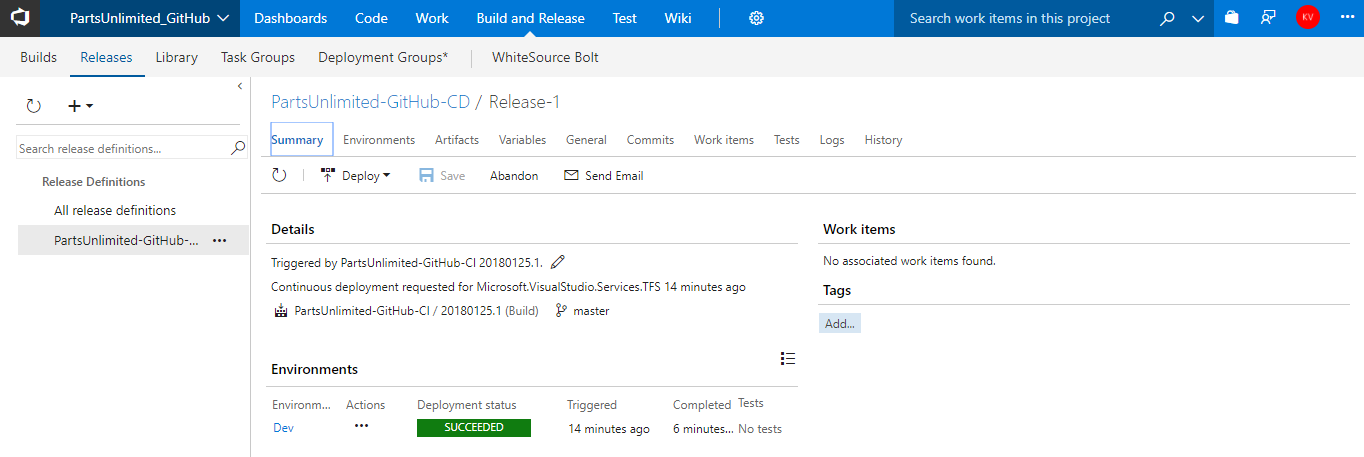
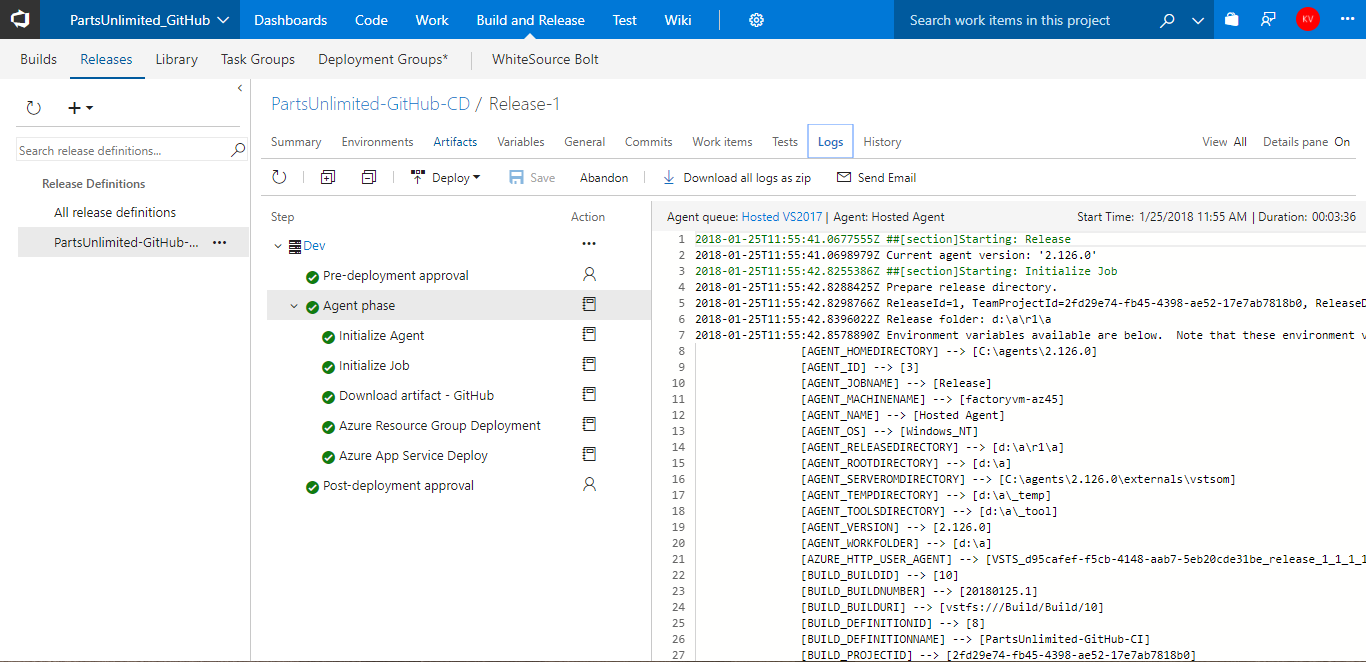
Once the release is complete, you will see the task-wise summary.
-
Login to Azure Portal and search for Github resource group. Click the web app in the resource group and you will see the application deployed successfully with the changes.

Summary
Whether your code lives in Visual Studio Team Services or GitHub (or both), manage build, test, and deploy in one place. Create and manage a Continuous Integration process that connects to GitHub, gets the source files, compiles and deploys the binaries to any environment with Continuous Deployment feature.