Overview
In this lab, you will learn how you can use Azure Pipelines to deploy a Java web application to Apache Tomcat with a MySQL database on Azure. Apache Tomcat is an open-source Java Servlet Container developed by the Apache Software Foundation (ASF). MySQL is a very popular open-source relational database management system.
For this lab, you will use Azure App Service and Azure Database for MySQL, a relational database service based on the open source MySQL Server engine. It is a fully managed database as a service, capable of handing mission-critical workload with predictable performance and dynamic scalability.
What’s covered in this lab
This lab will show how you will
- Create a new Azure App Service with a MySQL database server and configure the web app to use Apache Tomcat
- Use Azure App Service Task to deploy a WAR file
Before you begin
-
Refer the Getting Started page before you follow the exercises.
-
Use MyShuttle as a template to provision the new Azure DevOps project using the Azure DevOps Demo Generator.
Exercise 1: Creating Azure Web App and MySQL database
-
Launch the Azure Cloud Shell from the portal. To deploy to a resource group, enter the following command
az group create --name MyResourceGroup --location westus -
To create an App service plan
az appservice plan create --resource-group MyResourceGroup --name MyPlan --sku S1 -
Create the web app with a unique app name
az webapp create --resource-group MyResourceGroup --plan MyPlan --name MyUniqueAppName -
Finally, create the MySQL server with a unique server name.
az mysql server create --resource-group MyResourceGroup --name mysqldbserver --admin-user mysqldbuser --admin-password P2ssw0rd@123 --sku-name GP_Gen5_2Important: Enter a unique SQL server name. Since the Azure SQL Server name does not support UPPER / Camel casing naming conventions, use lowercase for the DB Server Name field value. -
Navigate to the resource group that you have created. You should see a Azure Database for MySQL server provisioned. Select the database server.
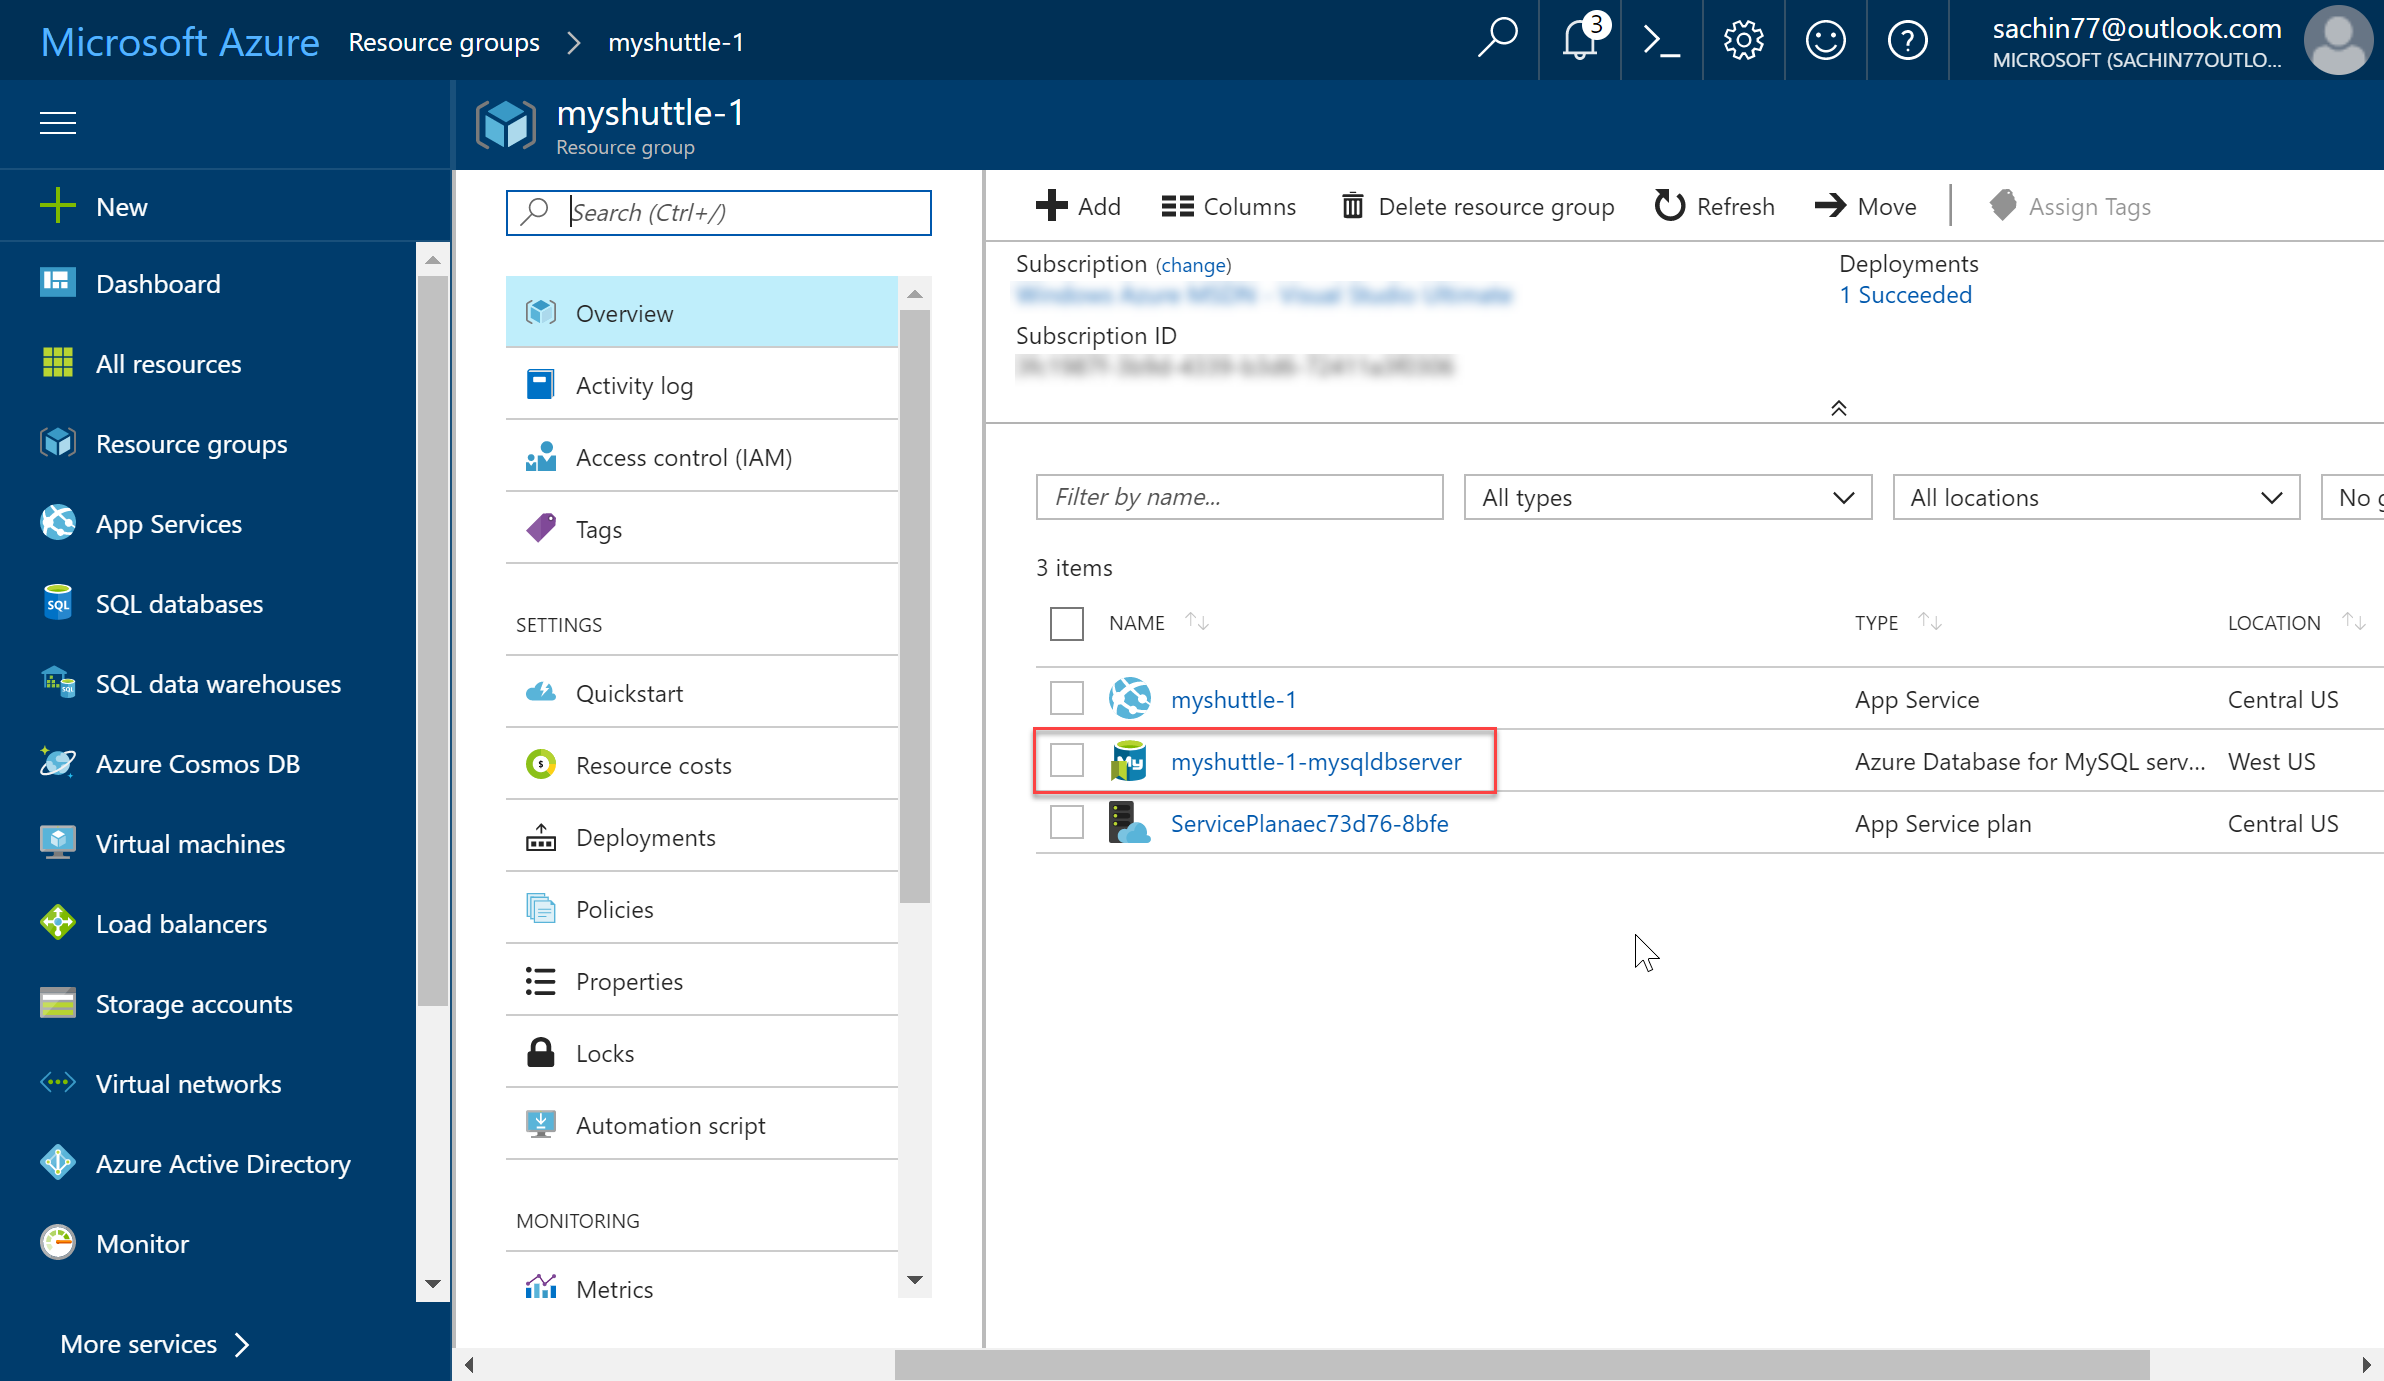
-
Select Properties. Save the Server name and Server admin login name to a notepad.
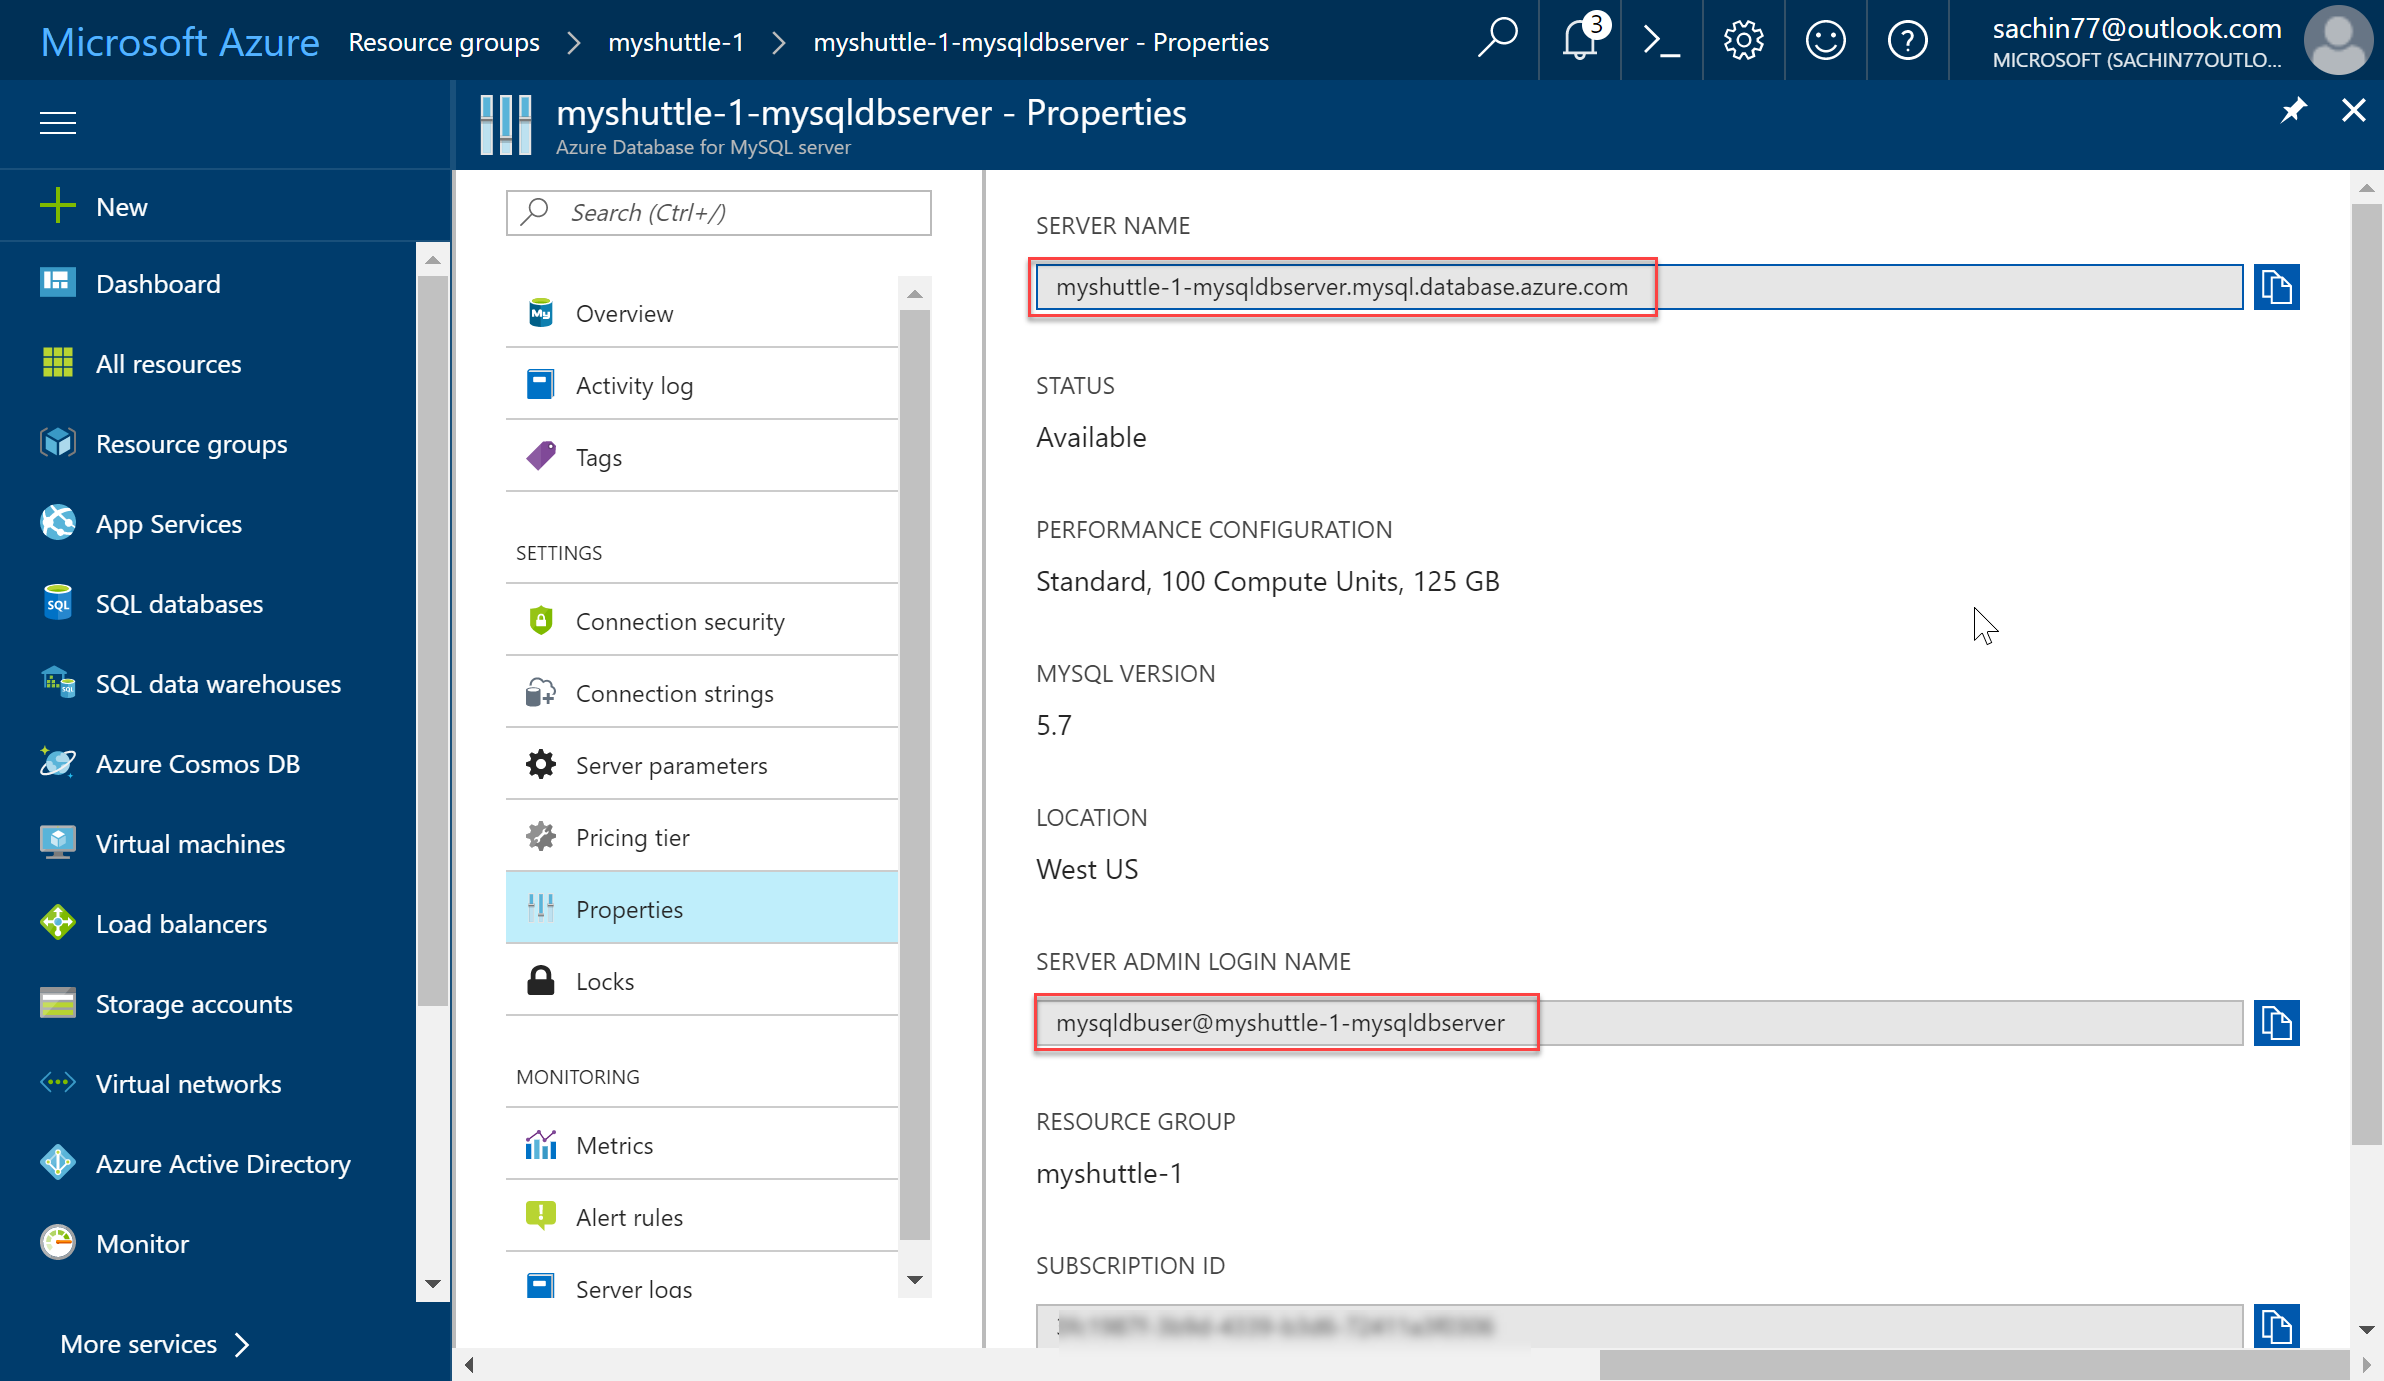
In this example, the server name is myshuttle-1-mysqldbserver.mysql.database.azure.com and the admin user name is mysqldbuser@myshuttle-1-mysqldbserver.
-
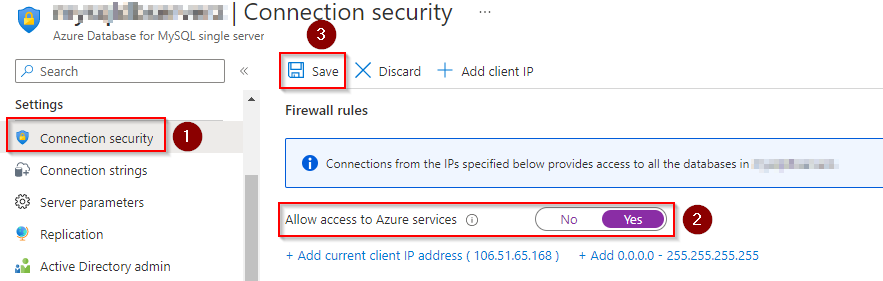
Select Connection security. Enable Allow access to Azure services toggle and Save the changes. This provides access to Azure services for all the databases in your MySQL server.
Exercise 2: Updating the App Settings for the Web App
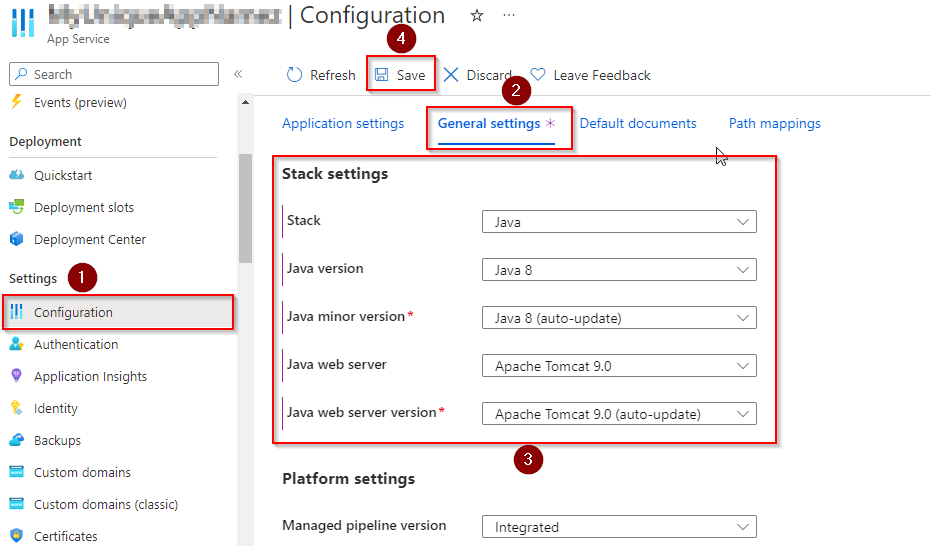
Next, navigate to the Web app that you have created. As you are deploying a Java application, you need to change the web app’s web container to Apache Tomcat.
-
Select Configuration. Set the Stack settings as shown in below image and click Save.
-
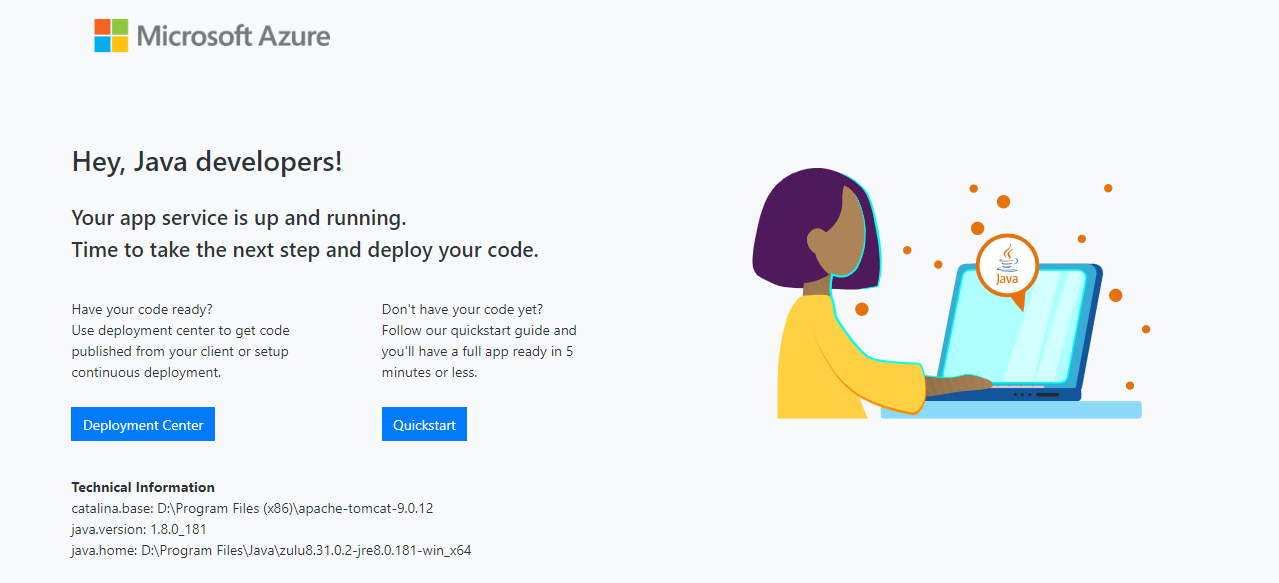
Select Overview and click Browse.

The web page will look like the below image.
Next, you need to update the connection strings for the web app to connect to the database correctly. There are multiple ways you can do this - but for the purpose of this lab, you will take a simple approach by updating it directly on the Azure portal.
-
From the Azure portal, select the Web app you provisioned. Go to Configuration | Application settings | Connection strings and click on + New connection string.
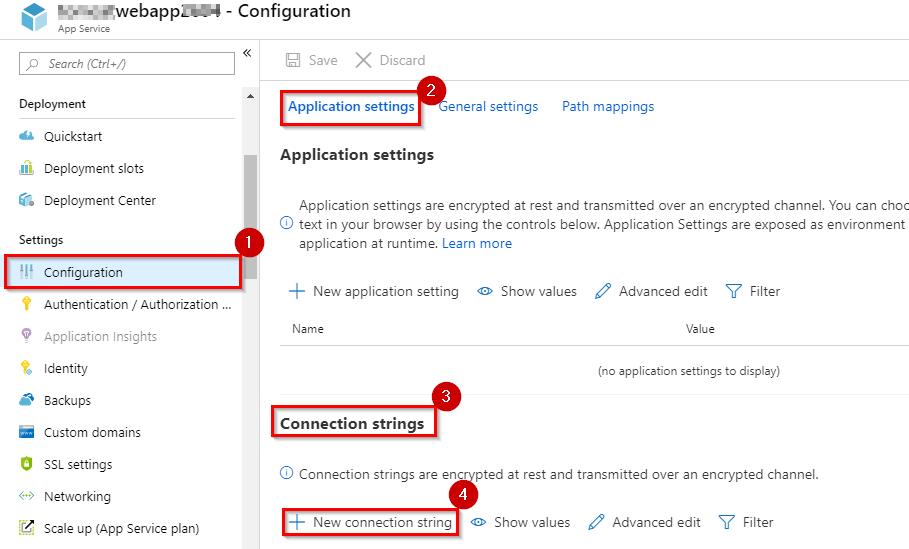
-
In Add/Edit connection string window, add a new MySQL connection string with MyShuttleDb as the name, paste the following string for the value and replace MySQL Server Name, your user name and your password with the appropriate values. Click Update.
jdbc:mysql://{MySQL Server Name}:3306/alm?useSSL=true&requireSSL=false&autoReconnect=true&user={your user name}&password={your password}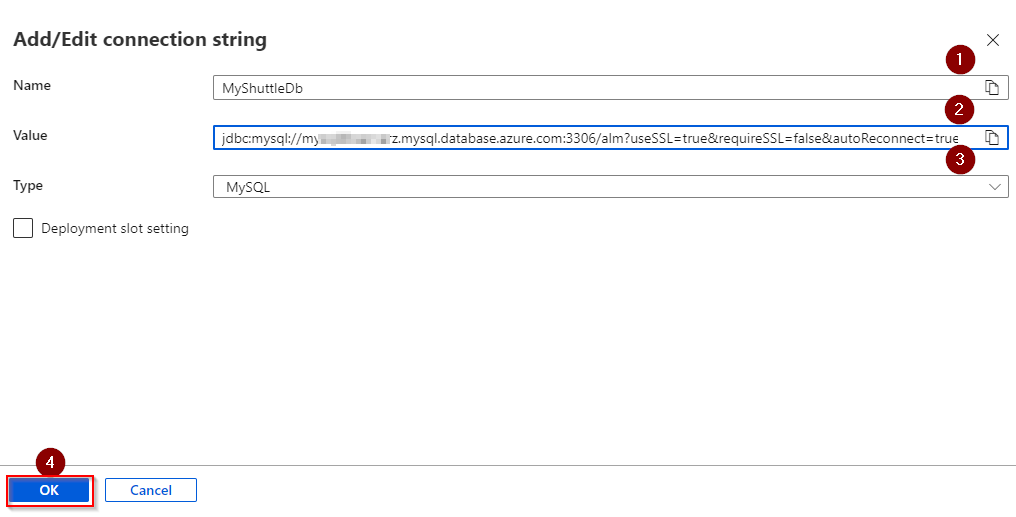
- MySQL Server Name : Value that you copied previously from the MySQL server Properties.
- your user name : Value that you copied previously from the MySQL server Properties.
- your password : Value that you provided during the creation of MySQL database server.
-
Click on Save to save the connection string.
Note: Connection Strings configured here will be available as environment variables, prefixed with connection type for Java apps (also for PHP, Python and Node apps). In the DataAccess.java file under src/main/java/com/microsoft/example folder, we retrieve the connection string using the following codeString conStr = System.getenv("MYSQLCONNSTR_MyShuttleDb");
You have now setup and configured all the resources that is needed to deploy and run the MyShuttle application.
Exercise 3: Deploy the changes to Web App
-
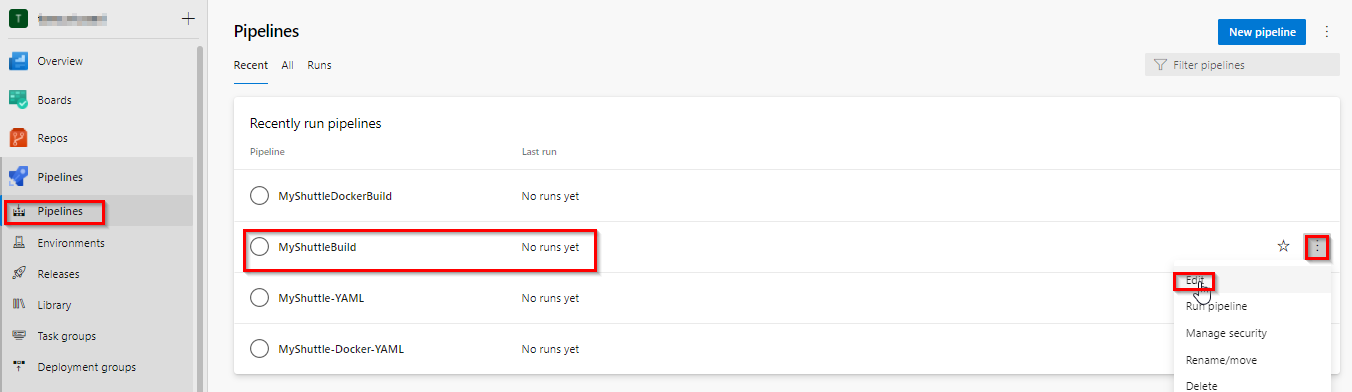
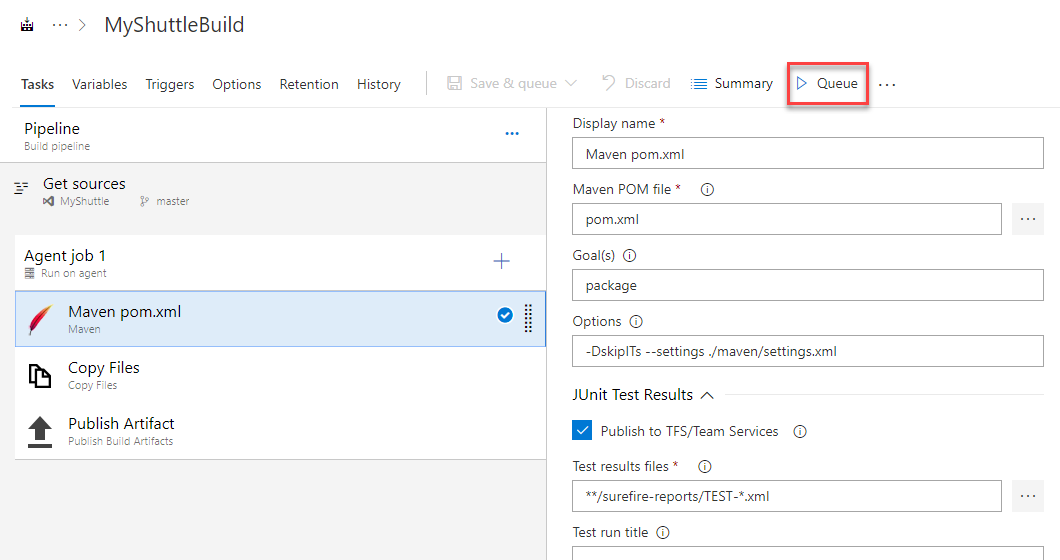
Select Pipelines | Pipelines. Choose the pipeline MyShuttleBuild and click Edit Pipeline to view the build definition.
The lab uses the standard Maven build template to compile the code, copy and publish the resulting artifacts for deployment. An additional file which is copied here is the
CreateMYSQLDB.sqlfile which creates a MySQL database and inserts a few records into it during the deployment.Note: We also have a YAML build pipeline if that’s something you’re interested in. To proceed through the YAML pipeline, choose MyShuttle-YAML and click Edit to view the YAML pipeline. If you utilize the YAML pipeline, make sure to update the MyShuttleRelease release definition’s artifact link. -
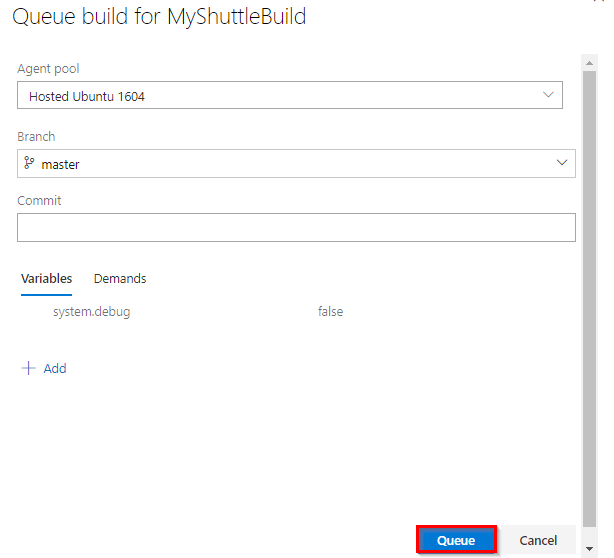
Click Queue to trigger the build and wait for the build to complete.
-
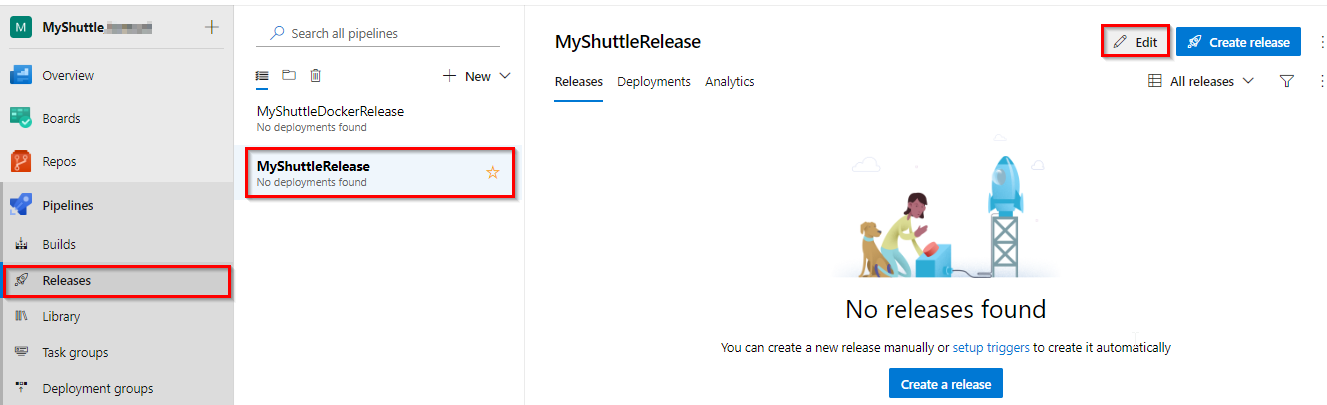
Once the build succeeds, select Releases under Pipelines.
-
Select MyShuttle Release and click Edit to open the release definition.
-
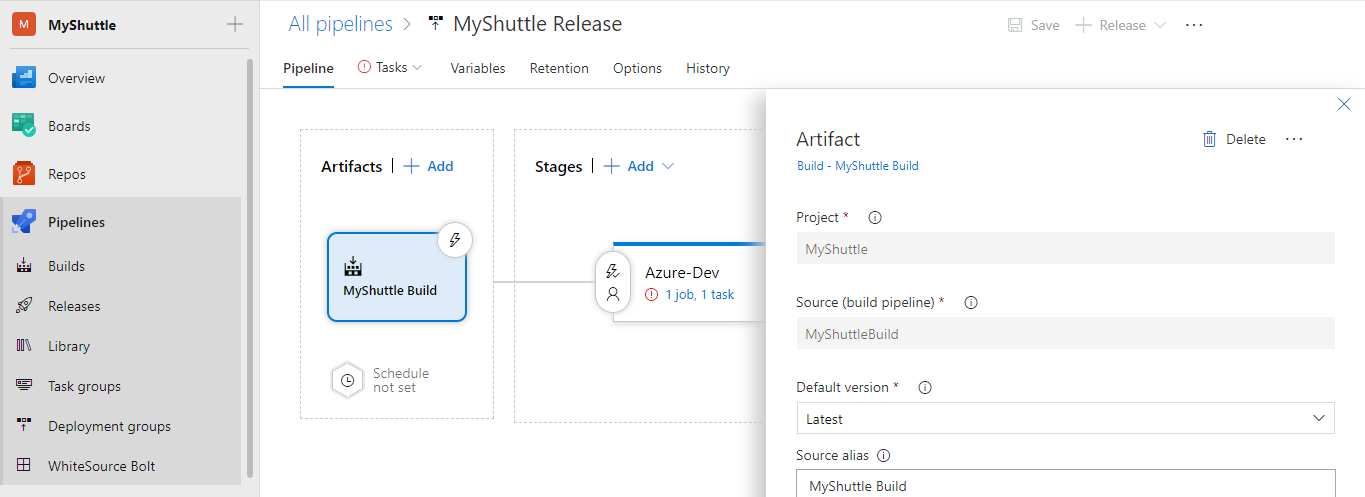
Make sure the artifact is pointing to the Build artifact as shown below. If you are following this lab from Jenkins hands-on-lab, make sure the artifact is pointing to Jenkins.
-
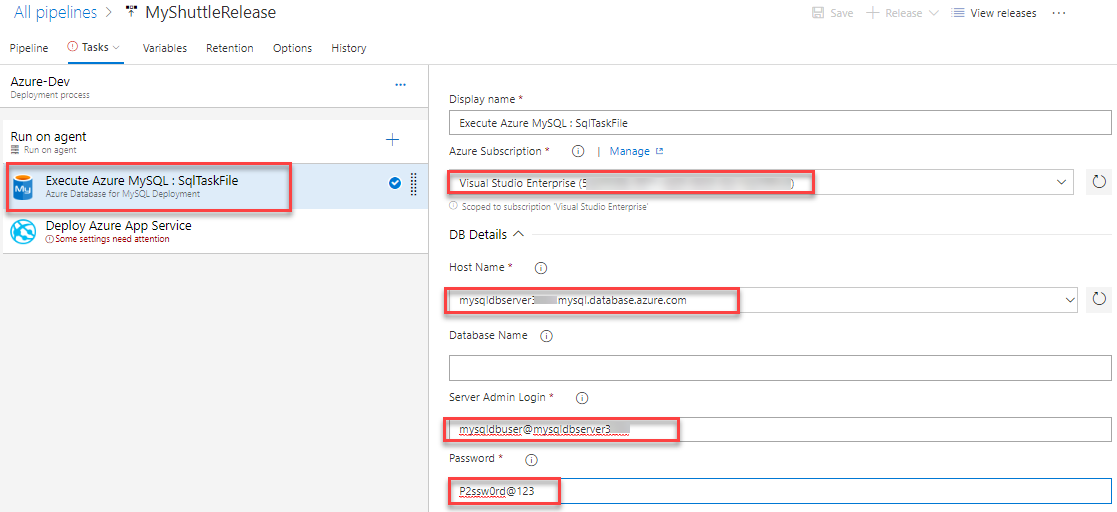
Click Tasks. Select Execute Azure MySQL : SqlTaskFile task and provide the following details.
- Azure Subscription Details : Select the appropriate subscription. Click Authorize and login to your Azure subscription in the pop-up window.
- Host Name : Select the MySQL Database server host name that was created.
- Server Admin Login : Provide the Server admin login name that you noted down previously.
- Password : Provide the password that you created during the creation of MySQL server in the Azure portal.
-
Select the Deploy Azure App Service task, choose the Azure subscription details and select App Service name from the dropdown.
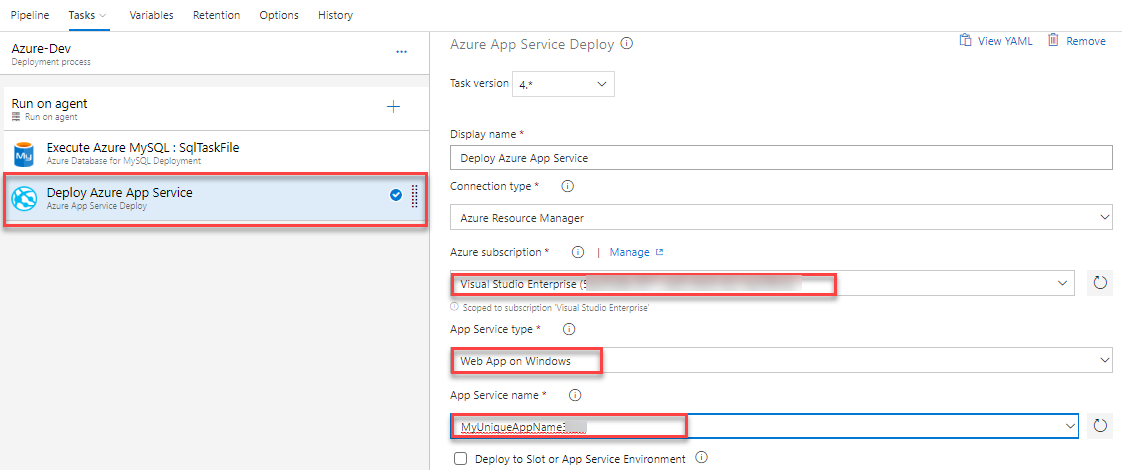 Note: We are using the Deploy Azure App Service task. This task is used to update Azure App Service to deploy Web Apps and WebJobs to Azure. The task works on cross platform agents running Windows, Linux or Mac and uses the underlying deployment technologies of Web Deploy and Kudu. The task works for ASP.NET, ASP.NET Core 1 and Node.js based web applications. Note that this task works with Azure Resource Manager APIs only.
 -
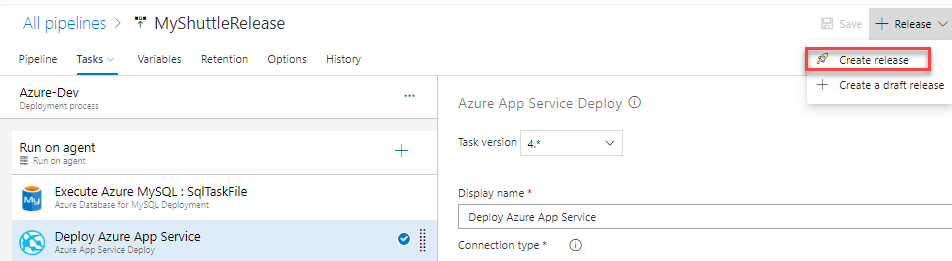
Click on Save and then +Release | Create Release to start a new release
-
Wait for the release to complete. Then navigate to the Web App and select the URL from the overview blade. Add /myshuttledev context to the URL. For instance - http://myshuttle1.azurewebsites.net/myshuttledev
-
Select Login and try logging in to the site with any one of the following credentials.
Username Password barney barneypassword fred fredpassword -
If your database was setup correctly and the connection parameters are valid, you should be able to login to the portal.
Warning: If you encounter an error with The specified CGI application encountered an error and the server terminated the process message, check whether you have entered the app settings variables and values (for the database connection) correctly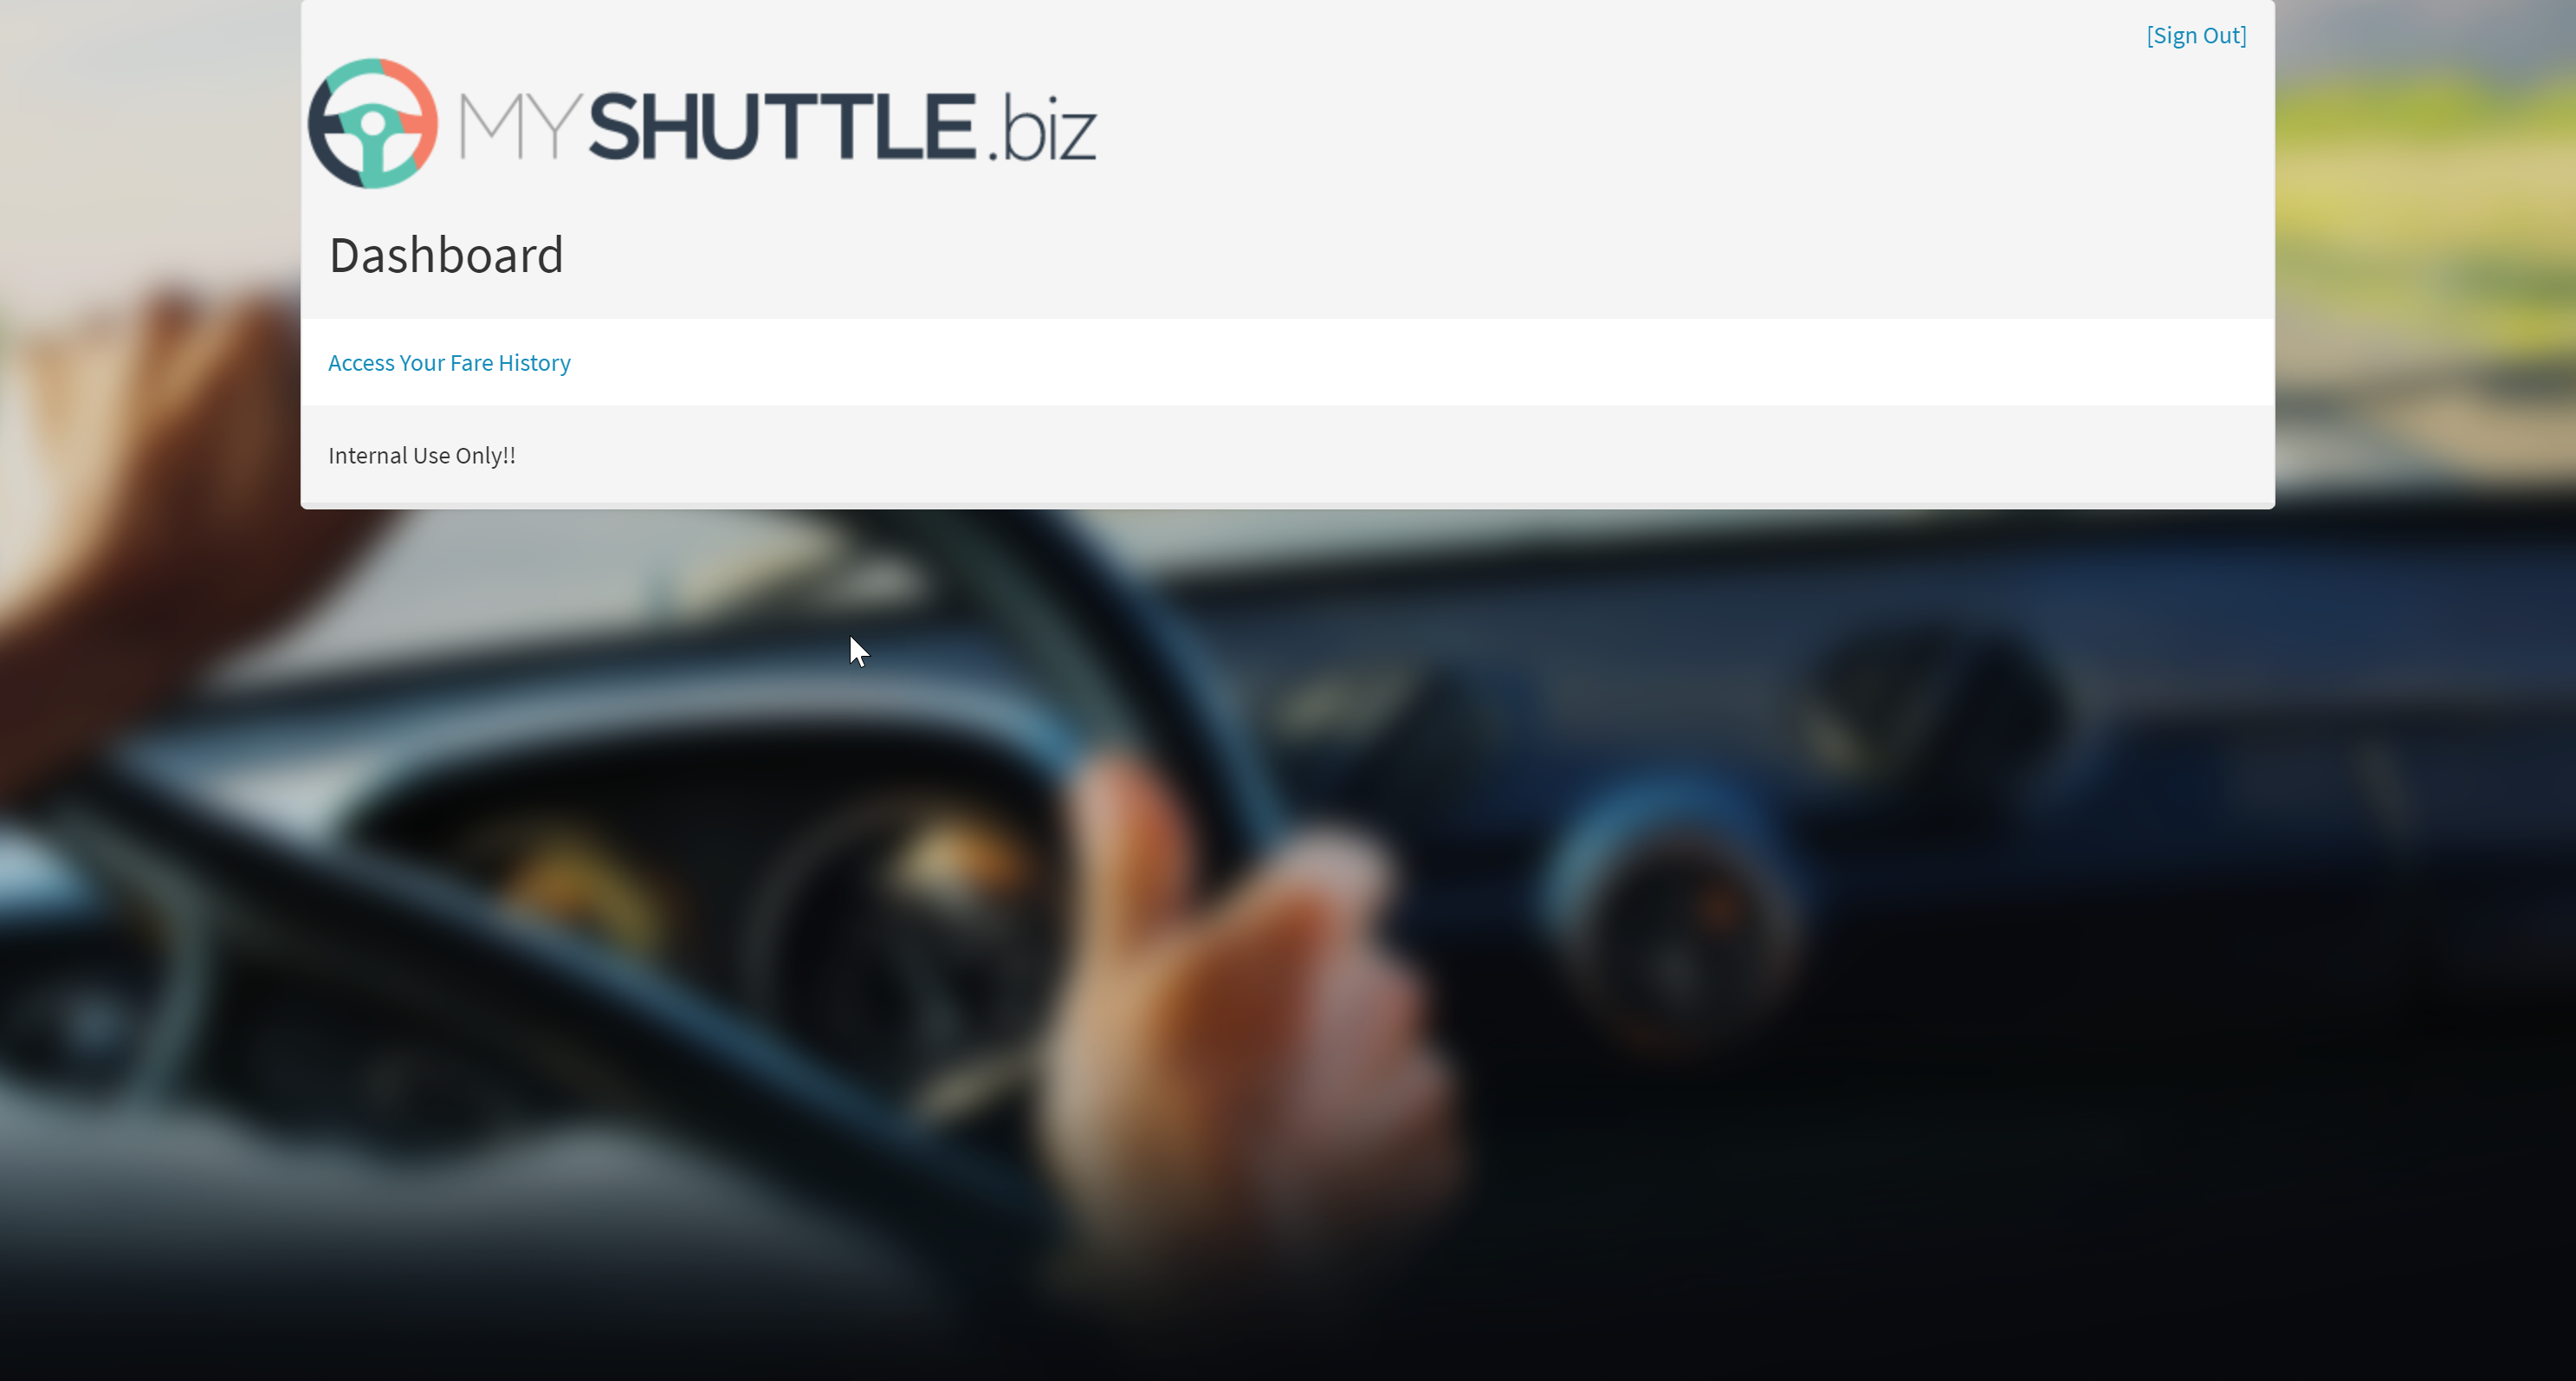
Summary
In this lab, you have learnt how to deploy a Tomcat based Java application with MySQL database on Azure with Azure Pipelines.