Introduction
Development teams adopting DevOps often struggle to apply DevOps processes to their SQL Server databases. ReadyRoll is a tool designed to make this easy, so teams can safely automate their database deployments. Development teams use ReadyRoll to develop, source control, build, validate, test, package, review and release database changes alongside application changes with precision and control.
ReadyRoll includes a new project type in visual studio that can be used as an alternative to the standard SQL Server Database Project, if used it allows you to:
-
Easily and accurately automate deployments of SQL Server database changes alongside application changes.
-
Keep up with the pace of application development and deliver value to users quickly and efficiently.
-
Extend DevOps practices from your application to your database
The tasks in this lab relate to the PartsUnlimited Sample solution and the steps assume you have already connected to and opened the relevant solution in team explorer as well as navigating to the appropriate project page in your browser.
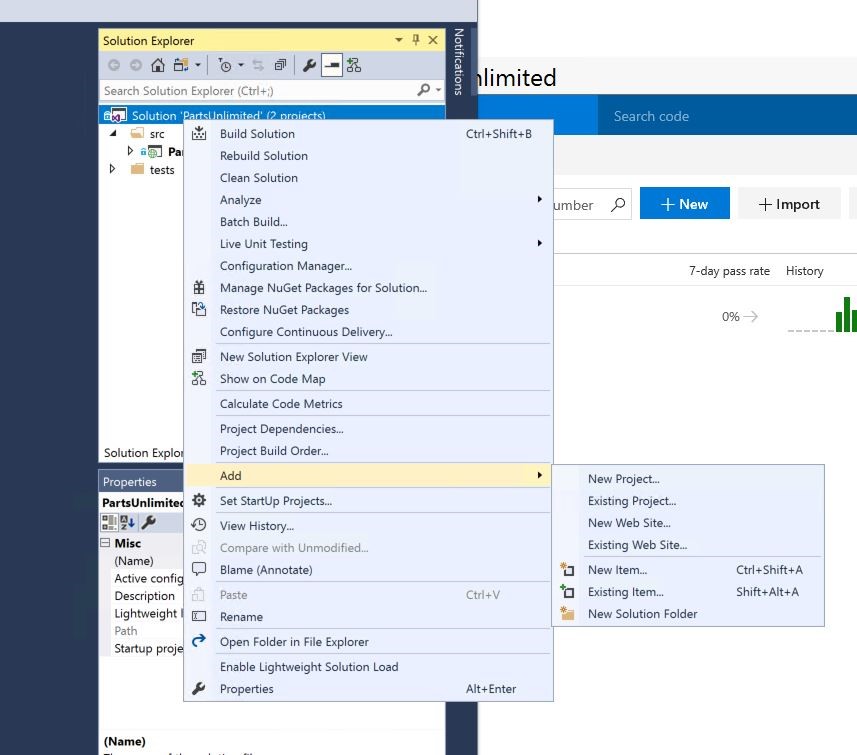
Task 1: Adding A ReadyRoll Project to the PartsUnlimited Solution
-
Right click on the PartsUnlimited Solution and choose Add | New Project
-
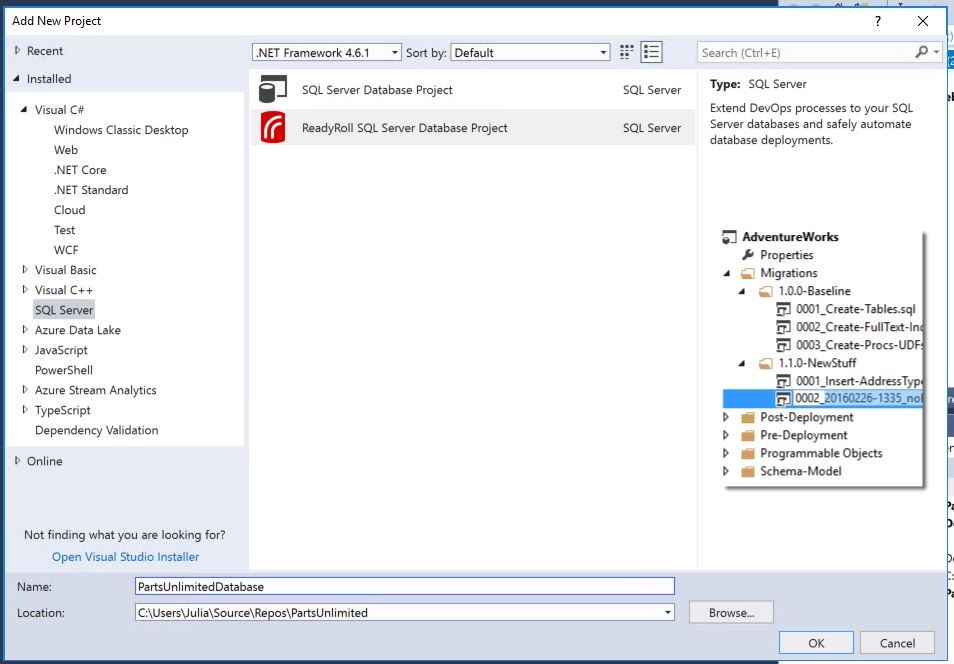
Choose ReadyRoll SQL Server Database Project from the available SQL Server project types, adding the name PartsUnlimitedDatabase or similar.
-
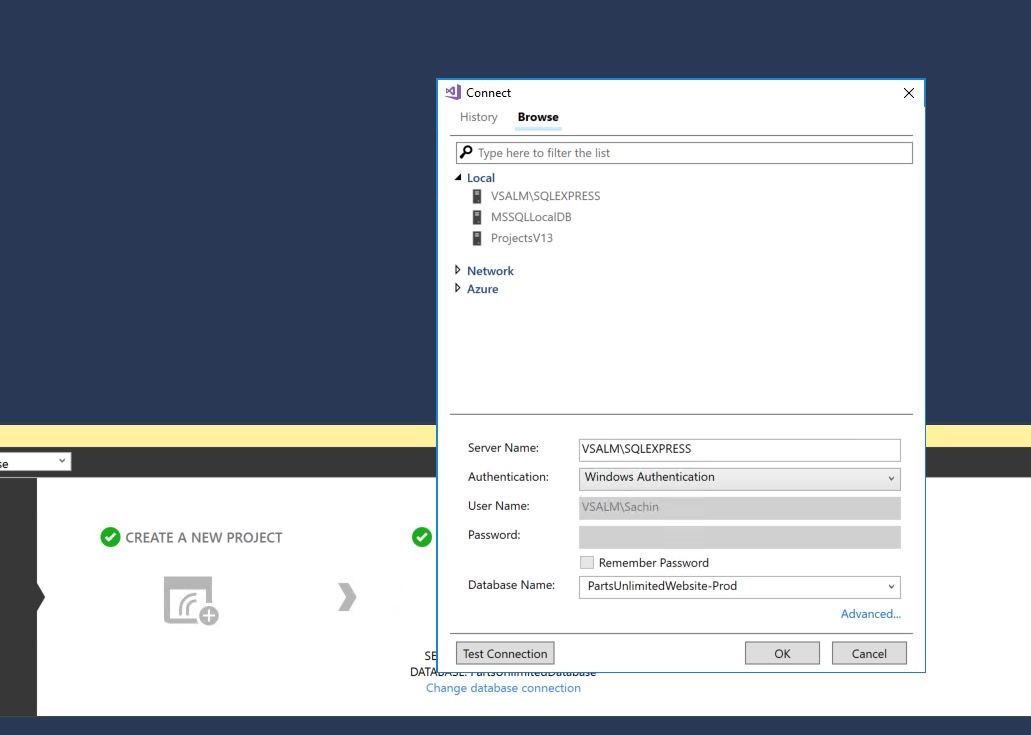
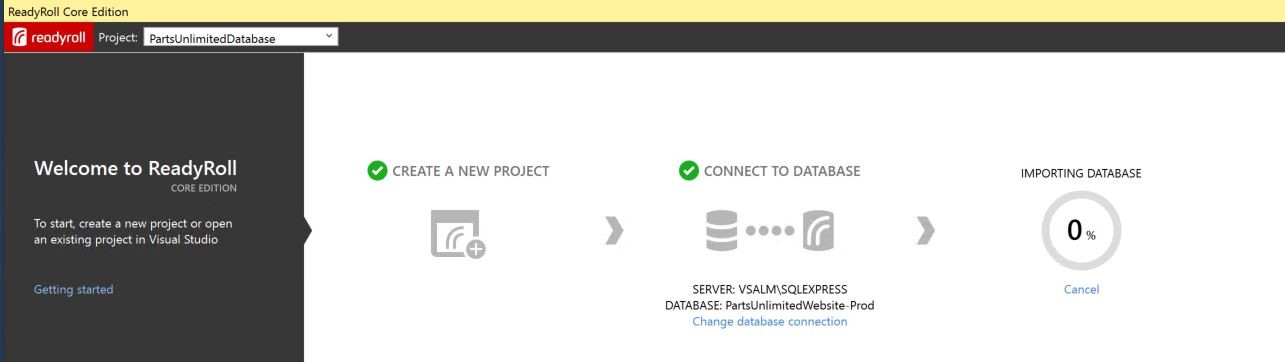
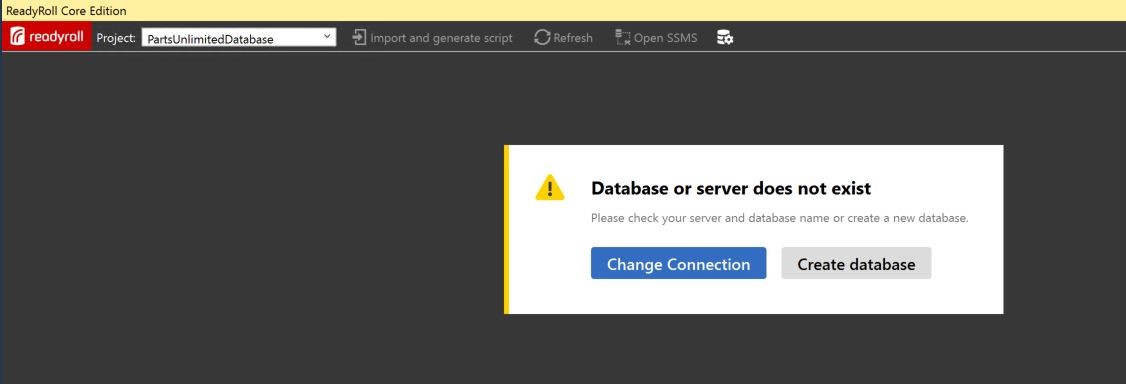
In the ReadyRoll window, click the Connect to Database button and use the Connect window to choose the PartsUnlimitedWebsite-Prod database from the local VSALM\SQLEXPRESS server instance.

-
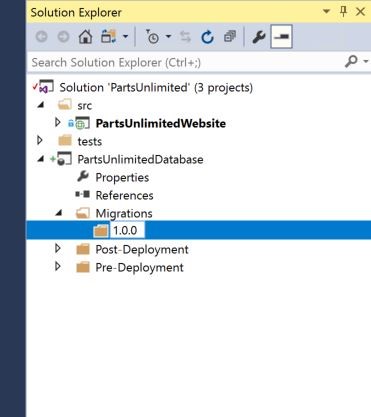
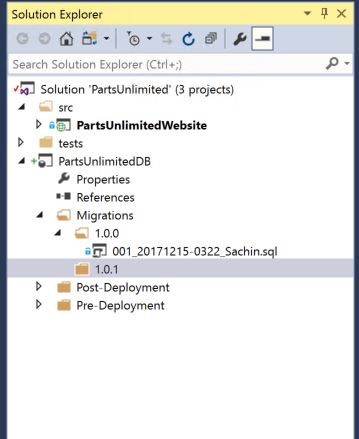
In the solution Explorer, right click on the Migrations folder and choose to add a new folder called 1.0.0.
-
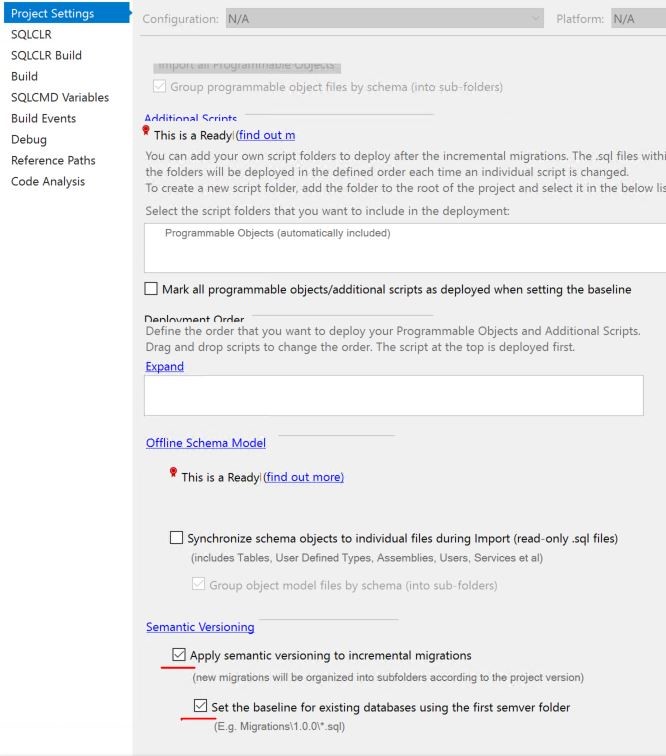
Right click on the PartsUnlimitedDatabase project in the Solution Explorer and choose Properties.
-
In the resulting window check both of the boxes in the section headed Semantic Versioning.
-
Save the project settings and close the window.
-
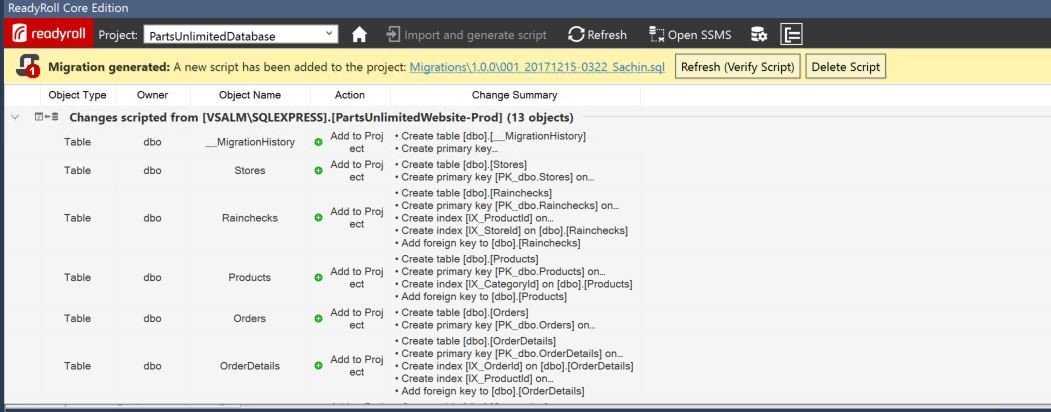
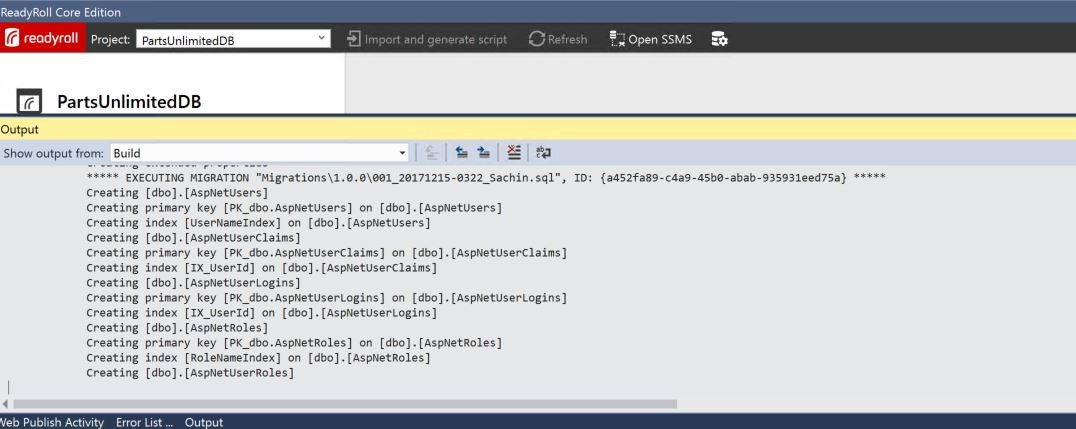
In the ReadyRoll window click the ‘Import Database’ button and wait for the process to complete.

-
Once completed, click the ‘Refresh (Verify Script)’ button within the ReadyRoll window and wait for it to complete the process, repeat the refresh task again if the verification encounters any initial problems.

-
This has added your initial baseline script to your project, now we will create a new folder to hold the changes from this point on.
-
Return to the solution explorer and repeat step 4 but this time add a folder called 1.0.1.
-
Save All.
-
Finally, we want to provide a development environment for ReadyRoll to work in, so we need to disconnect the project from the production database and specify localdb for development use, in the ReadyRoll window, click the configure connection button from the toolbar (as highlighted) and use the Connect window to select MSSQLLocalDB (under Local) as the server instance.

-
ReadyRoll will now detect that a development database does not exist and will ask if you would like to create it, choose to Create Database and wait for ReadyRoll to complete its re-build and deploy the dev database onto LocalDB.
-
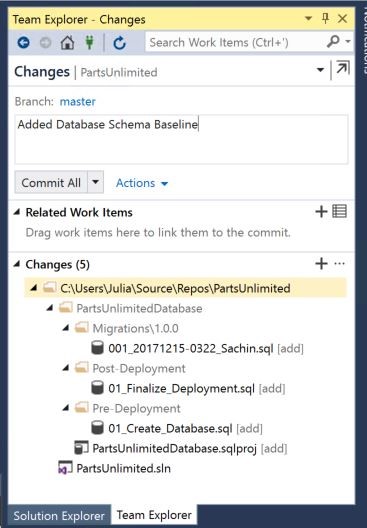
You have now completed the setup of the ReadyRoll project ready for further development and can now use Team Explorer to commit to source control.
Task 2: Setting up Builds
-
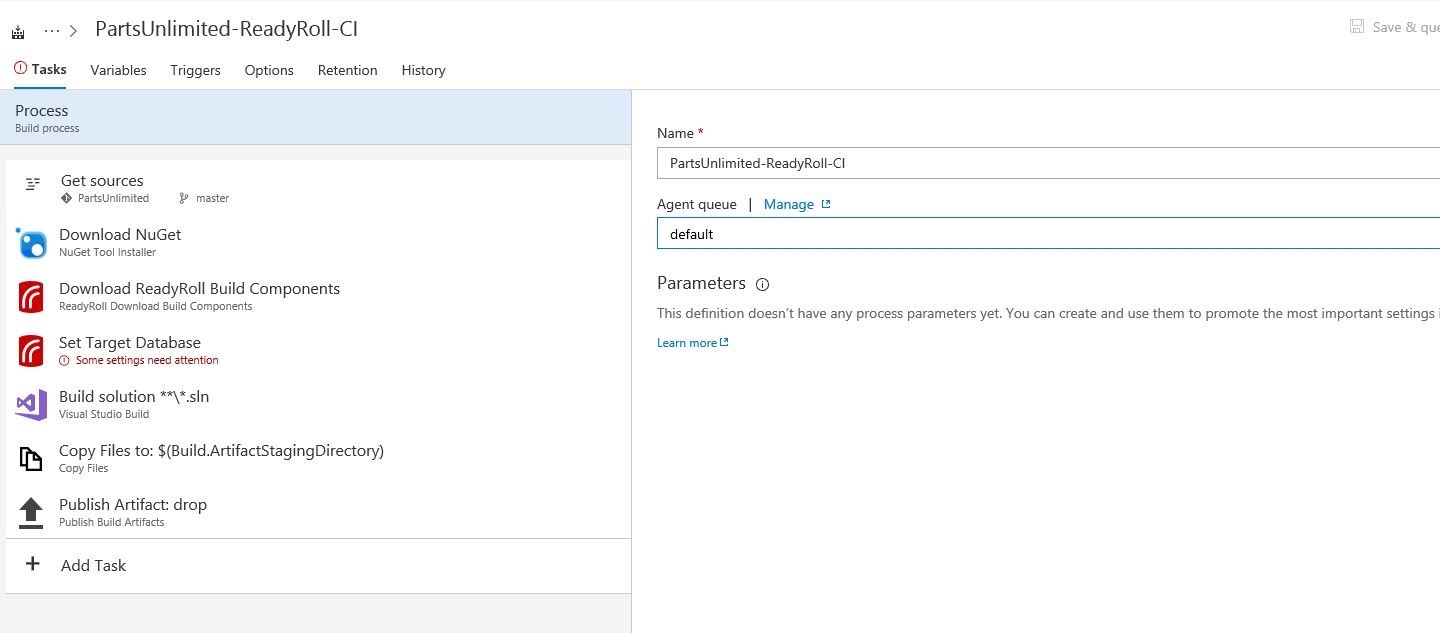
Navigate to Build from the Build and Release tab on the TFS project webpage then select + New to create a new build definition.
-
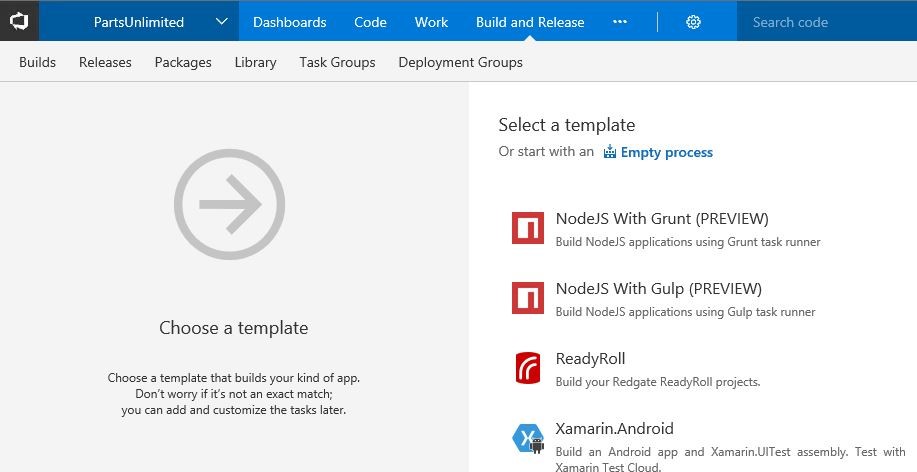
Choose ReadyRoll from the available build templates to populate your definition with the core tasks.
-
We now need to adjust some settings within these core tasks, firstly choose default for the Agent queue.
-
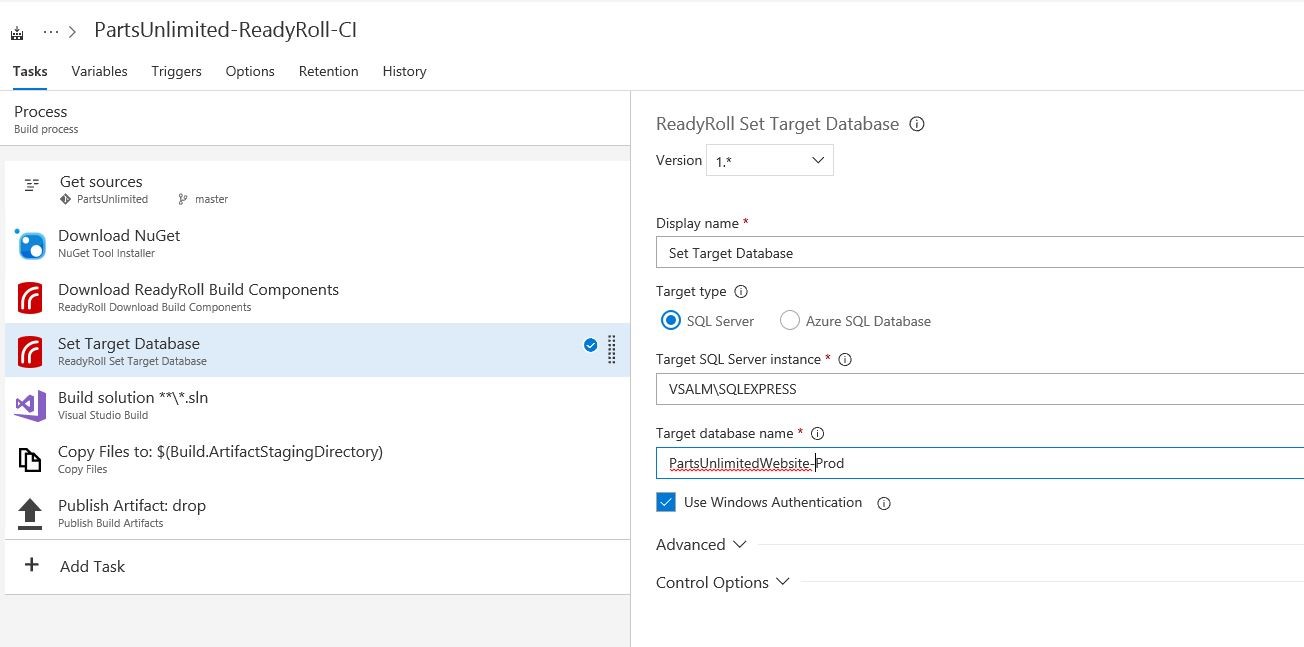
Next, select the ‘Set Target Database’ task to configure our ultimate deployment target, in this case the PartsUnlimitedWebsite-Prod database on the VSALM\SQLEXPRESS local SQL Server instance.
Note: If we were deploying to Azure we could change the Target type and select an appropriate existing SQL Database running in Azure
-
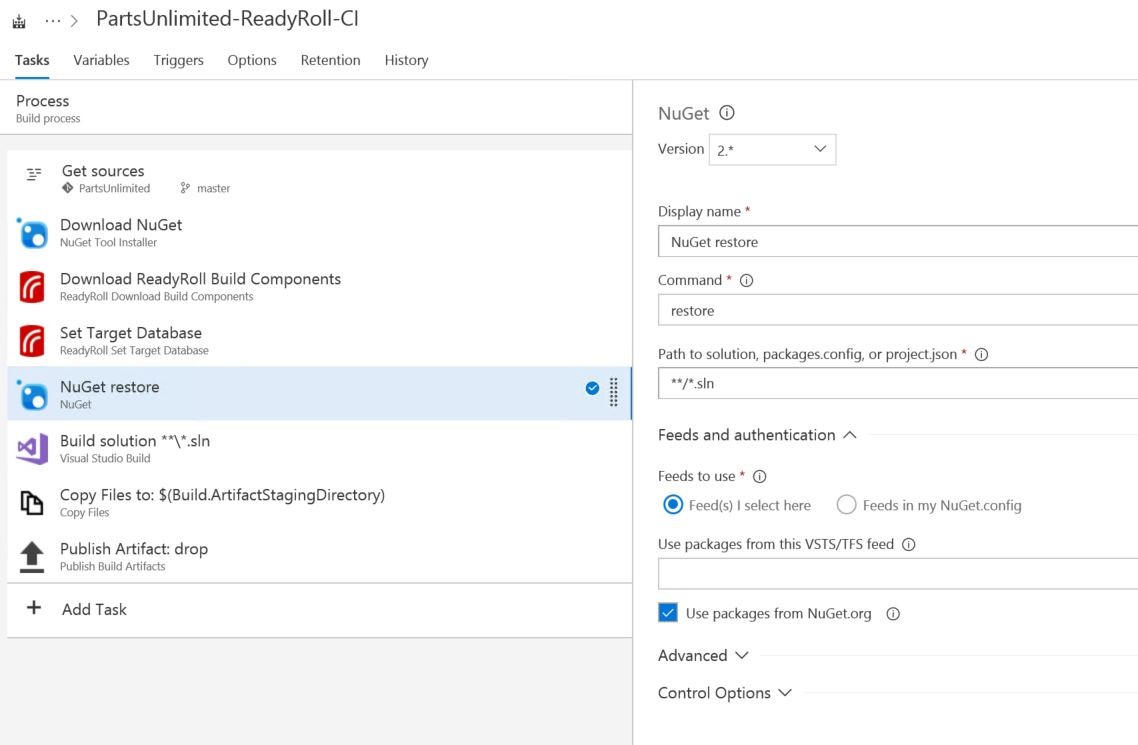
If our solution only consisted of the ReadyRoll database project then that would complete our build definition setup but, as there were existing projects related to the website and tests we need to ensure that their dependencies are taken care of by adding a Nuget package restore task for the solution, click on + Add Task selecting the Nuget task and setting the options as shown below.
-
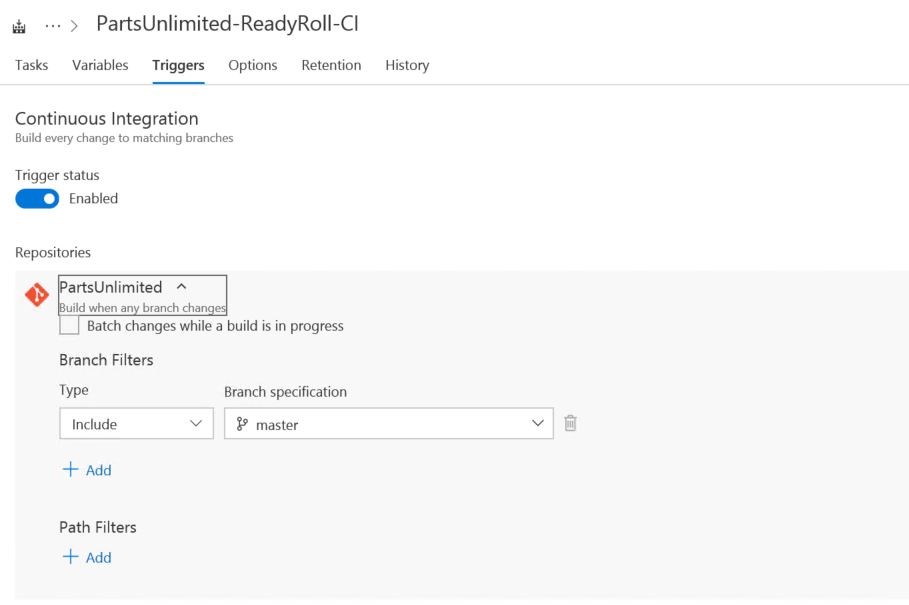
Optionally – If we want to automatically trigger a build after a commit to source control then we need to set a trigger. Click on the Triggers tab within the definition and set Continuous Integration to Enabled.
-
This completes the setup for automated builds, on the toolbar choose Save & Queue to save your settings and trigger a build. This initial build will fail as it configures the necessary components for future builds.
-
Optionally – If you’d like to check everything is working as expected up to this point you can manually trigger a second build.

Task 3: Setting up Automated Releases
-
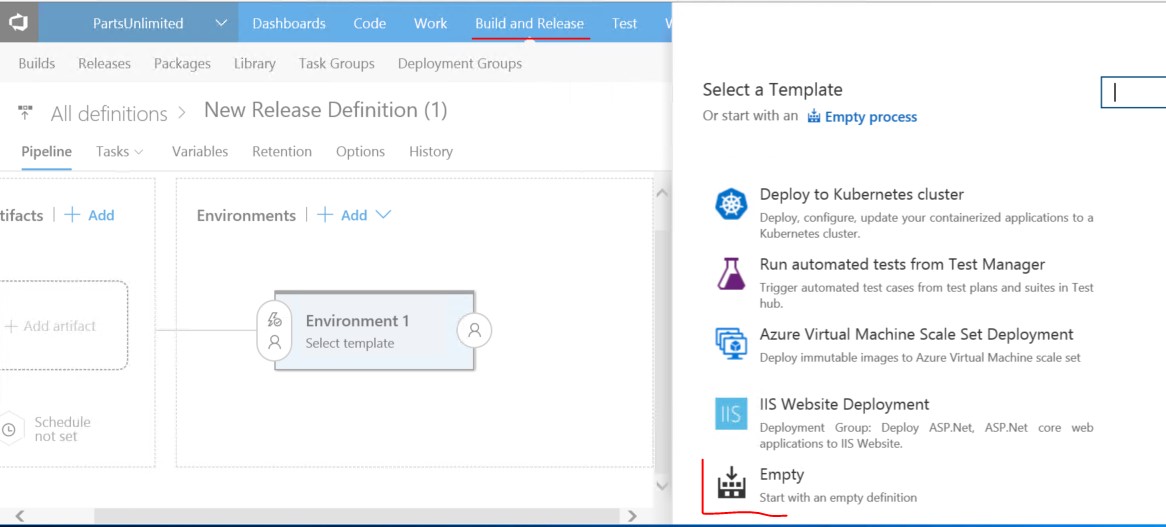
Select ‘Release’ from the Build and Releases tab within TFS and choose to create a new release definition, selecting to start with an Empty template.
-
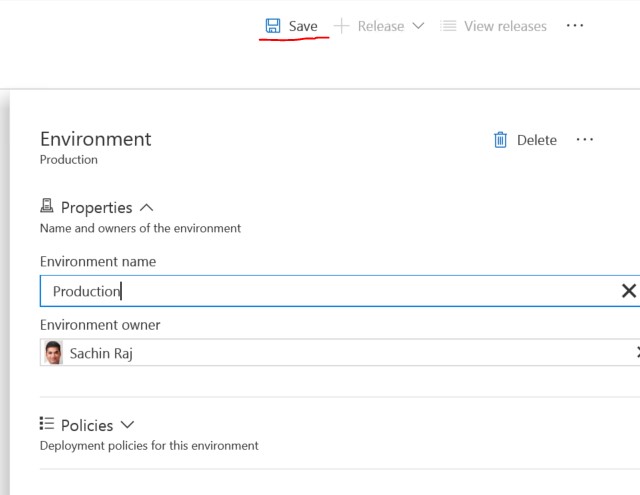
Specify ‘Production’ as the Environment Name, then click ‘Save’
-
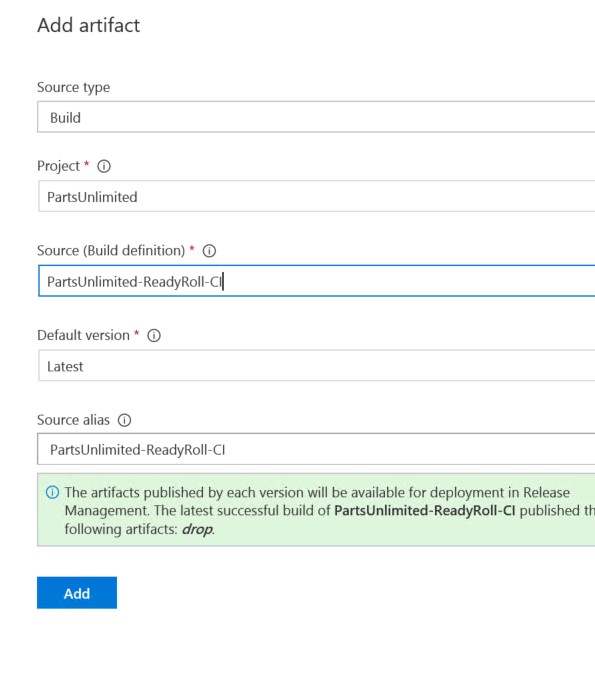
In the main window click the ‘+ Add’ next to ‘Artifacts’, choose the ReadyRoll build definition and choose ‘Add’
-
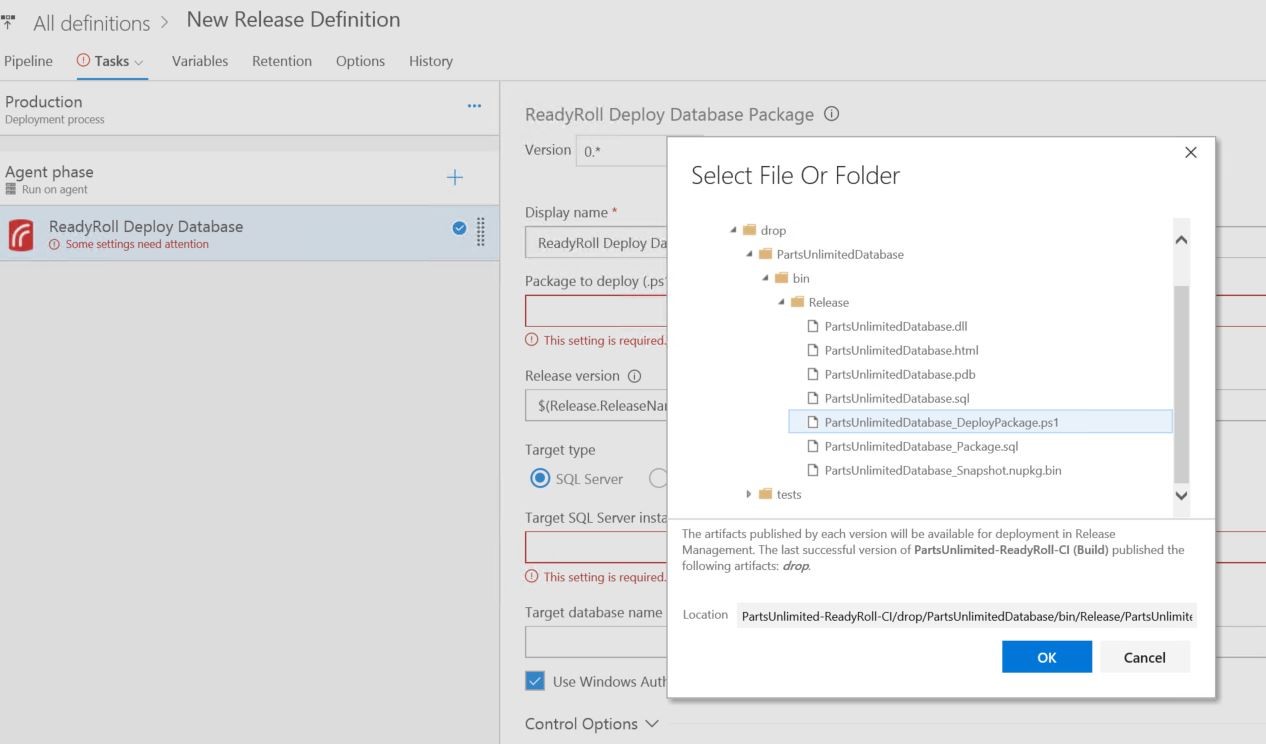
Now switch to the ‘Tasks’ tab within the definition and choose to add a task to the ‘Production deployment’, selecting a ReadyRoll Deploy Database Package task.

-
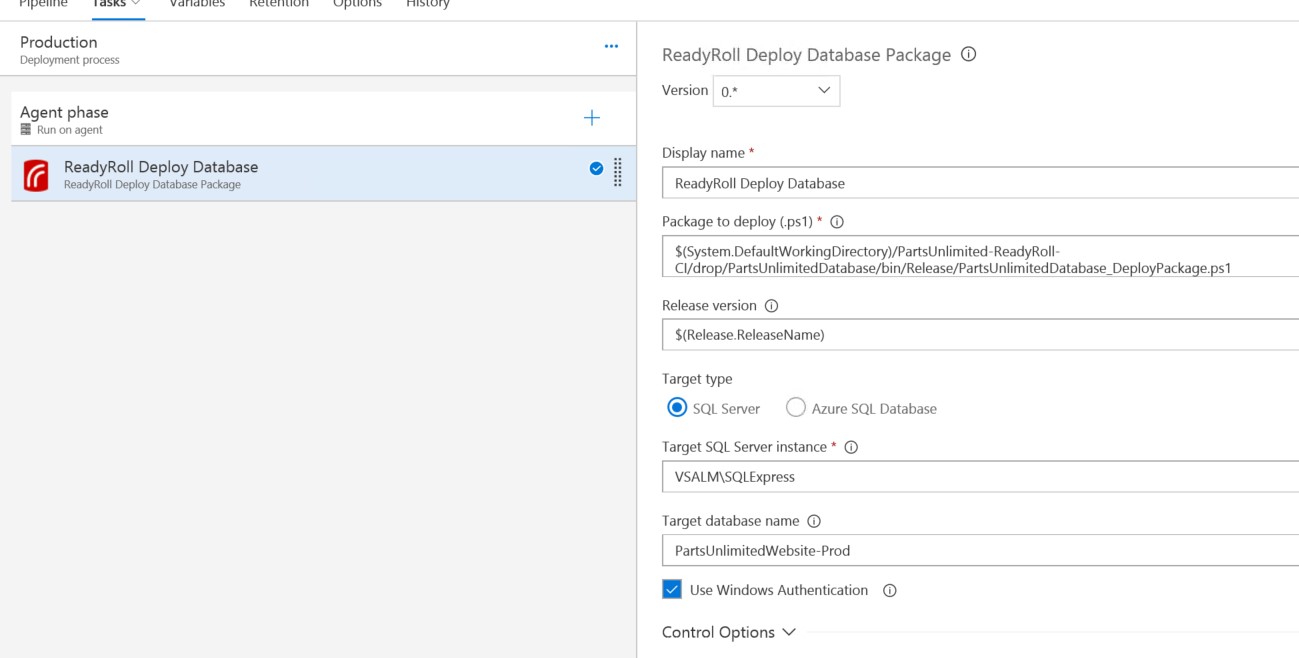
We now need to configure some settings within the task, firstly select the DeployPackage.PS1 file from the browsing dialog for the Package to deploy.
-
Next specify the Target database again selecting the PartsUnlimitedWebsite-Prod we referenced earlier in Task 2, step 4.
Note: If we were deploying to Azure we could change the ‘Target type’ and select an appropriate existing SQL Database running in Azure
-
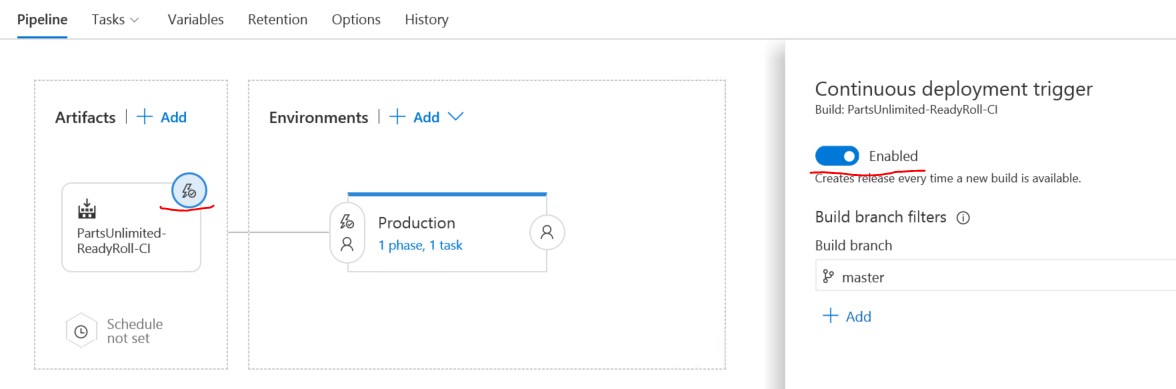
Optionally – If we want to automatically trigger the creation and deployment of a release after a successful build we need to set a trigger. Back on the ‘Pipeline’ tab Click on the Continuous Deployment icon within the definition and set Continuous deployment to Enabled.
This completes the tasks necessary to setup an automated build and deployment pipeline.
Making changes
When making changes to the database, there are a number of supported workflows, we will use a range of approaches for a series of changes we’d like to make.
Our database currently has a ‘Price’ column in the ‘Product’ table, but the business has decided that they would like to be able to price products independently depending on region. As a first step we will introduce a new ‘PriceGBP’ column for the British market and rename our existing ‘Price’ column to ‘PriceUSD’ for the US market.
Task 4: Making a change using SQL Server Object Explorer
-
Open SQL Server Object Explorer from the View menu
-
Browse to the PartUnlimitedDatabase database on LocalDB
-
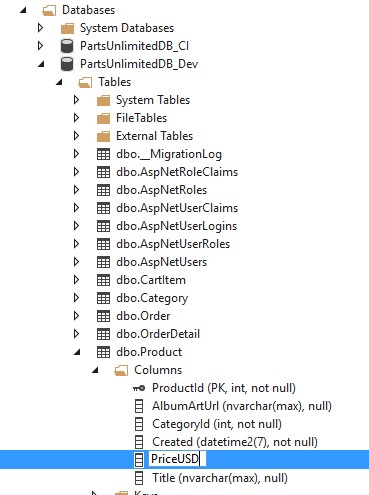
Expand ‘Tables’, ‘Product’ and ‘Columns’ to find the ‘Price’ column
-
Right click ‘Rename’, and change the name to ‘PriceUSD’
-
When the preview Database Update window launches, click Generate Script
This adds the new migration script to our solution
-
Click Deploy Project
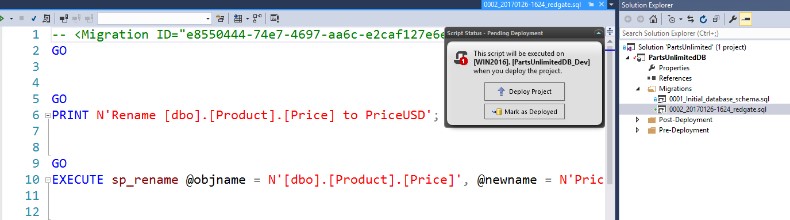
This applies the change to the database
-
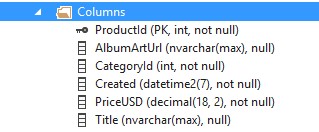
In the Object Explorer, right click on ‘Columns’ and click Refresh to check the change.
-
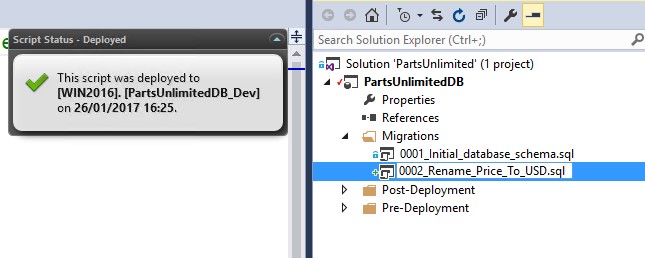
In the Solution Explorer, we can rename the produced migration script to something more descriptive such as Rename_Price_To_USD
Now let’s use a query window to add our new column and populate it with some data.
Task 5: Make a change using a query window
-
In the Object explorer, right click on the same database and select New Query
-
In the query window, type the code to add the new ‘PriceGBP’ column and execute

-
Check it’s been added by typing and executing SELECT * FROM Product in the query window
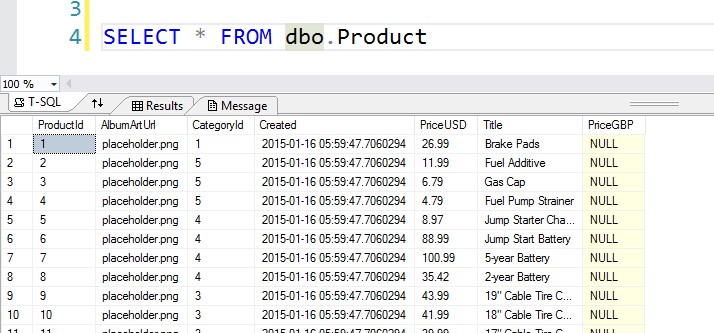
We can see that the ‘PriceGBP’ column now exists but all or the values null. We would like to set this new price to the correct amount based upon the current exchange rate.
-
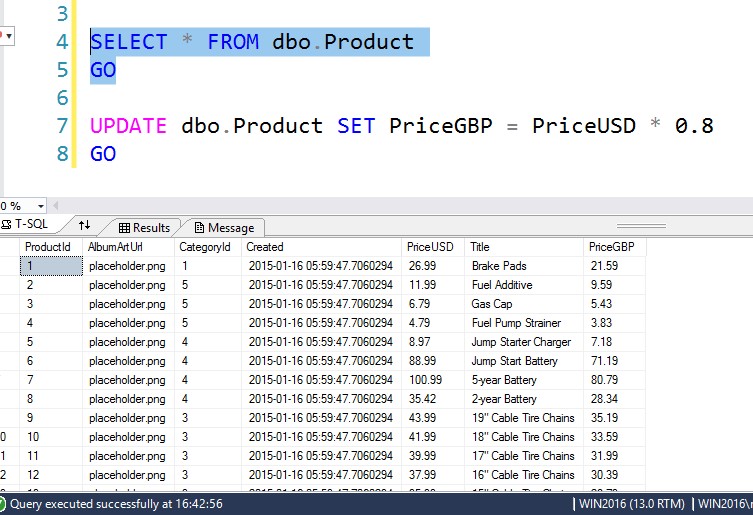
In the query window, type the code to add update the values and execute

-
Rerun the select statement from earlier to check the new values
-
Open the ReadyRoll window and click ‘Refresh’
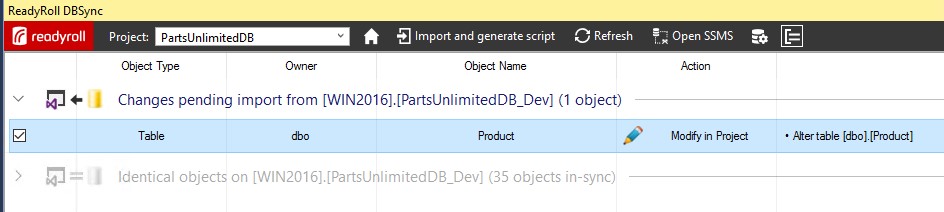
This will list the changes made to the database ready for us to import them into our project
-
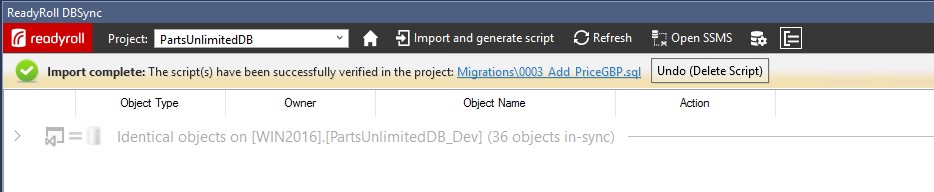
Click ‘Import and generate script’ to generate and add the script to the project
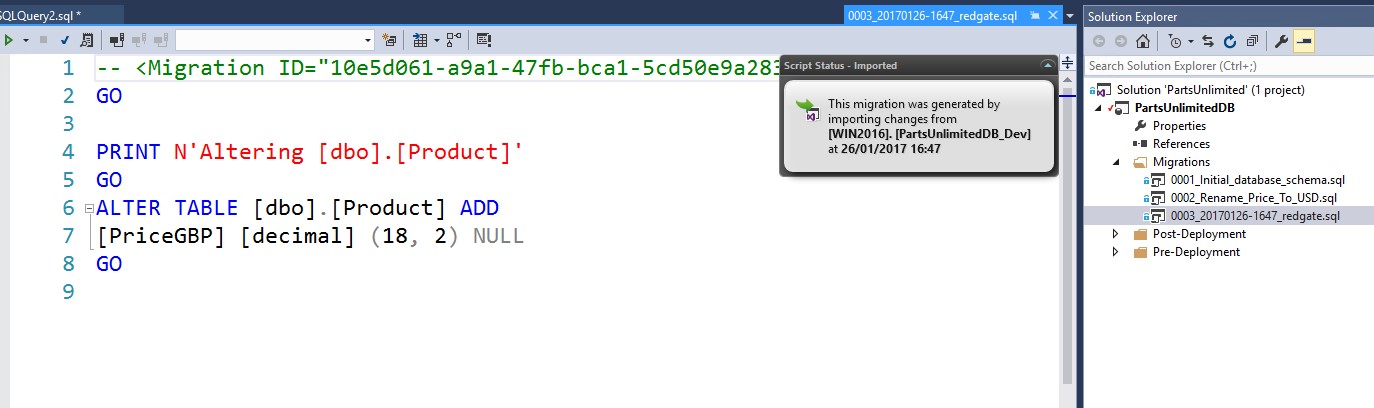
SSDT would generate this script at deployment time but as ReadyRoll produces the script here, at development time, we can add to or amend the deployment script. In this case to include the missing detail of updating the PriceGBP values
-
Copy and paste the update statement from your query to add it to the generated script
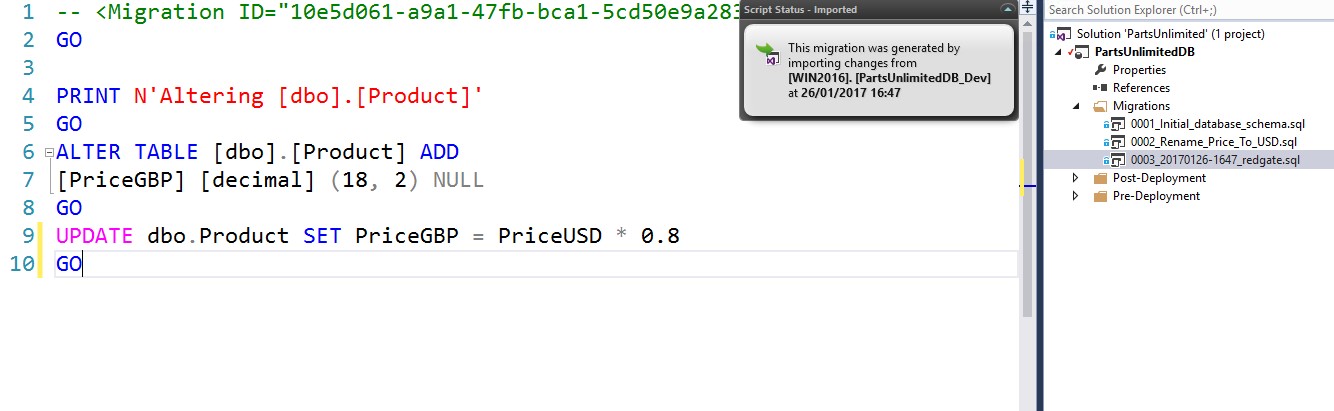
-
We can now save this new version of the change script by pressing Ctrl+S
-
Click Mark as Deployed to tell ReadyRoll that we’ve already applied this change to the database.
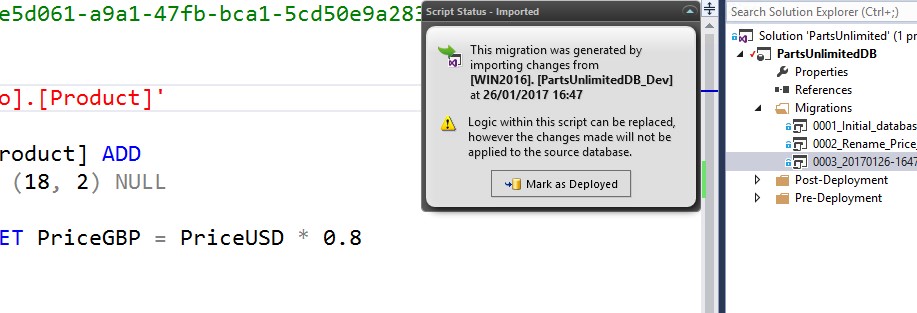
-
Then rename the script in the project descriptively to Add_PriceGBP
-
In the ReadyRoll window, click ‘Refresh (Verify Script)’ to verify the amended migration script
Now that we’ve updated the values, we need to update this column to not allow null values so that it matches the original ‘Price’ column. This time we’ll use the designer.
Task 6: Making Changes using the Designer
-
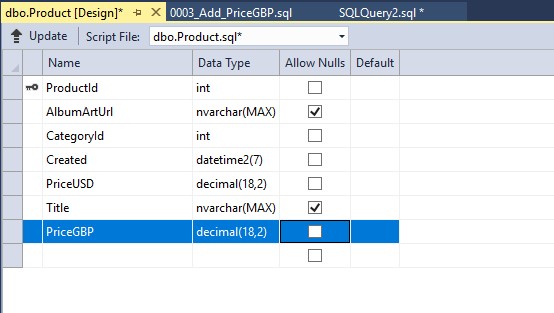
In the Object Explorer, right click on the ‘Product’ table and click ‘View Designer’
-
Uncheck the ‘Allow Nulls’ box for the ‘PriceGBP’ column to stop this column from allowing empty values
-
Click Update and then click Generate Script in the Preview Database Updates window
This has again updated our project with the new migration script
-
Click Deploy Project to update the database
-
Once again we can rename the migration script in the project to something descriptive
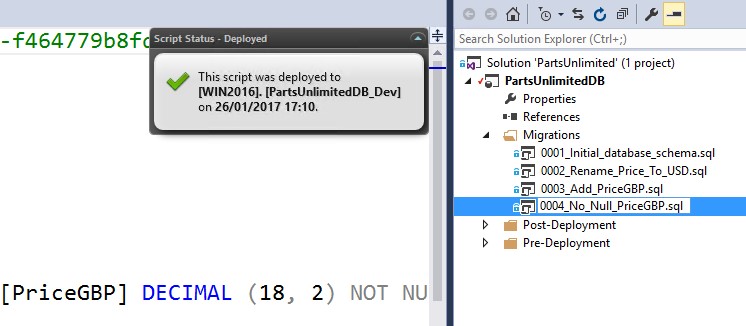
If these changes were to be deployed on to testing or production using the standard SSDT approach then our update would fail. This is because the data update would not be included and it would be unable to create the new ‘not null’ column (PriceGBP) we’ve added to our development database. However, with ReadyRoll we simply concatenate these verified migration scripts into a single transaction which ensures a successful deployment.
You can now commit these changes to source control to see the automated build and deployment process which will push the changes out to the PartsUnlimitedWebsite-Prod database.